1. Introduction
Thank you for choosing the GreenBlue GB104 DIN Rail Digital Timer. This electronic timer is designed for advanced weekly programming, offering precise control over electrical devices. Please read this manual carefully before installation and operation to ensure safe and efficient use of the product.
2. Safety Instructions
Always observe the following safety precautions:
- Installation should only be performed by a qualified electrician.
- Ensure the power supply is disconnected before any installation or maintenance work.
- Do not expose the device to moisture or extreme temperatures.
- Do not exceed the maximum load capacity of 16A 250VAC.
- This device is designed for indoor use only.
3. Product Features
The GreenBlue GB104 Digital Timer offers a range of features for versatile control:
- DIN rail mounting for easy integration into electrical panels.
- Advanced weekly programming with up to 16 ON/OFF settings.
- Digital electronic switching programs for daily and weekly cycles.
- Minute-level precision for scheduling.
- LCD display showing real-time hours/minutes and ON/AUTO/OFF status.
- Built-in battery backup for program retention during power outages (over 15 days).

Figure 3.1: Front view of the GreenBlue GB104 Digital Timer, showing the LCD screen and programming buttons.
4. Technical Specifications
| Parameter | Value |
|---|---|
| Brand | GreenBlue |
| Model Number | GB104 |
| Voltage | AC180V-264V (50/60Hz) |
| Contact Type | 1 Inverter (SPDT) |
| ON/OFF Programs | Up to 16 ON and 16 OFF |
| Power Consumption | 4.5W (max) |
| Time Interval | 1 minute - 168 hours |
| Battery Backup | > 15 days |
| Minimum Delay | 1 minute |
| Max Load Capacity | 16A 250VAC |
| Humidity | 35% to 85% RH |
| Operating Temperature | -10°C to 55°C |
| Weight | 125g (product only) / 140g (with packaging) |
| Dimensions (L x W x H) | 9 x 4 x 4 cm |
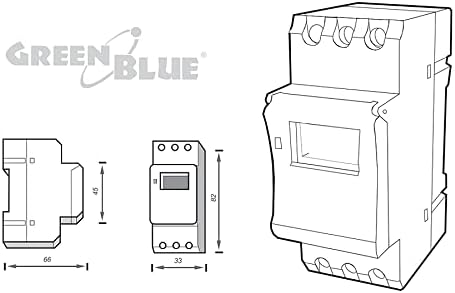
Figure 4.1: Product dimensions for installation planning.
5. Package Contents
The package should contain the following items:
- 1 x GreenBlue GB104 DIN Rail Digital Timer
- 1 x User Manual (this document)

Figure 5.1: The GreenBlue GB104 timer as packaged for retail.
6. Installation
The GB104 timer is designed for DIN rail mounting. Follow these steps for proper installation:
- Power Disconnection: Before starting any electrical work, ensure the main power supply to the circuit is completely disconnected at the circuit breaker.
- Mounting: Snap the timer onto a standard 35mm DIN rail in your electrical distribution box.
- Wiring: Refer to the wiring diagram below for correct connections. The timer has terminals for Line (L), Neutral (N), and switched output (Common, Normally Open, Normally Closed).
- Secure Connections: Ensure all wire connections are tight and secure to prevent loose contacts and potential hazards.
- Power Restoration: Once installation is complete and verified, restore power to the circuit.
6.1 Wiring Diagram
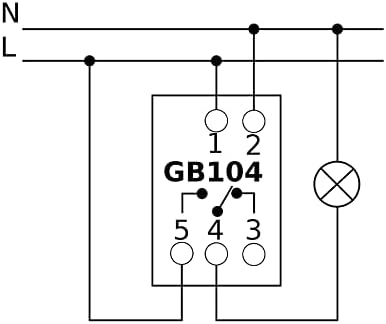
Figure 6.1: Wiring diagram for the GB104 timer. Connect L and N for power input. Terminals 3, 4, 5 are for the switched output (Common, Normally Open, Normally Closed).
Note: The diagram on the device itself might be simplified. Always refer to this manual's diagram for accurate wiring. Terminals are typically: 1 (L-input), 2 (N-input), 3 (Normally Closed), 4 (Common), 5 (Normally Open).
7. Initial Setup
After installation and power-up, perform the initial setup:
- Reset: Press the RESET button (usually a small recessed button requiring a pointed object like a pen) to clear all previous settings and initialize the timer. The LCD display will show "00:00" and all segments will flash.
- Set Current Time:
- Press the D+ button to set the current day of the week (1=Monday, 2=Tuesday, etc.).
- Press the H+ button to set the current hour.
- Press the M+ button to set the current minute.
- Confirm: The time will automatically save after a few seconds of inactivity.
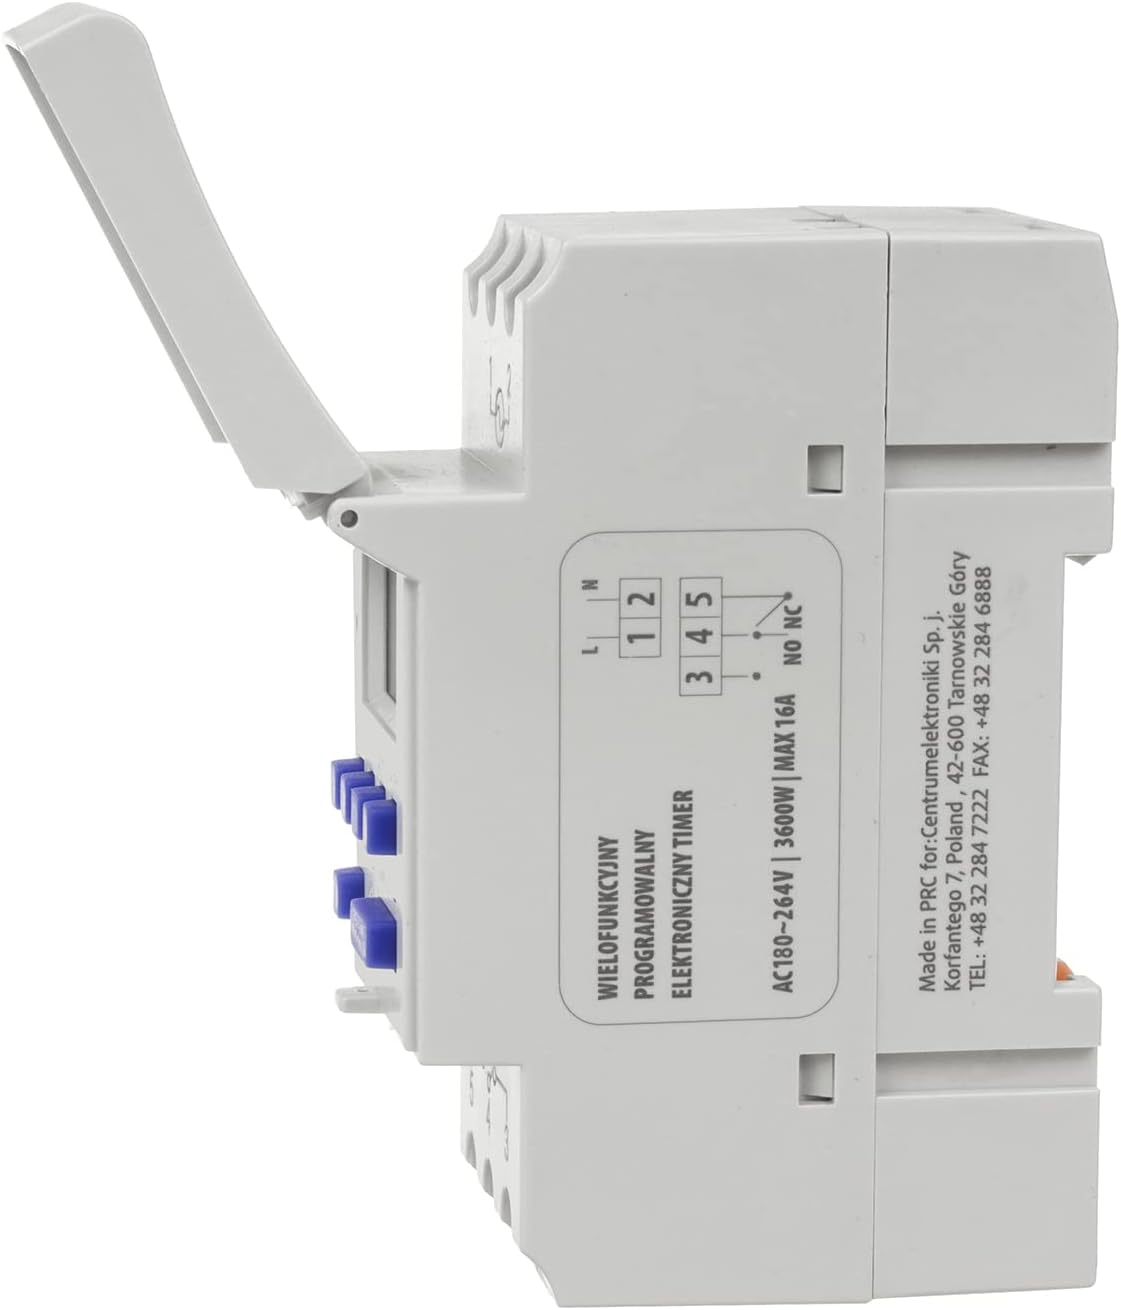
Figure 7.1: Control panel showing the D+, H+, M+, RESET, and MANUAL buttons.
8. Operating Instructions: Programming ON/OFF Cycles
The GB104 allows for up to 16 ON/OFF programs. Follow these steps to set your desired schedules:
- Press the P button once. The display will show "1 ON" and the first program setting.
- Use D+ to select the day(s) for this "ON" event. You can choose individual days, weekdays, weekends, or all days.
- Use H+ and M+ to set the desired hour and minute for the "ON" event.
- Press P again. The display will show "1 OFF".
- Use D+, H+, and M+ to set the day(s), hour, and minute for the corresponding "OFF" event.
- Repeat steps 1-5 for additional ON/OFF programs (up to 16 pairs). Each press of P will cycle through "2 ON", "2 OFF", and so on.
- To exit programming mode and return to the current time display, press the CLOCK button (often indicated by a clock icon, or the same button as P if it's a multi-function button).
8.1 Manual Override
The MANUAL button allows you to override the programmed settings temporarily:
- Press MANUAL repeatedly to cycle through modes:
- ON: The output is continuously ON, ignoring programs.
- AUTO: The timer operates according to the programmed ON/OFF cycles.
- OFF: The output is continuously OFF, ignoring programs.
- Ensure the timer is set to AUTO for programmed operation.
9. Maintenance
The GreenBlue GB104 Digital Timer requires minimal maintenance:
- Keep the device clean and free from dust. Use a soft, dry cloth for cleaning.
- Do not use abrasive cleaners or solvents.
- Periodically check wiring connections for tightness, especially after initial installation.
- The internal battery is designed for long life and typically does not require replacement.
10. Troubleshooting
| Problem | Possible Cause | Solution |
|---|---|---|
| Display is blank. | No power supply; Internal battery depleted. | Check power connections. If power is present, allow the unit to charge for a few minutes. If still blank, the unit may be faulty. |
| Timer does not switch ON/OFF at programmed times. | Timer is in MANUAL ON or MANUAL OFF mode; Incorrect programming; Time not set correctly. | Press MANUAL until "AUTO" is displayed. Review and correct programming settings. Ensure current time is accurate. |
| Programs are lost after power outage. | Internal battery is not holding charge. | The battery may be at the end of its life. While not user-replaceable, ensure the unit is powered for a few hours to fully charge the battery. If the issue persists, contact support. |
| Buttons are unresponsive. | Temporary software glitch. | Press the RESET button. Re-enter current time and programs. |
11. Warranty and Support
GreenBlue products are manufactured to high-quality standards. In the unlikely event of a defect, please contact your retailer or the manufacturer's customer support for assistance.
Please retain your proof of purchase for warranty claims. Warranty terms and conditions may vary by region and retailer.
For further support or technical inquiries, please visit the official GreenBlue website or contact their customer service department.


