1. Introduction
Thank you for choosing the Keramag Dejuna Illuminated Mirror Element. This manual provides essential information for the safe installation, operation, and maintenance of your new mirror. Please read this manual thoroughly before installation and keep it for future reference.
This product is designed to provide both reflective functionality and integrated illumination, enhancing the aesthetic and utility of your space.
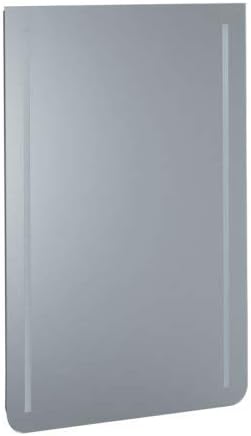
Figure 1: Keramag Dejuna Illuminated Mirror Element. This image shows the full rectangular mirror with integrated vertical light strips on both sides, designed for wall mounting.
2. Safety Information
Always observe the following safety precautions to prevent injury or damage to the product:
- Electrical Safety: Installation must be performed by a qualified electrician in accordance with all local electrical codes and regulations. Ensure the power supply is disconnected before any installation or maintenance work.
- Handling: Mirrors are fragile. Handle with care to avoid breakage. Wear protective gloves when handling to prevent cuts from sharp edges.
- Mounting: Ensure the wall structure is capable of supporting the weight of the mirror. Use appropriate mounting hardware for your wall type.
- Environment: Do not install in areas with excessive humidity or direct water spray unless the product is specifically rated for such conditions.
- Cleaning: Use only mild, non-abrasive cleaners specifically designed for mirrors. Avoid spraying cleaners directly onto electrical components.
3. Setup and Installation
This section outlines the general steps for installing your illuminated mirror. Professional installation is highly recommended.
3.1 Tools Required
- Drill
- Measuring Tape
- Level
- Pencil
- Screwdriver (appropriate type for mounting hardware)
- Wire Strippers (for electrical connection)
- Safety Glasses and Gloves
3.2 Installation Steps
- Unpack: Carefully remove the mirror from its packaging. Inspect for any damage.
- Mark Mounting Points: Hold the mirror against the desired wall location. Use a level to ensure it is straight. Mark the positions for the mounting brackets or holes with a pencil.
- Drill Holes: Drill holes at the marked points, ensuring the drill bit size matches the wall anchors/screws.
- Install Mounting Hardware: Insert wall anchors if necessary, then secure the mounting brackets or screws firmly into the wall.
- Electrical Connection: (This step must be performed by a qualified electrician) Ensure power to the circuit is OFF at the main breaker. Connect the mirror's electrical wiring to the designated power supply according to local electrical codes. Typically, this involves connecting live, neutral, and ground wires.
- Mount Mirror: Carefully lift the mirror and attach it to the installed mounting hardware. Ensure it is securely seated and stable.
- Test: Restore power to the circuit and test the illumination function.
4. Operating Instructions
The Keramag Dejuna Illuminated Mirror Element is designed for simple operation.
- Turning On/Off: The illumination is typically controlled by an external wall switch connected to the mirror's power supply. Flip the wall switch to turn the light on or off.
- Dimming (if applicable): If your electrical installation includes a compatible dimmer switch, you may be able to adjust the brightness of the illumination. Refer to your dimmer switch's instructions for operation.
5. Maintenance and Care
Proper care will ensure the longevity and appearance of your illuminated mirror.
5.1 Cleaning the Mirror Surface
- Use a soft, lint-free cloth.
- Apply a small amount of glass cleaner directly to the cloth, not directly onto the mirror surface, especially near electrical components.
- Wipe the mirror surface gently. Avoid abrasive cleaners or scrubbing pads.
- Dry the surface immediately with a clean, dry cloth to prevent streaks.
5.2 Light Source Replacement
The integrated light source in this mirror is designed for long-term use and is generally not user-replaceable. If the illumination fails, please contact a qualified electrician or Keramag customer support for assistance. Do not attempt to disassemble the mirror or replace internal components yourself.
6. Troubleshooting
If you encounter issues with your illuminated mirror, refer to the following common problems and solutions:
| Problem | Possible Cause | Solution |
|---|---|---|
| Light does not turn on. | No power supply. Faulty wall switch. Loose electrical connection. | Check if the wall switch is on. Verify power to the circuit breaker. If issues persist, contact a qualified electrician to check wiring. |
| Light flickers or is dim. | Unstable power supply. Incompatible dimmer switch (if applicable). | Ensure stable power. If using a dimmer, ensure it is compatible with LED lighting (if applicable) and rated for the mirror's wattage. Consult an electrician. |
| Mirror surface is scratched or damaged. | Improper handling or cleaning. | Damage to the mirror surface is typically not repairable. Contact Keramag customer support for replacement options. |
For problems not listed here, or if the suggested solutions do not resolve the issue, please contact Keramag customer support.
7. Specifications
| Feature | Detail |
|---|---|
| Model | Dejuna 650 x 1000 mm |
| Brand | Keramag |
| ASIN | B00J6A92GI |
| Wattage | 27 watts |
| Batteries Required | No |
| Manufacturer | Keramag |
8. Warranty Information
Keramag products are manufactured to high quality standards. This product comes with a limited warranty against defects in materials and workmanship. Please retain your proof of purchase. For specific warranty terms and conditions, refer to the warranty card included with your product or visit the official Keramag website. This warranty does not cover damage caused by improper installation, misuse, abuse, or normal wear and tear.
9. Customer Support
If you have any questions, require technical assistance, or need to report a problem with your Keramag Dejuna Illuminated Mirror Element, please contact our customer support team:
- Website: www.keramag.com (Please note: This is a placeholder URL, replace with actual if known)
- Email: support@keramag.com (Please note: This is a placeholder email, replace with actual if known)
- Phone: Refer to the contact information provided on the Keramag website for your region.
When contacting support, please have your product model (Dejuna 650 x 1000 mm) and ASIN (B00J6A92GI) ready.


