
InFocus IN126x
InFocus Projector User Manual
Model: IN126x (F321717)
Introduction
This manual provides comprehensive instructions for the setup, operation, and maintenance of your InFocus IN126x WXGA Network Projector. Designed for both business presentations and home cinema, this projector delivers 4200 lumens and excellent image quality with high contrast and BrilliantColor technology. Its compact and lightweight design ensures portability while maintaining powerful performance.

Figure 1: InFocus IN126x Projector Front View
This image displays the InFocus IN126x projector from a front-right angle, highlighting its main lens and the sleek black casing. The top panel features control buttons and the InFocus logo.
Important Safety Information
Please read all safety instructions carefully before operating the projector. Failure to follow these instructions may result in fire, electric shock, or other injuries.
- Power Source: Use only the power adapter supplied with the projector. Ensure the power outlet matches the voltage requirements.
- Ventilation: Do not block ventilation openings. Adequate airflow is essential to prevent overheating.
- Heat: The projector lamp and surrounding areas can become very hot during operation. Avoid touching these areas.
- Lamp Warning: The lamp contains mercury. Dispose of lamps according to local regulations. Do not open the lamp compartment until the projector has cooled down.
- Liquid Exposure: Do not expose the projector to rain, moisture, or any liquids.
- Servicing: Do not attempt to service this product yourself. Refer all servicing to qualified service personnel.

Figure 2: Projector Bottom Panel with Warning Labels
This image shows the underside of the InFocus IN126x projector, displaying various regulatory and safety labels. Notable warnings include information about mercury in the lamp and instructions for lamp replacement, emphasizing the need to allow the unit to cool down before servicing.
Setup Guide
1. Unpacking and Placement
Carefully remove the projector and all accessories from the packaging. Place the projector on a stable, flat surface or mount it securely. Ensure there is adequate space around the projector for proper ventilation.

Figure 3: Projector Dimensions
This image illustrates the physical dimensions of the InFocus IN126x projector. The measurements are approximately 29.2 cm (length), 22.1 cm (width), and 9.8 cm (height), providing a clear understanding of its compact size for placement considerations.
2. Connecting Power
Connect the power cord to the projector's power inlet and then plug the other end into a grounded electrical outlet.
3. Connecting Input Sources
The InFocus IN126x projector supports various input sources. Connect your device (e.g., laptop, Blu-ray player) to the appropriate port on the projector's rear panel.
- HDMI: For high-definition digital video and audio.
- VGA (Computer 1/2): For analog computer video input.
- S-Video/Video: For standard definition video.
- Audio In (Audio 1/2): For analog audio input.
- USB-A/USB-B: For service or specific data transfer.
- LAN: For network connectivity.
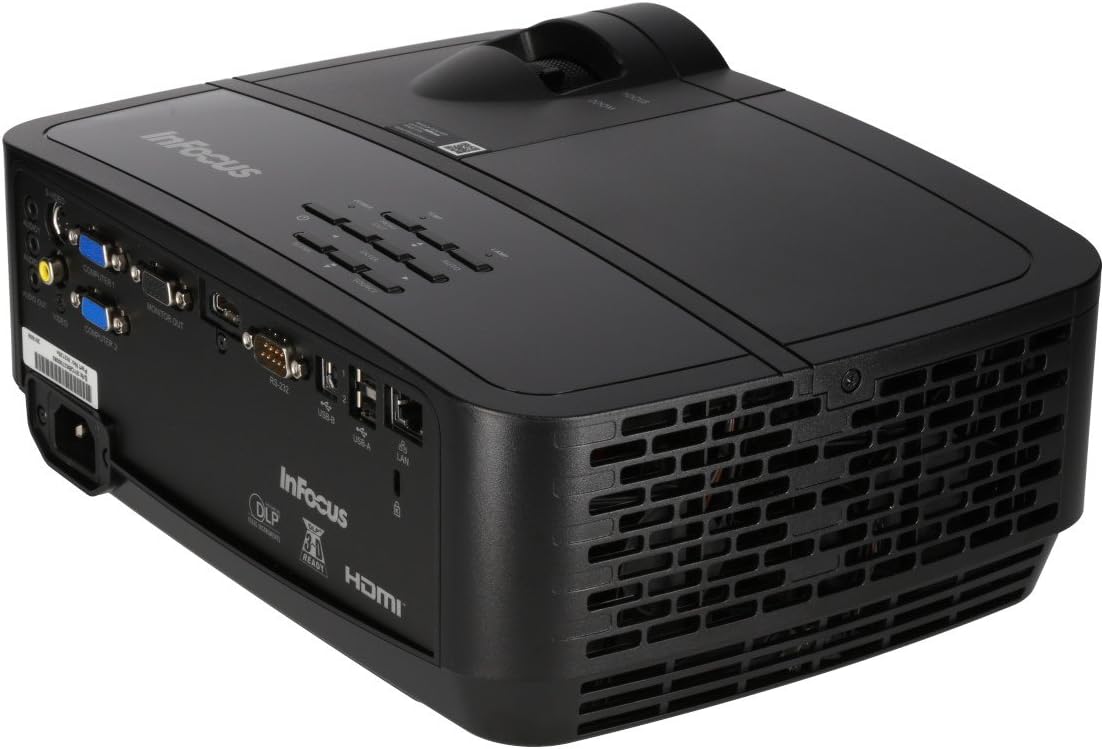
Figure 4: Projector Rear Panel Connectivity
This image provides a detailed view of the rear panel of the InFocus IN126x projector, clearly showing all available input and output ports. These include HDMI, VGA (Computer 1 and 2), S-Video, Video, Audio In (Audio 1 and 2), Monitor Out, RS-232, USB-B, USB-A, and LAN ports, facilitating diverse connectivity options.
4. Initial Power On and Adjustment
Press the power button on the projector or remote control. The projector will power on and display the input source. Use the focus and zoom rings on the lens to adjust the image clarity and size to your desired projection area.

Figure 5: Projector Top Panel Controls
This image shows the top surface of the InFocus IN126x projector, highlighting the control panel with various buttons for navigation and settings adjustment. The focus and zoom rings on the lens are also visible, used for fine-tuning the projected image.
Operating Instructions
Basic Controls
The projector can be operated using the control panel on the top of the unit or the included remote control.
- Power Button: Turns the projector on or off.
- Source Button: Cycles through available input sources (HDMI, VGA, etc.).
- Menu Button: Opens the On-Screen Display (OSD) menu.
- Navigation Buttons: Used to navigate through menu options and adjust settings.
- Enter Button: Confirms selections in the menu.
Menu Navigation and Settings
Press the Menu button to access the OSD. Use the navigation buttons to select categories such as Picture, Display, Setup, and Advanced. Within each category, you can adjust settings like:
- Brightness & Contrast: Optimize image visibility.
- Color & Tint: Fine-tune color accuracy.
- Aspect Ratio: Select between 4:3, 16:9, or other ratios to match your content.
- Keystone Correction: Adjust image shape if the projector is not perfectly perpendicular to the screen.
- BrilliantColor Technology: Enhance color vibrancy and detail.
Advanced Features
The IN126x supports a superior viewing experience, including 3D home cinema (3D Glasses sold separately). For enhanced connectivity, the projector can easily connect to your phone or iPad with a LightCast Key (sold separately).
Maintenance
Lamp Replacement
The projector lamp has a lifespan of over 5,000 hours. When the lamp reaches the end of its life, a warning message may appear, or the lamp indicator light may illuminate. Always allow the projector to cool down completely (at least 60 minutes) before attempting to replace the lamp. Refer to the safety information on the bottom of the projector for specific warnings regarding mercury content and replacement procedures.
Cleaning
- Lens: Use a soft, lint-free cloth specifically designed for optical lenses. Do not use abrasive cleaners.
- Projector Casing: Wipe with a soft, damp cloth. Avoid harsh chemicals.
- Air Vents: Regularly check and clean the air vents to ensure proper airflow and prevent overheating. Use a soft brush or compressed air to remove dust.

Figure 6: Projector Side Ventilation
This image displays the side of the InFocus IN126x projector, prominently featuring the ventilation grilles. These grilles are crucial for dissipating heat generated during operation, and keeping them clear of obstructions is vital for the projector's longevity and performance.
Troubleshooting
| Problem | Possible Cause | Solution |
|---|---|---|
| No image on screen |
|
|
| Image is dim or poor quality |
|
|
| No sound |
|
|
Specifications
| Feature | Detail |
|---|---|
| Brand | InFocus |
| Model Number | F321717 (IN126x) |
| Product Dimensions | 18.58 x 20.67 x 7.44 inches |
| Item Weight | 5.5 pounds |
| Display Resolution | 1280 x 800 (WXGA) |
| Connectivity Technology | HDMI, VGA, S-Video, USB, LAN |
| Lamp Life | Over 5,000 hours |
| Special Feature | Portable |
| First Available Date | August 7, 2016 |
Warranty Information
The InFocus IN126x Projector comes with a 2-year warranty. InFocus stands behind its products and provides customer service for any issues you may encounter. Please retain your proof of purchase for warranty claims.
Customer Support
For technical assistance, troubleshooting beyond this manual, or warranty inquiries, please contact InFocus customer support. Visit the official InFocus website for the most up-to-date contact information, including phone numbers and online support resources.
You can also refer to the official InFocus website for additional resources and FAQs: www.infocus.com
Related documentsIN126x


Ask a question about this manual
Ask about setup, troubleshooting, compatibility, parts, safety, or missing instructions. Manuals+ will review the question and use this page’s manual context to help answer it.