
1. Introduction
This manual provides detailed instructions for the safe installation, operation, and maintenance of your Craftmade LK104-BNK-LED Low Profile LED Light Kit. Please read all instructions carefully before beginning installation and retain this manual for future reference.
2. Safety Information
WARNING:
- Always disconnect power at the circuit breaker before installation or servicing.
- All wiring must be in accordance with national and local electrical codes. If you are unfamiliar with wiring, consult a qualified electrician.
- Do not install this light kit with a dimmer switch unless specifically rated for LED lighting.
- Ensure the mounting surface can support the weight of the light kit.
- This product contains chemicals known to the State of California to cause cancer and birth defects or other reproductive harm. Wash hands after handling.
3. Package Contents
Verify that all components are present before beginning installation:
- 1x LED Light Kit Assembly (Cased Frost White Glass, Brushed Polished Nickel finish)
- Mounting Hardware Kit
- Instruction Manual
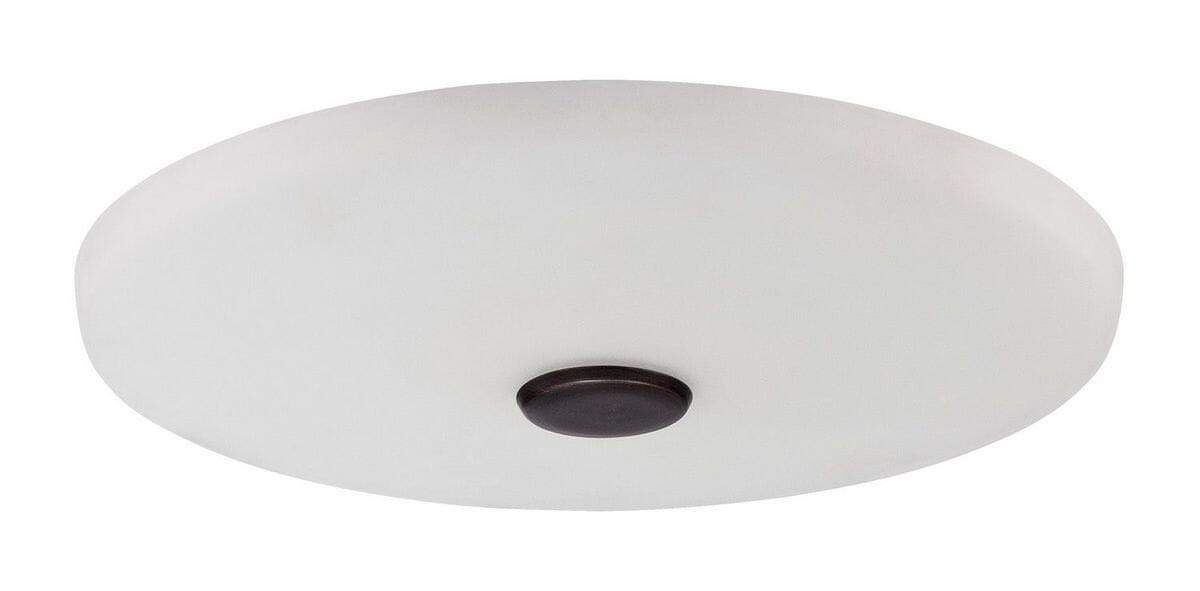
Image 1: Craftmade LK104-BNK-LED Low Profile LED Light Kit. This image shows the complete light kit assembly with its cased frost white glass diffuser and brushed polished nickel center cap.
4. Tools Required
The following tools are typically required for installation:
- Phillips Head Screwdriver
- Flat Head Screwdriver
- Wire Strippers
- Electrical Tape
- Ladder
5. Setup and Installation
Follow these steps to install your LED light kit:
- Turn Off Power: Before starting, ensure the power to the ceiling fan circuit is turned off at the main electrical panel.
- Remove Existing Light Kit (if applicable): Carefully detach any existing light kit from your ceiling fan, following its specific removal instructions. Disconnect all wiring.
- Prepare Wiring: Identify the fan's light kit wires (typically black for hot, white for neutral, and green/bare copper for ground). Strip insulation if necessary.
- Connect Wires: Connect the light kit's wires to the corresponding fan wires using wire nuts (usually black to black, white to white, and ground to ground). Ensure all connections are secure.
- Mount Light Kit: Align the light kit assembly with the mounting holes on the bottom of the ceiling fan. Secure it using the provided screws. Do not overtighten.
- Install Glass Shade: Carefully place the cased frost white glass shade onto the light kit assembly. Secure it according to the design (e.g., twist-lock, thumb screws).
- Restore Power: Once installation is complete and all components are secure, restore power at the circuit breaker.

Image 2: Detailed view of the Craftmade LK104-BNK-LED light kit. This image highlights the brushed polished nickel finish of the central component and the texture of the cased frost white glass.
6. Operating Instructions
This LED light kit is designed for integration with a compatible ceiling fan. Operation is typically controlled via the fan's pull chain, wall switch, or remote control system.
- Power On/Off: Use the designated light control on your ceiling fan (pull chain, wall switch, or remote) to turn the LED light on or off.
- Brightness: If your ceiling fan system includes dimming capabilities compatible with LED lighting, you may adjust the brightness using the fan's control. Refer to your ceiling fan's manual for specific dimming instructions.
7. Maintenance
Regular maintenance ensures optimal performance and longevity of your light kit.
- Cleaning: To clean the glass shade and metal finish, ensure power is off. Wipe surfaces with a soft, damp cloth. Do not use abrasive cleaners, solvents, or polishes, as these can damage the finish or glass.
- LED Module: The integrated LED module is designed for long life and is not user-replaceable. If the LED light fails, the entire light kit assembly may need replacement.
- Connections: Periodically check electrical connections for tightness, especially if you notice flickering or intermittent operation. Ensure power is off before checking connections.
8. Troubleshooting
| Problem | Possible Cause | Solution |
|---|---|---|
| Light does not turn on. | No power to the fixture. Loose wire connection. Faulty LED module. | Check circuit breaker. Verify all wire connections are secure (with power off). Contact customer support if LED module is suspected faulty. |
| Light flickers. | Loose wire connection. Incompatible dimmer switch. | Check wire connections (with power off). Ensure dimmer is rated for LED lighting; replace if necessary. |
| Light is dim. | Dimmer setting too low. Incompatible dimmer switch. | Adjust dimmer to maximum setting. Ensure dimmer is rated for LED lighting. |
9. Specifications
| Feature | Detail |
|---|---|
| Model Number | LK104-BNK-LED |
| Brand | Craftmade |
| Finish | Brushed Polished Nickel |
| Shade Material | Cased Frost White Glass |
| Light Source Type | Integrated LED |
| Number of Light Sources | 1 |
| Brightness | 1300 Lumens |
| Voltage | 120 Volts |
| Product Dimensions | 12.25"L x 12.25"W x 3"H |
| Item Weight | 3.81 Pounds |
| Safety Rating | cETLus |
| Installation Type | Surface Mount |
| Control Method | Remote (via fan control) |
10. Warranty Information
This Craftmade LK104-BNK-LED Light Kit comes with a 1-year manufacturer's warranty. This warranty covers defects in materials and workmanship under normal use. Please retain your proof of purchase for warranty claims. For specific warranty terms and conditions, please refer to the official Craftmade website or contact their customer service.
11. Customer Support
If you have any questions regarding the installation, operation, or maintenance of your Craftmade LK104-BNK-LED Light Kit, please contact Craftmade customer support.
Website: www.craftmade.com
Please note that contact information may vary. Refer to the official Craftmade website for the most current support details.