1. Introduction
Thank you for choosing the KRUPS EA8108 Fully Automatic Coffee Machine. This appliance is designed to provide high-quality coffee beverages with convenience and ease. To ensure optimal performance and longevity of your machine, please read this instruction manual thoroughly before initial use and keep it for future reference. This manual covers essential information regarding setup, operation, maintenance, and troubleshooting.
2. Important Safety Instructions
When using electrical appliances, basic safety precautions should always be followed to reduce the risk of fire, electric shock, and/or injury to persons, including the following:
- Read all instructions before operating the appliance.
- Do not touch hot surfaces. Use handles or knobs.
- To protect against fire, electric shock, and injury to persons, do not immerse cord, plugs, or appliance in water or other liquid.
- Close supervision is necessary when any appliance is used by or near children.
- Unplug from outlet when not in use and before cleaning. Allow to cool before putting on or taking off parts, and before cleaning the appliance.
- Do not operate any appliance with a damaged cord or plug or after the appliance malfunctions, or has been damaged in any manner.
- The use of accessory attachments not recommended by the appliance manufacturer may result in fire, electric shock, or injury to persons.
- Do not use outdoors.
- Do not let cord hang over edge of table or counter, or touch hot surfaces.
- Do not place on or near a hot gas or electric burner, or in a heated oven.
- Always attach plug to appliance first, then plug cord into the wall outlet. To disconnect, turn any control to "off", then remove plug from wall outlet.
- Do not use appliance for other than intended use.
- Exercise extreme caution when disposing of hot steam.
3. Product Overview and Components
Familiarize yourself with the main components of your KRUPS EA8108 coffee machine.

Figure 1: Front view of the KRUPS EA8108 fully automatic coffee machine, showing the control panel, coffee spouts, drip tray, and bean hopper on top.

Figure 2: Side view illustrating the dimensions of the coffee machine: 33 cm height, 36.5 cm depth, and 24.5 cm width.
Key Components:
- Bean Hopper: Located on top, for whole coffee beans.
- Water Tank: Removable, typically on the side or rear, for fresh water.
- Control Panel: Features buttons and a rotary knob for various functions and settings.
- Coffee Spouts: Adjustable height for different cup sizes.
- Drip Tray: Collects excess liquid and coffee grounds.
- Milk Frother Nozzle: For steaming milk for specialty beverages.
- Grind Adjustment Dial: Inside the bean hopper, for setting coffee fineness.
4. Setup and First Use
4.1 Unpacking
- Carefully remove the coffee machine from its packaging.
- Remove all protective films and packaging materials.
- Place the machine on a stable, flat, and heat-resistant surface.
4.2 Initial Cleaning
- Wash the water tank, drip tray, and coffee grounds container with warm water and a mild detergent. Rinse thoroughly and dry.
- Wipe the exterior of the machine with a damp cloth.
4.3 Filling the Water Tank
- Remove the water tank from the machine.
- Fill it with fresh, cold tap water up to the MAX level indicator.
- Replace the water tank securely.
4.4 Filling the Bean Hopper
- Open the lid of the bean hopper.
- Pour fresh, whole coffee beans into the hopper. Do not use ground coffee, instant coffee, or caramelized beans.
- Close the lid securely.
4.5 First Use / Priming
- Plug the power cord into a grounded electrical outlet.
- Press the power button to turn on the machine.
- The machine will perform an automatic rinsing cycle. Place a container under the coffee spouts to collect the water.
- Once the rinsing cycle is complete, the machine is ready for use.
5. Operating the Coffee Machine
5.1 Basic Coffee Preparation
The KRUPS EA8108 allows for intuitive preparation of various coffee beverages.

Figure 3: The KRUPS EA8108 coffee machine brewing a fresh cup of coffee in a contemporary kitchen environment.
- Place one or two cups under the coffee spouts.
- Select your desired coffee type (e.g., espresso, long coffee) using the dedicated buttons.
- The machine will automatically grind the beans, brew, and dispense the coffee.
5.2 Adjusting Coffee Strength and Volume
You can customize your coffee to your preference.

Figure 4: Visual representation of three different coffee strengths or volumes that can be prepared by the machine.
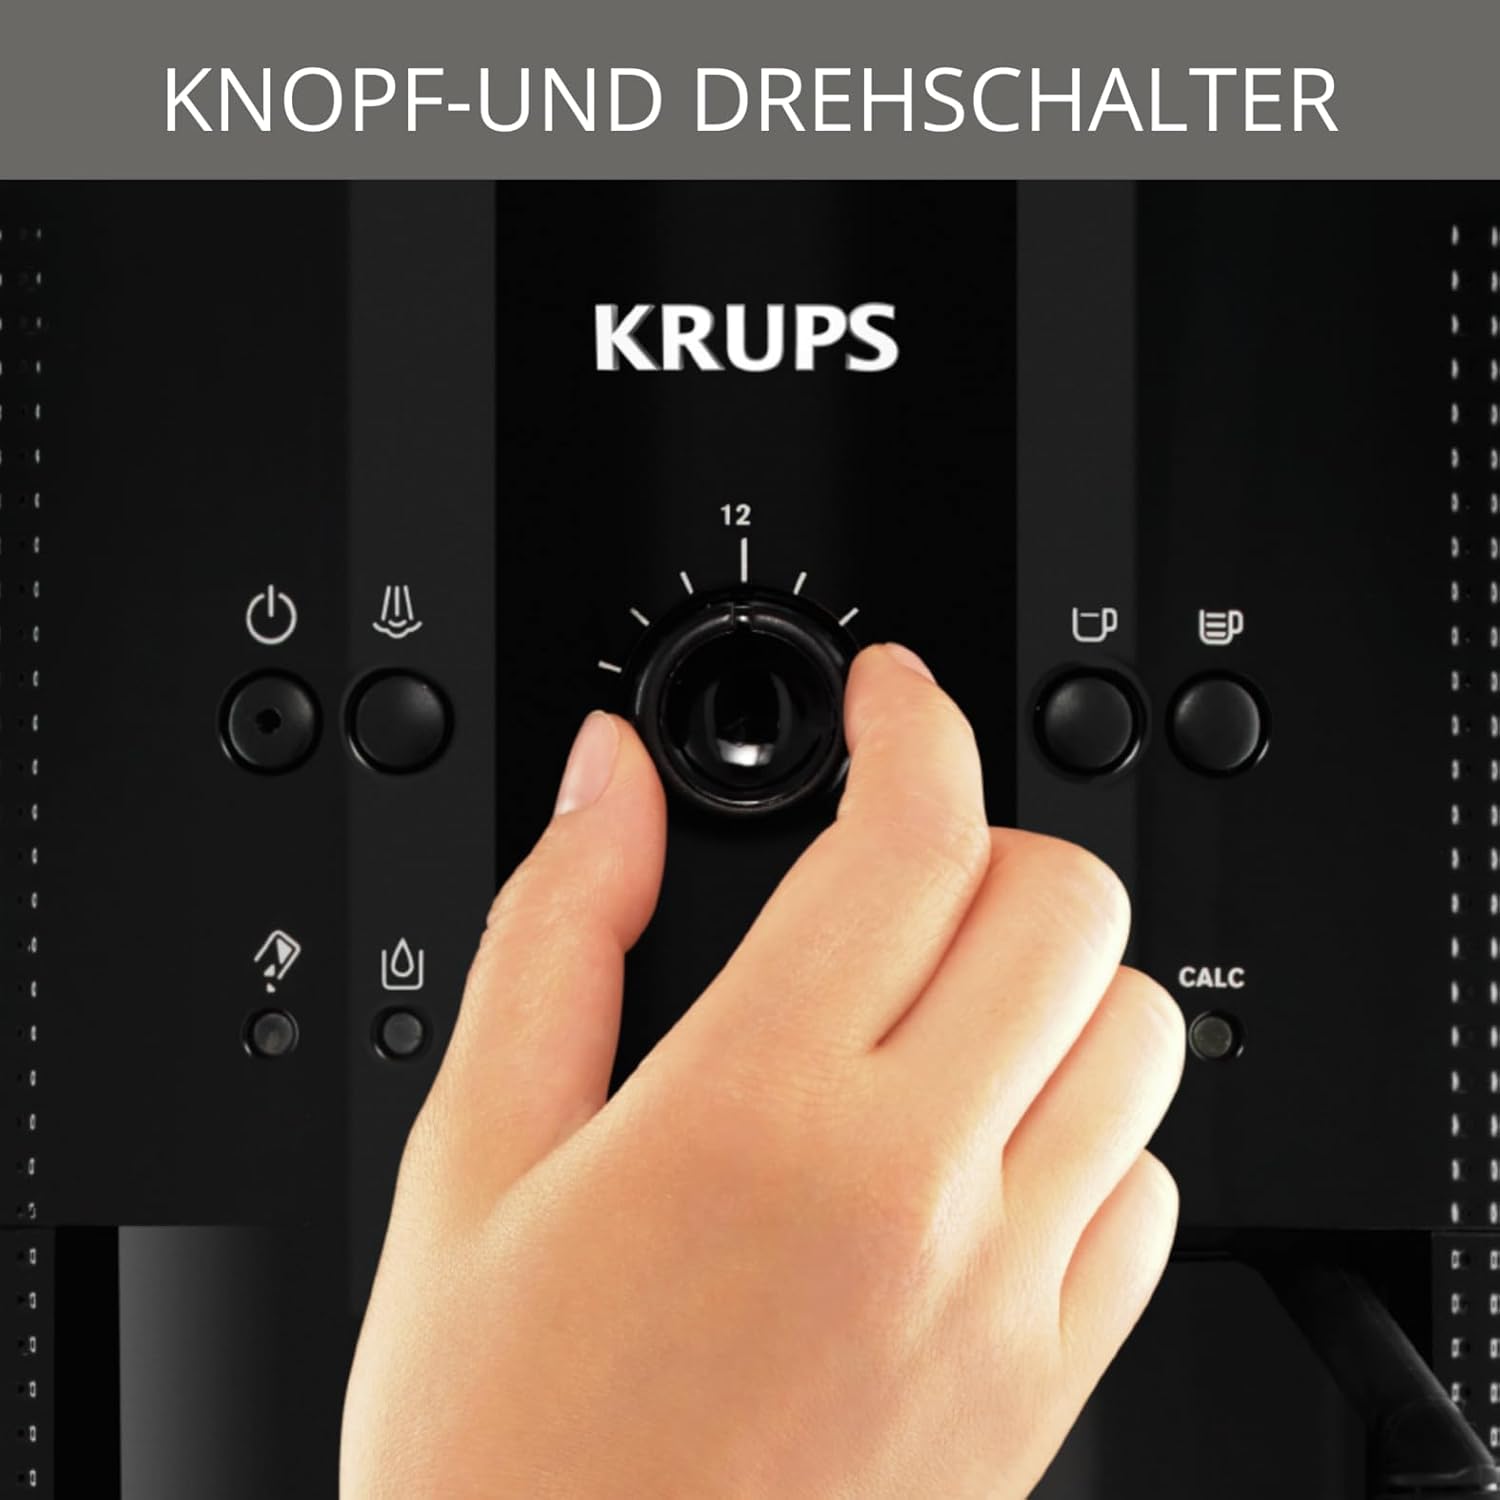
Figure 5: A hand demonstrating the adjustment of coffee volume or strength using the central rotary control knob on the machine's front panel.
- Coffee Volume: Use the central rotary knob to adjust the desired volume of water for your coffee (e.g., from 20ml to 220ml).
- Coffee Strength: The machine offers various settings for coffee strength, typically indicated by dedicated buttons or menu options. Refer to the display or button labels for specific strength selections.
5.3 Adjusting Grind Fineness
The grind fineness affects the flavor extraction. A finer grind results in a stronger coffee, while a coarser grind yields a milder taste.

Figure 6: Close-up view of the coffee bean hopper, showing the integrated dial for adjusting the coffee grind fineness.
- The grind adjustment dial is located inside the bean hopper.
- Adjust the dial only when the grinder is operating to prevent damage.
- Turn the dial towards the finer setting for stronger coffee, and towards the coarser setting for milder coffee.
5.4 Using the Milk Frother
The integrated milk frother nozzle allows you to prepare creamy milk foam for cappuccinos and latte macchiatos.

Figure 7: The milk frother nozzle in action, creating frothed milk for a layered latte macchiato.
- Fill a pitcher with cold milk (preferably semi-skimmed or full-fat).
- Submerge the milk frother nozzle into the milk.
- Activate the steam function (refer to your machine's control panel for the specific button).
- Move the pitcher up and down to create desired foam consistency.
- After frothing, clean the nozzle immediately to prevent milk residue from drying.
6. Maintenance and Cleaning
Regular cleaning and maintenance are crucial for the performance and lifespan of your coffee machine.
6.1 Daily Cleaning
- Drip Tray and Coffee Grounds Container: Empty and rinse daily. The machine will indicate when the grounds container needs emptying.
- Water Tank: Rinse daily and refill with fresh water.
- Coffee Spouts: Wipe with a damp cloth.
6.2 Cleaning the Milk Frother Nozzle
- Immediately after each use, wipe the nozzle with a damp cloth.
- Run a short burst of steam through the nozzle to clear any milk residue.
- Periodically, remove the nozzle and clean it thoroughly with warm soapy water and a small brush.
6.3 Automatic Cleaning Program
The KRUPS EA8108 features a closed brewing system and an automatic cleaning program, simplifying maintenance.

Figure 8: An illustration emphasizing the durable metal brewing group, a key component for consistent coffee quality and heat conduction in KRUPS machines.
- The machine will prompt you when a cleaning cycle is required (indicated by a 'CLEAN' light).
- Follow the on-screen instructions or refer to the manual for the specific steps to initiate the automatic cleaning program using a cleaning tablet.
- The metal brewing group ensures efficient heat conduction and durability, contributing to the effectiveness of the cleaning process.
6.4 Descaling Program
- The machine will prompt you when descaling is required (indicated by a 'CALC' light).
- Use a suitable descaling solution recommended by KRUPS.
- Follow the detailed instructions in the machine's display or the full manual to perform the descaling cycle. This typically involves filling the water tank with the descaling solution and running the program.
- Rinse the machine thoroughly after descaling to remove any residue.
7. Troubleshooting
This section addresses common issues you might encounter with your KRUPS EA8108 coffee machine.
| Problem | Possible Cause | Solution |
|---|---|---|
| No coffee is dispensed. | Water tank empty, coffee beans empty, machine not primed. | Fill water tank, fill bean hopper, perform priming cycle. |
| Coffee is too weak. | Grind is too coarse, insufficient coffee dose, water filter needs replacement. | Adjust grind to a finer setting, select stronger coffee setting, replace water filter. |
| Coffee is not hot enough. | Cups are cold, machine needs descaling. | Pre-heat cups, perform descaling cycle. |
| Milk frother not producing foam. | Nozzle clogged, milk not cold enough, incorrect milk type. | Clean nozzle thoroughly, use cold milk, try semi-skimmed or full-fat milk. |
| Machine displays 'CLEAN' or 'CALC'. | Cleaning or descaling cycle required. | Perform the indicated cleaning or descaling program. |
If the problem persists after attempting these solutions, please contact KRUPS customer support.
8. Technical Specifications
| Feature | Specification |
|---|---|
| Brand | KRUPS |
| Model | EA8108 |
| Voltage | 230 Volts |
| Wattage | 1450 watts |
| Water Tank Capacity | 1.8 Liters |
| Material | Stainless Steel |
| Product Dimensions (L x W x H) | 36.5 x 26 x 32 cm |
| Item Weight | 7 kg |
| Noise Level | 60 dB |
| Special Features | Removable Tank, Water Filter, Milk Frother |
9. Warranty Information
Your KRUPS EA8108 Fully Automatic Coffee Machine is covered by a manufacturer's warranty. The specific terms and duration of the warranty may vary by region and retailer. Please retain your proof of purchase for warranty claims. For detailed warranty information, refer to the warranty card included with your product or visit the official KRUPS website for your region.
10. Customer Support
For further assistance, technical support, or to order spare parts and accessories, please contact KRUPS customer service. You can typically find contact information (phone numbers, email, or online support portals) on the official KRUPS website or in the documentation provided with your appliance.
Online Resources: Visit www.krups.com for product registration, FAQs, and additional support.


