Introduction
This user manual provides essential information for the safe and effective operation of your ChoiceMMed BP11 Digital Blood Pressure Monitor. Please read this manual thoroughly before using the device and keep it for future reference.
The ChoiceMMed BP11 blood pressure monitor is designed for non-invasive measurement of an adult individual's blood pressure (systolic and diastolic) and heart rate. It is an upper arm type monitor with fully automatic inflation. Readings are calculated from the three most recent results, ensuring accuracy even for individuals with conditions like glycuresis, hyperlipaemia, or hypertension.
Key features include a color indicator code based on WHO blood pressure classification, an irregular heartbeat indicator, and a memory function storing 120 readings with date and time for effective blood pressure management. The device features a large 4-inch LCD display for easy reading and comes with a comfortable cuff and a carrying bag.
Important Safety Information
- Pressurized Air Content: Do not puncture or make the container non-waterproof.
- Consult your physician for interpretation of blood pressure measurements. Self-diagnosis and treatment based on measurements can be dangerous.
- Do not use the device on infants, children, or individuals who cannot express their consent.
- Avoid using the device in a moving vehicle or on an airplane.
- Do not use the device near strong electromagnetic fields, such as mobile phones or microwave ovens.
- Keep the device out of reach of children and pets.
What's in the Box
Upon unpacking, please verify that all the following items are present and undamaged:
- Digital Blood Pressure Monitor
- Arm Cuff (Medium size, fits arm circumference 22-36 cm)
- User Manual
- Convenient Carrying Case
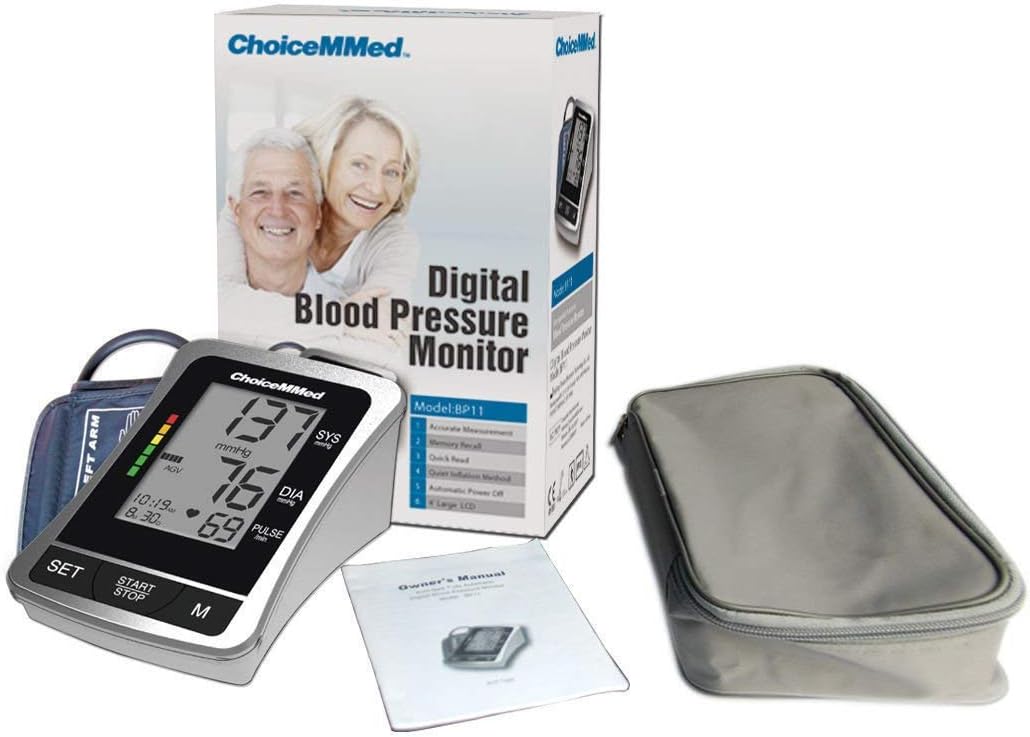
Figure 1: ChoiceMMed BP11 Digital Blood Pressure Monitor, including the device, packaging, user manual, and carrying case.
Product Overview
Device Components
The ChoiceMMed BP11 monitor consists of the main unit with an LCD display and control buttons, and an arm cuff connected via an air tube.
LCD Display and Buttons
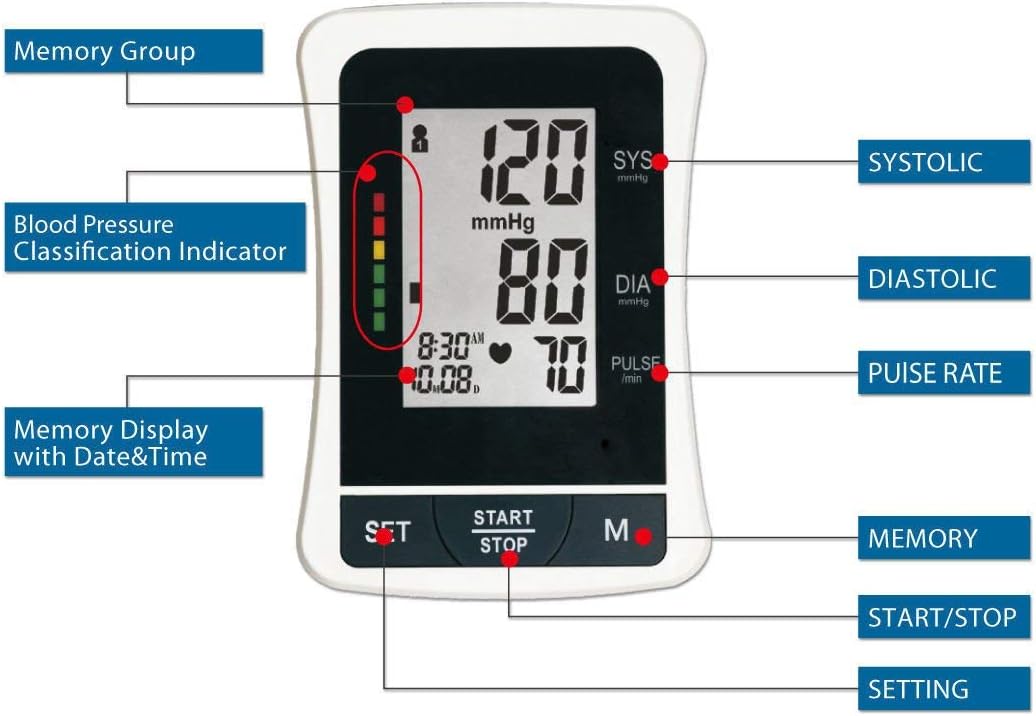
Figure 2: Detailed view of the ChoiceMMed BP11 LCD display and control buttons.
- SYS (Systolic Pressure): Top number in mmHg.
- DIA (Diastolic Pressure): Middle number in mmHg.
- PULSE (Pulse Rate): Bottom number in beats/min.
- Blood Pressure Classification Indicator: Vertical color bar on the left, indicating blood pressure level according to WHO guidelines.
- Memory Display with Date & Time: Shows current time and date, and memory group.
- SET Button: Used to adjust settings (e.g., date, time).
- START/STOP Button: Initiates and stops a measurement.
- M (Memory) Button: Used to recall stored measurements.
Setup
1. Installing Batteries
- Open the battery compartment cover on the back of the monitor.
- Insert 4 AA alkaline batteries (not provided) according to the polarity indicators (+/-) inside the compartment.
- Close the battery compartment cover securely.
Note: If the low battery indicator appears on the display, replace all four batteries simultaneously.
2. Connecting the Arm Cuff
- Locate the air tube connector on the side of the monitor.
- Firmly insert the air tube plug from the arm cuff into the connector port until it clicks into place.
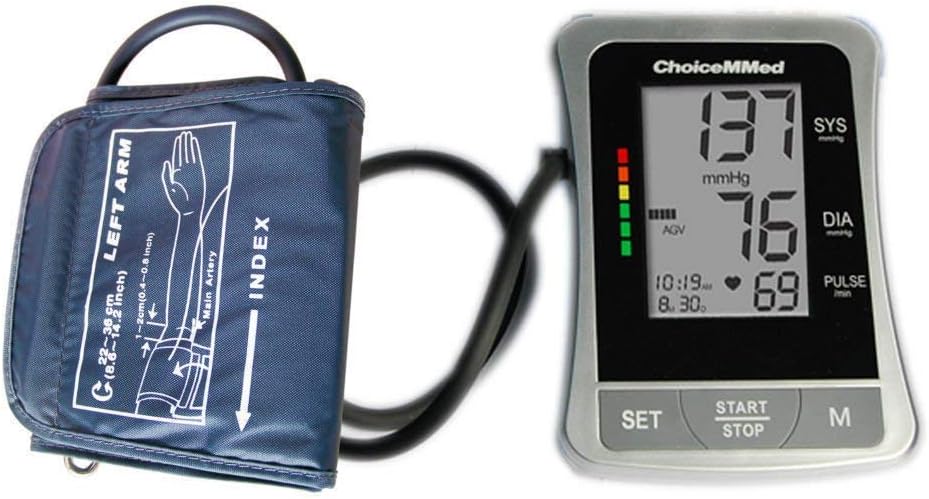
Figure 3: The ChoiceMMed BP11 monitor and arm cuff, showing the connection.

Figure 4: The ChoiceMMed BP11 monitor fully connected to its arm cuff.
Operating Instructions
Taking a Measurement
- Prepare for Measurement: Sit comfortably with your back supported and feet flat on the floor. Rest your arm on a table so the cuff is at heart level. Avoid talking or moving during the measurement.
- Apply the Cuff: Slide your left arm through the cuff loop. Position the cuff so the air tube runs down the center of your arm in line with your middle finger. The bottom edge of the cuff should be approximately 2-3 cm (0.8-1.2 inches) above your elbow. Ensure the cuff is snug but not too tight; you should be able to insert two fingers between the cuff and your arm.
- Start Measurement: Press the START/STOP button. The cuff will automatically inflate. Remain still and quiet.
- Reading Display: Once the measurement is complete, the cuff will deflate, and your systolic pressure, diastolic pressure, and pulse rate will be displayed on the LCD screen.
- Power Off: Press the START/STOP button again to turn off the device, or it will automatically power off after a period of inactivity.

Figure 5: Proper cuff placement and measurement posture.
Recalling Measurements from Memory
The device stores up to 120 measurements with date and time stamps.
- With the device off, press the M (Memory) button.
- The most recent measurement will be displayed first.
- Press the M button repeatedly to scroll through previous measurements.
- To exit memory mode, press the START/STOP button or wait for automatic power-off.
Understanding Your Readings
Blood Pressure Values
- Systolic Pressure (SYS): The higher number, representing the pressure in your arteries when your heart beats.
- Diastolic Pressure (DIA): The lower number, representing the pressure in your arteries between beats, when your heart rests.
- Pulse Rate: Your heart rate, measured in beats per minute (bpm).
WHO Blood Pressure Classification Indicator
The monitor features a color indicator on the left side of the display, which corresponds to the World Health Organization (WHO) classification of blood pressure levels. This helps you quickly understand your reading's category:
- Green: Optimal/Normal Blood Pressure
- Yellow: High-Normal Blood Pressure
- Orange: Mild-Moderate Hypertension
- Red: Severe Hypertension
Always consult a healthcare professional for diagnosis and treatment of high blood pressure.
Irregular Heartbeat Indicator
If an irregular heartbeat is detected during the measurement, a special symbol will appear on the display. This indicates that a pulse rhythm inconsistent with a normal heartbeat was detected. If this symbol appears frequently, please consult your doctor.
Maintenance and Care
- Cleaning: Use a soft, dry cloth to clean the monitor. If necessary, a cloth lightly dampened with water or a mild detergent can be used, then wipe dry immediately. Do not use abrasive cleaners or immerse the device in water.
- Storage: Store the device and cuff in the provided carrying case in a cool, dry place, away from direct sunlight, extreme temperatures, and humidity.
- Battery Replacement: If the device will not be used for an extended period, remove the batteries to prevent leakage and damage.
- Cuff Care: The cuff can be gently wiped clean with a damp cloth. Do not wash the cuff in a washing machine or immerse it in water.
Troubleshooting
| Problem | Possible Cause | Solution |
|---|---|---|
| No display when powered on. | Batteries are dead or incorrectly inserted. | Replace batteries with new ones, ensuring correct polarity. |
| Error message on display. | Cuff not applied correctly, movement during measurement, or air leakage. | Reapply cuff correctly, remain still and quiet, check cuff connection. Repeat measurement. |
| Inconsistent or inaccurate readings. | Improper cuff placement, talking/moving during measurement, or incorrect posture. | Ensure proper cuff placement, remain still, and maintain correct posture. Take multiple readings at different times of day. |
| Device does not inflate. | Air tube disconnected or damaged. | Check that the air tube is securely connected to the monitor and cuff. Inspect for any visible damage. |
Specifications
| Feature | Detail |
|---|---|
| Model Number | ChoiceMMed America |
| Display | 4-inch LCD |
| Measurement Method | Oscillometric |
| Measurement Range | Pressure: 0-300 mmHg; Pulse: 40-199 beats/minute |
| Accuracy | Pressure: ±3 mmHg; Pulse: ±5% of reading |
| Memory | 120 measurements with date and time |
| Cuff Size | Medium (fits arm circumference 22-36 cm) |
| Power Source | 4 x AA batteries (not included) |
| Automatic Power Off | Yes |
| Color | Silver |
Warranty and Support
For warranty information or technical support, please refer to the contact details provided with your purchase documentation or visit the official ChoiceMMed website. Keep your purchase receipt as proof of purchase.


