
BAOFENG UV-82C
Contents
BAOFENG UV-82C Dual-Band Two-Way Radio User Manual
Model: UV-82C
1. Introduction
The BAOFENG UV-82C is a robust and versatile dual-band FM two-way radio designed for business and commercial licensed operators. It is FCC Part 90 certified, ensuring compliance with regulatory standards for professional use. This manual provides detailed instructions for setting up, operating, maintaining, and troubleshooting your UV-82C radio to ensure optimal performance and longevity.
2. Package Contents
Upon opening your BAOFENG UV-82C package, please verify that all the following items are included:
- UV-82C Transceiver
- 1800mAh Lithium-Ion Battery (BL-8)
- Dual Band Antenna
- Desktop Charger (CH-8)
- 110V AC Adapter
- Earpiece Kit
- Wrist Strap
- Belt Clip
- User Manual
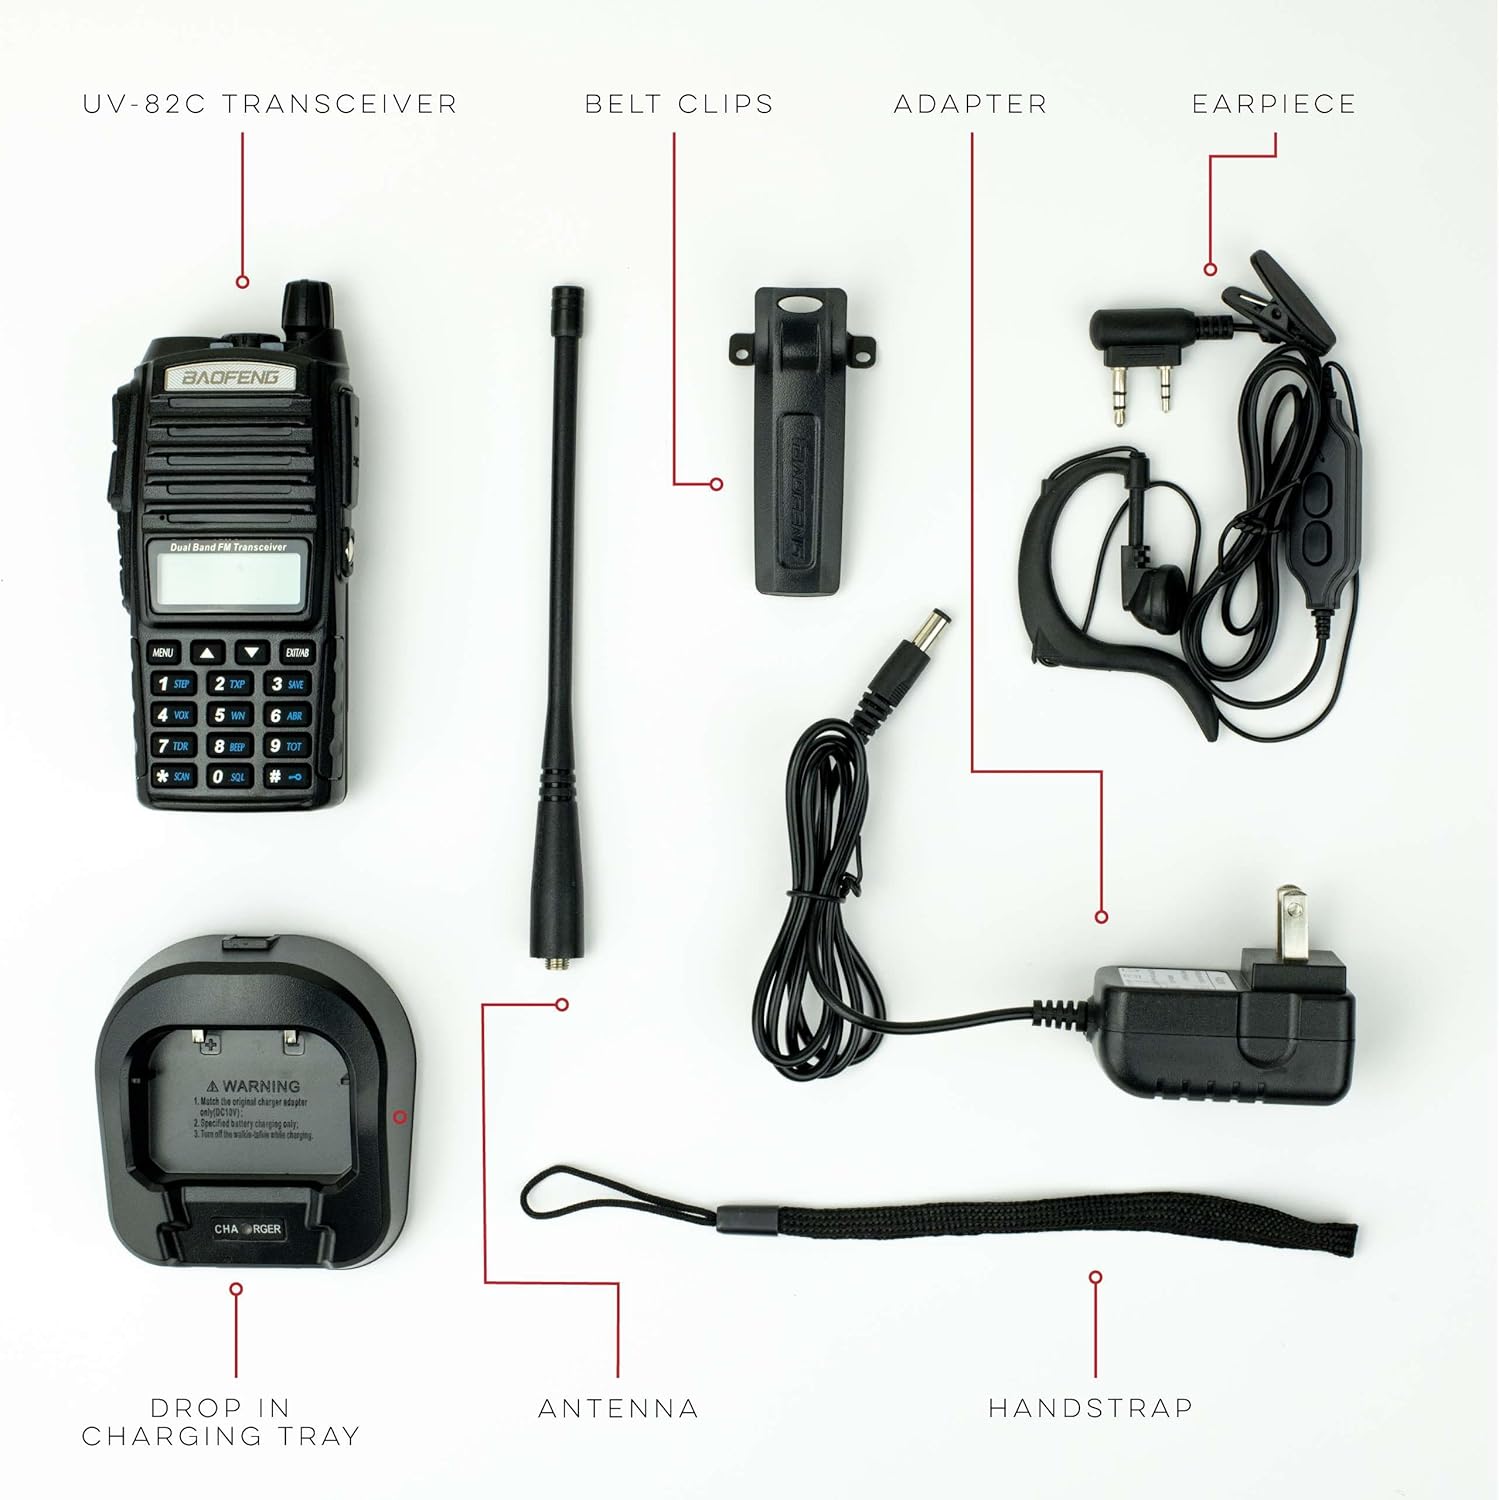
Figure 2.1: Contents of the BAOFENG UV-82C package, showing the radio, battery, antenna, charger, earpiece, wrist strap, and belt clip.
3. Product Features
The BAOFENG UV-82C is equipped with a range of features to enhance communication efficiency and user experience:
- FCC Part 90 Certified: Complies with FCC Part 90 standards, making it suitable for business and industrial applications requiring compliant radios.
- Dual-Band Operation: Supports both VHF (136-174 MHz) and UHF (400-520 MHz) frequency ranges.
- Adjustable Power Settings: Offers 5W and 1W power output options to conserve battery or extend range as needed.
- Enhanced Audio and Build: Features an improved 1-watt speaker for clear audio and a robust case design with larger buttons for durability and ease of use.
- Advanced Communication Features: Includes VOX (Voice Operated Transmit), Talk Around Mode, Busy Channel Lock-Out (BCLO), Transmission Time Out, Channel Receive Only (TX OFF), Frequency Reverse, and Squelch Tail Elimination (STE).
- Cloning Capability: Unique feature allowing direct radio-to-radio frequency and setting transfer without a computer.
- Lockdown Function: Enables employers to restrict access to menus and prevent unauthorized modifications to radio settings.
- Integrated Flashlight: Provides a convenient light source.
- FM Radio: Built-in FM radio for entertainment.
- 128 Memory Channels: Ample storage for frequently used frequencies.

Figure 3.1: The UV-82C is FCC Part 90 certified, making it suitable for commercial applications.

Figure 3.2: The radio features a unique dual PTT button for independent transmission on two frequencies.

Figure 3.3: Equipped with an improved 1-watt speaker for clear and loud audio.

Figure 3.4: Designed for commercial use with 128 memory channels and flexible PTT options.
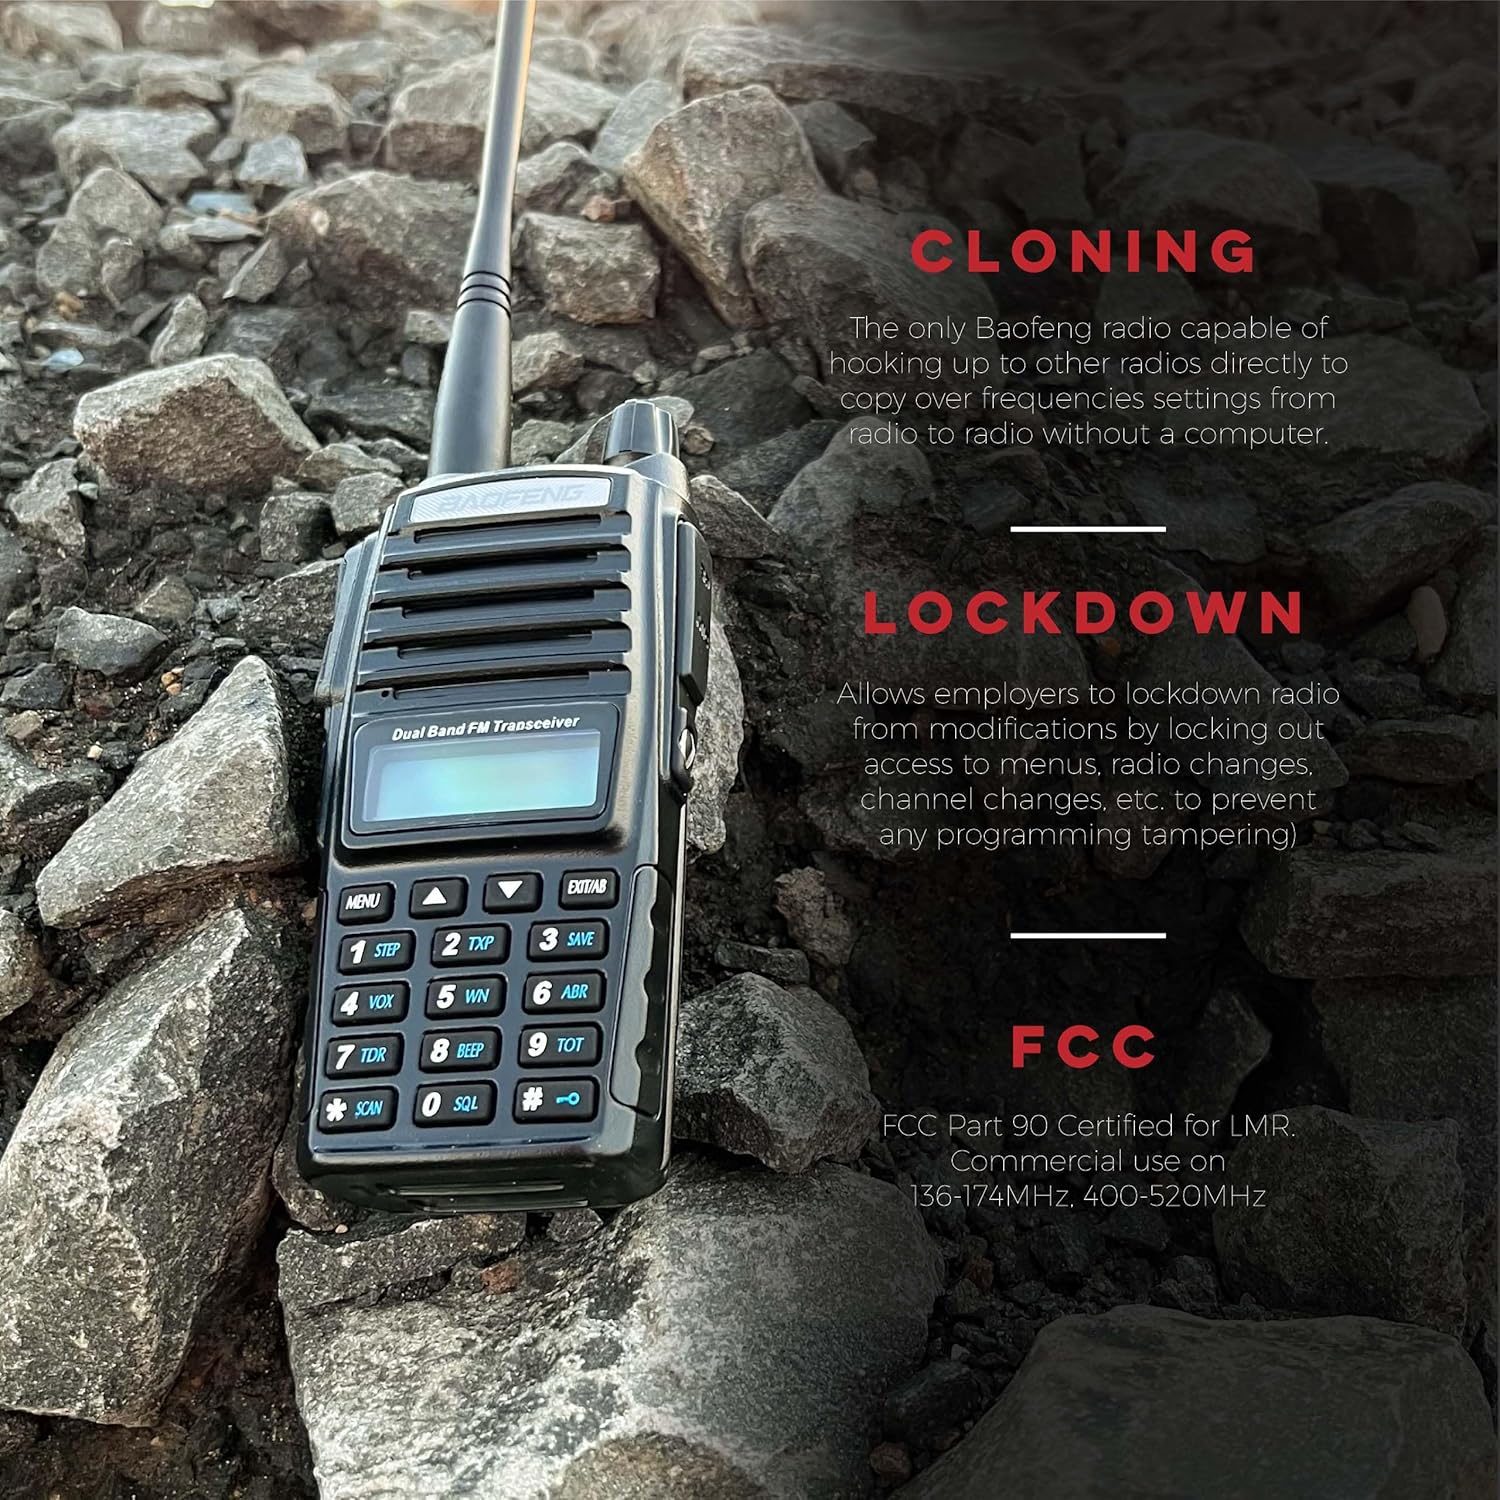
Figure 3.5: Advanced features include radio cloning and a lockdown function for secure operation.
Product Highlight Video
Video 3.1: An overview of the BaoFeng UV-82C Part 90 Handheld Radio, highlighting its key features and benefits for commercial users.
4. Setup
4.1 Battery Installation
- Align the battery pack (BL-8) with the grooves on the back of the radio.
- Slide the battery upwards until it clicks into place, indicating it is securely locked.
- To remove, press the battery release latch located at the bottom of the battery and slide the battery downwards.
4.2 Charging the Battery
- Connect the 110V AC adapter to the desktop charger (CH-8).
- Plug the AC adapter into a standard wall outlet.
- Place the radio with the battery attached into the charging slot of the desktop charger. Ensure the charging contacts align.
- The charger indicator light will typically turn red while charging and green when fully charged.
- Important: Only use the original charger and adapter provided with your UV-82C. Do not attempt to charge other battery types or use non-original chargers.
4.3 Antenna Attachment
- Screw the dual-band antenna clockwise onto the antenna connector at the top of the radio until it is finger-tight. Do not overtighten.
4.4 Earpiece Connection
- Open the rubber cover on the side of the radio to expose the earpiece jacks.
- Insert the earpiece plugs firmly into the corresponding jacks.
5. Operating Instructions
5.1 Power On/Off and Volume
Rotate the volume knob (located on top of the radio) clockwise to power on the radio and increase volume. Rotate counter-clockwise to decrease volume and power off.
5.2 Frequency (VFO) and Channel Mode
The UV-82C operates in two main modes: Frequency Mode (VFO) for direct frequency input and Channel Mode for pre-programmed channels. Press the VFO/MR button to switch between these modes.
5.3 Dual PTT Button
The UV-82C features a unique dual Push-To-Talk (PTT) button. The upper PTT button transmits on the A-band (upper display line), and the lower PTT button transmits on the B-band (lower display line). This allows for quick switching between two active frequencies.
5.4 VOX (Voice Operated Transmit)
VOX allows for hands-free transmission. To activate/deactivate and adjust VOX sensitivity:
- Press MENU.
- Navigate to the VOX setting (usually menu item 4).
- Press MENU again to enter the setting.
- Use the UP/DOWN arrows to select a sensitivity level (1-10, 1 being most sensitive). Select OFF to disable.
- Press MENU to confirm, then EXIT/AB to exit.
5.5 Scanning
To initiate scanning for active frequencies or channels:
- In VFO mode, press and hold the SCAN button (key 7) to start frequency scanning.
- In Channel mode, press and hold the SCAN button (key 7) to start channel scanning.
- The radio will stop on an active signal. Press any key to stop scanning manually.
5.6 FM Radio
To access the built-in FM radio:
- Press the FM button (located on the side of the radio, above the PTT).
- Use the UP/DOWN arrows to tune to a station or press SCAN to auto-scan.
- Press the FM button again to exit FM radio mode.
5.7 Integrated Flashlight
To activate the flashlight:
- Press the MONI button (located on the side of the radio, below the PTT) briefly to turn the flashlight on.
- Press it again for a flashing light mode.
- Press a third time to turn it off.
6. Advanced Features
6.1 Cloning
The UV-82C supports direct radio-to-radio cloning, allowing you to copy frequencies and settings from one UV-82C to another without the need for a computer. Refer to the detailed cloning procedure in the full user manual for specific steps.
6.2 Lockdown
This feature allows administrators to 'lock down' the radio, preventing users from accessing certain menus or making unauthorized changes to frequencies and settings. This is particularly useful in commercial environments to maintain consistent radio configurations across a fleet.
6.3 FCC Part 90 Compliance
The UV-82C is FCC Part 90 certified, which means it meets the technical standards for Land Mobile Radio (LMR) services. This certification is crucial for businesses and organizations that operate on licensed frequencies, ensuring legal and interference-free communication.
7. Maintenance
7.1 Cleaning
Wipe the radio's surface with a soft, damp cloth. Do not use harsh chemicals, solvents, or abrasive cleaners, as these can damage the radio's casing and internal components.
7.2 Battery Care
- Avoid overcharging or completely discharging the battery.
- Store the battery in a cool, dry place when not in use.
- If storing for extended periods, charge the battery to approximately 50% capacity.
7.3 Storage
When not in use for prolonged periods, store the radio in a dry, dust-free environment away from direct sunlight and extreme temperatures.
8. Troubleshooting
| Problem | Possible Cause | Solution |
|---|---|---|
| Radio does not power on | Battery depleted or not installed correctly. | Charge the battery. Ensure battery is securely attached. |
| No audio or low audio | Volume too low; Squelch level too high; Earpiece not connected properly. | Increase volume. Adjust squelch level (SQL menu). Re-insert earpiece firmly. |
| Cannot transmit | Incorrect frequency/channel; Busy Channel Lock-Out (BCLO) active; Low battery. | Verify frequency/channel. Disable BCLO if necessary. Charge battery. |
| Poor communication range | Antenna not properly attached; Obstructions; Low power setting. | Ensure antenna is tight. Move to an open area. Switch to high power (5W). |
| Difficulty programming channels | Manual programming complexity; Software/cable issue. | Consider using a programming cable (e.g., BTECH) and software like CHIRP for easier programming. |
9. Specifications
| Feature | Specification |
|---|---|
| Model Number | UV-82C |
| Frequency Range | VHF: 136-174 MHz, UHF: 400-520 MHz |
| Number of Channels | 128 |
| Power Output | 5W / 1W (Adjustable) |
| Battery | 1800mAh Lithium-Ion (7.4 Volts) |
| Dimensions (H x W x D) | 11.3 x 2 x 2.4 inches (approx. with antenna) |
| Item Weight | 8 ounces |
| Water Resistance Level | Waterproof (IP54 Weather Resistant) |
| Special Features | Integrated Flashlight, Call Alert, FM Radio, PL & DPL Tones, SOS, Supports NOAA Bands |
| Manufacturer | Baofeng Tech |
| Date First Available | February 20, 2014 |
10. Warranty and Support
The BAOFENG UV-82C is backed by real US-based support and warranty provided by BTECH. For any technical assistance, warranty claims, or inquiries, please refer to the contact information provided in your product packaging or visit the official BTECH support website. Ensure you retain your proof of purchase for warranty validation.
Documents and downloads
Ask a question about this manual
Ask about setup, troubleshooting, compatibility, parts, safety, or missing instructions. Manuals+ will review the question and use this page’s manual context to help answer it.