1. Introduction
Thank you for choosing the Rothenberger ROSCOPE i2000 Set Pipe 25/16 Inspection Camera. This manual provides essential information for the safe and efficient operation, maintenance, and troubleshooting of your device. Please read this manual thoroughly before using the product and keep it for future reference.
The ROSCOPE i2000 is designed for professional inspection of pipes and drains, featuring a robust design and clear imaging capabilities to assist in diagnostic tasks.
2. Safety Information
Always observe the following safety precautions to prevent injury and damage to the device:
- Read all instructions: Familiarize yourself with the operation and safety guidelines before use.
- Use in appropriate environments: This device is not waterproof. Avoid exposure to water or excessive moisture to prevent electrical shock or damage.
- Battery safety: Use only specified Lithium-ion batteries. Ensure correct polarity when inserting. Do not expose batteries to extreme temperatures or dispose of them in fire.
- Avoid damage to the cable: Do not bend, pinch, or stretch the camera cable excessively.
- Maintenance: Only perform maintenance as described in this manual. Refer all other servicing to qualified personnel.
- Personal Protective Equipment: Wear appropriate PPE, such as gloves and eye protection, when working in potentially hazardous environments.
3. Package Contents
Verify that all items are present in your package:
- Rothenberger ROSCOPE i2000 Camera Unit
- ROSCOPE i2000 Module 25/16-tec100 (16m cable length)
- Lithium-ion Battery (1 required, may be pre-installed or separate)
- User Manual (this document)
4. Setup
4.1. Battery Installation
- Locate the battery compartment on the ROSCOPE i2000 camera unit.
- Open the compartment cover.
- Insert the Lithium-ion battery, ensuring correct polarity.
- Close the battery compartment cover securely.
- Charge the battery fully before first use according to the charger's instructions (charger not explicitly listed, assume standard charging process).
4.2. Connecting the Camera Module
- Align the connector of the ROSCOPE i2000 Module 25/16-tec100 with the port on the main camera unit.
- Gently push the connector in until it clicks into place, ensuring a secure connection.
- To disconnect, press any release buttons or twist the connector collar as indicated on the device, then pull apart.

Figure 1: Rothenberger ROSCOPE i2000 inspection camera with the 16m cable module coiled on its stand.
5. Operating Instructions
5.1. Powering On/Off
- To Power On: Press and hold the power button (usually marked with ⏻ or similar icon) until the LCD screen illuminates.
- To Power Off: Press and hold the power button again until the device shuts down.
5.2. Basic Inspection
- Ensure the camera module is securely connected and the device is powered on.
- Carefully insert the camera probe into the pipe or area to be inspected. Guide the cable smoothly to avoid kinks or damage.
- Observe the live feed on the integrated LCD screen. The screen provides a 720p video resolution for clear viewing.
- Use the control buttons on the unit to adjust settings such as illumination, zoom (optical zoom available), or to capture images/videos if supported by the model.
- Slowly retract the camera after inspection.
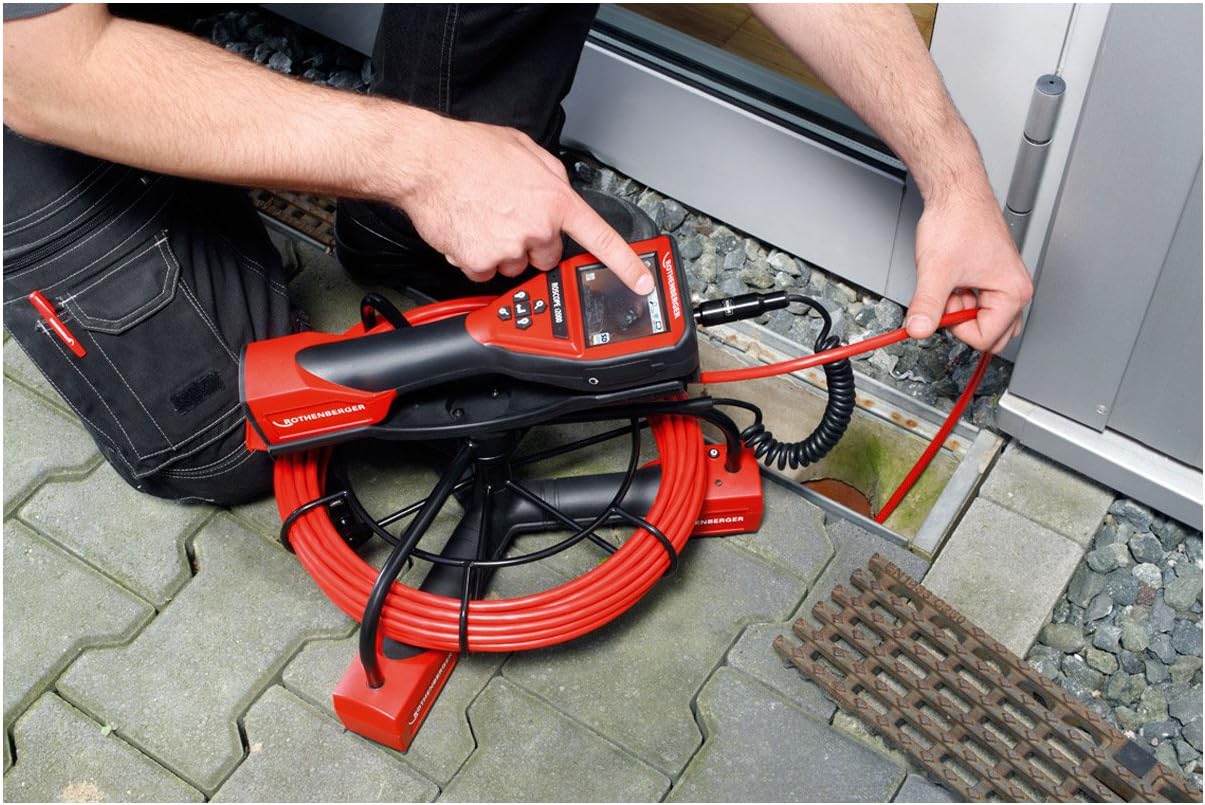
Figure 2: A user inserting the camera probe of the ROSCOPE i2000 into a drain for inspection.
5.3. Viewing and Recording
- The device features an LCD screen for direct viewing.
- For external display or recording, the device supports HDMI connectivity. Connect an HDMI cable from the camera unit to a compatible monitor or recording device.
- Refer to the on-screen menu for options to capture still images or record video footage. Saved media can typically be stored on an SD card (if slot available) or transferred via compatible connectivity options.

Figure 3: A user pointing at the live inspection feed displayed on the ROSCOPE i2000's LCD screen.
6. Maintenance
6.1. Cleaning
- After each use, gently wipe the camera probe and cable with a soft, damp cloth to remove any debris.
- Important: The device is not waterproof. Do not immerse the main unit or camera probe in water. Avoid using harsh chemicals or abrasive cleaners.
- Clean the LCD screen with a soft, lint-free cloth.
6.2. Storage
- Store the ROSCOPE i2000 in a clean, dry place, away from direct sunlight and extreme temperatures.
- Ensure the cable is neatly coiled and not kinked to prevent damage.
- If storing for an extended period, remove the battery or ensure it is partially charged to prolong its lifespan.
7. Troubleshooting
If you encounter issues with your ROSCOPE i2000, refer to the following common problems and solutions:
- Device does not power on:
- Check if the battery is correctly installed and fully charged.
- Ensure the battery compartment is securely closed.
- No image on screen:
- Verify that the camera module is securely connected to the main unit.
- Check for any damage to the camera cable or lens.
- Ensure the device is powered on and not in a standby mode.
- Poor image quality:
- Clean the camera lens.
- Adjust the illumination settings if available.
- Ensure there is sufficient light in the inspection area.
If the problem persists, contact Rothenberger customer support for assistance.
8. Specifications
| Brand | Rothenberger |
| Model | ROSCOPE i2000 |
| Module | 25/16-tec100 |
| Cable Length | 16 meters |
| Video Resolution | 720p |
| Display Type | LCD screen |
| Connectivity Technology | HDMI |
| Image Stabilization | Digital |
| Zoom Type | Optical Zoom |
| Focus Type | Automatic Focus |
| Exposure Control Type | Automatic |
| Supported Media Formats | ProductImage, EnhancedContent |
| Power Source | 1 Lithium-ion battery (required) |
| Water Resistance Level | Not waterproof |
| Item Weight | 28.11 Pounds (approx. 12.75 kg) |
| Package Dimensions | 78.5 x 64 x 45 cm |
9. Warranty and Support
For warranty information, please refer to the documentation provided with your purchase or visit the official Rothenberger website.
Spare Parts Availability: Spare parts are generally available within 3 days.
For technical support, service, or to inquire about spare parts, please contact your local Rothenberger dealer or customer service center.