Introduction
The Jumbl DIGITNOW Film Scanner is designed to convert your old 35mm/135, 110, 126KPK, and Super 8 films, slides, and negatives into digital JPEG format. Featuring a 14-megapixel sensor with software interpolation up to 22 megapixels, it allows for standalone operation without a computer, saving images directly to an SD card. The integrated 2.4-inch color LCD screen provides immediate viewing, and the device can connect to a TV for larger display.
What's in the Box
Upon opening your Jumbl Film Scanner package, you will find the following components:
- 1 x Digital Scanner Unit
- 1 x USB Cable
- 1 x Negatives (Film) Holder
- 1 x Positives (Slide) Holder
- 1 x AC/DC Adapter
- 1 x Cleaning Brush
- 1 x TV Cable
- 1 x User Manual
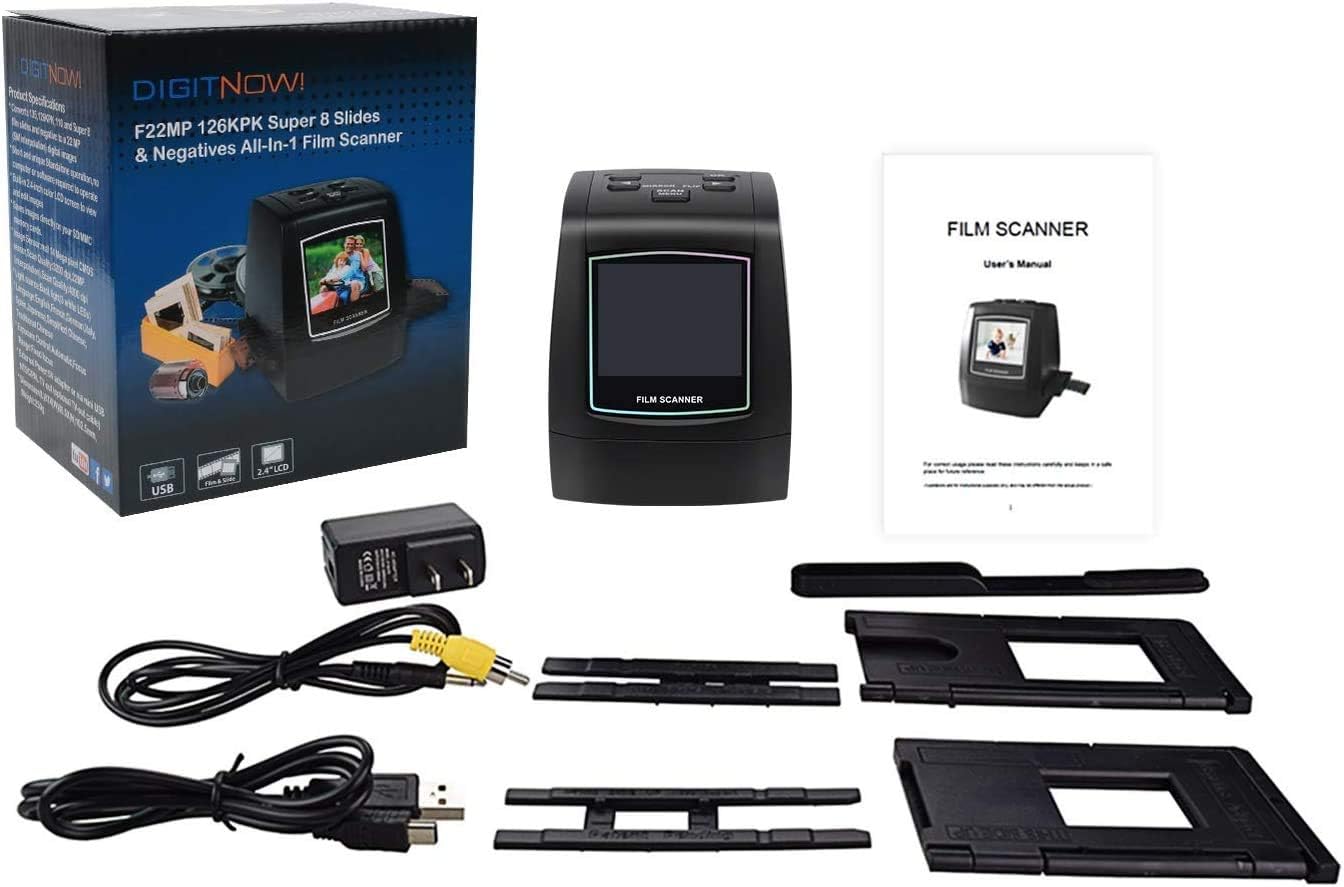
Figure 1: All components included in the Jumbl Film Scanner package.
Setup
Powering the Device
The Jumbl Film Scanner operates via a USB power connection. Connect the provided USB cable to the scanner's Mini USB port and the other end to the AC/DC adapter. Plug the adapter into a standard wall outlet. Alternatively, you can connect the USB cable directly to a computer's USB port for power and data transfer.
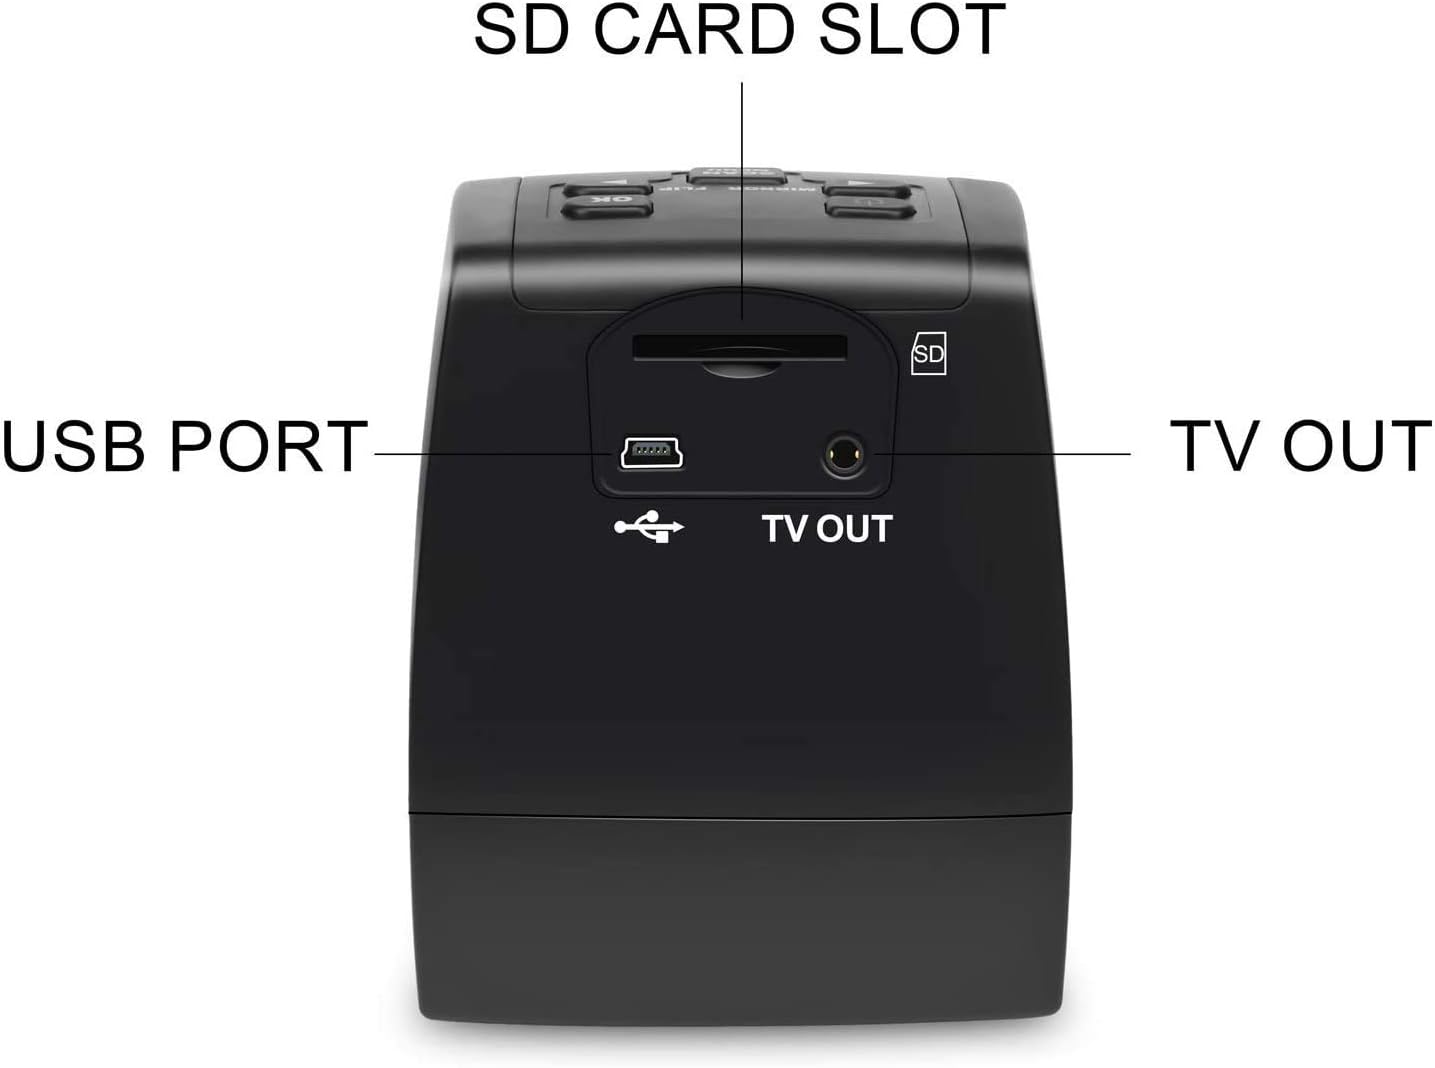
Figure 2: Rear ports of the scanner, including the USB port for power and data.
Inserting an SD Card (Recommended)
While the scanner has 128MB of built-in memory, it is highly recommended to use an SD card (up to 32GB, not included) for storing your digitized images. This allows for significantly more storage capacity. Insert the SD card into the SD card slot located at the rear of the device, ensuring it is oriented correctly (usually with the contacts facing down or towards the front of the scanner).
Loading Film and Slides
The scanner comes with two types of holders: one for negatives (film) and one for positives (slides). Open the appropriate holder and carefully place your film or slides into the designated slots. Ensure the film/slides are clean and free of dust or fingerprints to achieve the best scan quality.

Figure 3: The scanner supports multiple film and slide formats for digitization.
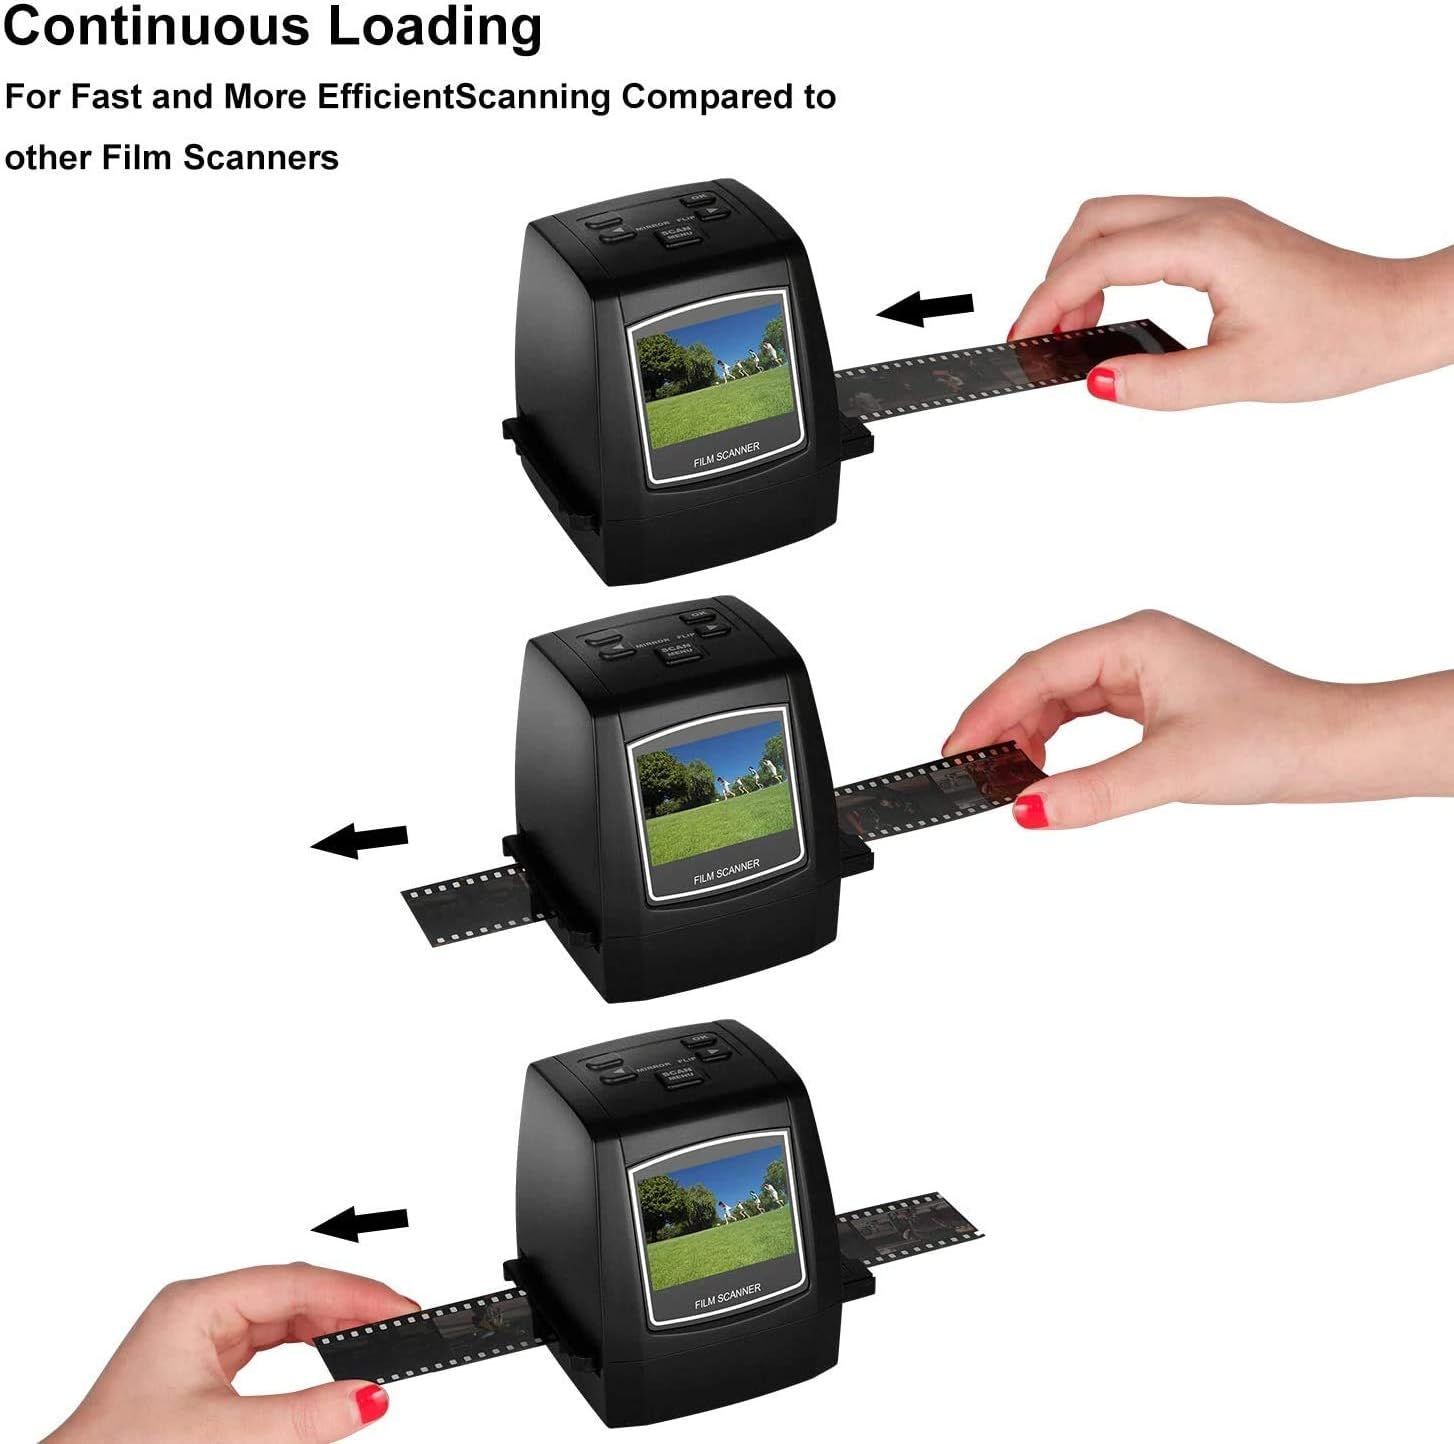
Figure 4: Example of loading a film strip into the scanner's holder.
Operating Instructions
Basic Operation
Once powered on, the scanner's 2.4-inch LCD screen will display the main menu. Use the navigation buttons (up, down, left, right) to select options and the 'OK' button to confirm. The 'Scan/Menu' button allows you to switch between scanning mode and the main menu.

Figure 5: The scanner's LCD screen for previewing images and navigating menus.
Scanning Your Media
- Select Film Type: From the main menu, navigate to 'Film Type' and select the correct media type (Negatives Film, Slides, or Black & White Film) that you are scanning.
- Adjust Settings (Optional): You can adjust exposure (EV), red (R), green (G), and blue (B) color levels to optimize image quality. Use the navigation buttons to select and adjust these settings.
- Preview: Insert the loaded film/slide holder into the scanner. The LCD screen will display a live preview of your media. Use the 'Mirror/Flip' button to correct orientation if needed.
- Scan: Once satisfied with the preview, press the 'Scan' button. The scanner will process the image.
- Save: After scanning, an option to 'Save' or 'Quit' will appear. Select 'Save' and press 'OK' to store the digitized image onto your SD card.
Connecting to a TV
Use the provided TV cable to connect the scanner's 'TV OUT' port to your television's video input. This allows you to view your scanned images on a larger screen, which can be helpful for detailed inspection or sharing with others.
Transferring Images to a Computer
To transfer images, connect the scanner to your computer using the USB cable. From the scanner's menu, select 'USB MSDC' (Mass Storage Device Class). Your computer will recognize the scanner as an external drive, allowing you to access and copy the images from the SD card.
Maintenance
To ensure optimal performance and image quality, regular maintenance is recommended:
- Clean Film/Slides: Before scanning, always ensure your film and slides are free from dust, dirt, or fingerprints. Any debris on the media will appear in the digitized image.
- Clean Scanner Lens: Use the provided cleaning brush to gently clean the scanner's internal lens and light source. This prevents dust accumulation from affecting scan quality.
- Remove Protective Film: Ensure the protective plastic film on the LCD screen is removed for clear viewing during operation.
Troubleshooting
If you encounter any issues with your Jumbl Film Scanner, consider the following general troubleshooting steps:
- Power Issues: Ensure the device is properly connected to a power source (AC adapter or computer USB) as it requires continuous power to operate.
- SD Card Not Recognized: Verify the SD card is inserted correctly and is not locked. Try formatting the SD card through the scanner's menu (note: this will erase all data on the card).
- Poor Image Quality: Check that your film/slides are clean. Ensure the scanner's internal components are free of dust using the cleaning brush. Adjust brightness and color settings via the scanner's menu.
- Buttons Unresponsive: Ensure the device is fully powered on and not in a frozen state. Disconnect and reconnect power if necessary.
For persistent issues, refer to the detailed user manual or contact Jumbl customer support.
Specifications
| Feature | Detail |
|---|---|
| Product Dimensions | 6 x 5.1 x 4 inches |
| Item Weight | 1.1 pounds |
| Item Model Number | JUMFS14MP |
| Media Type | Negatives, Slide |
| Scanner Type | Film |
| Brand | Jumbl |
| Connectivity Technology | USB |
| Resolution | 3200 (Optical), up to 22 Megapixels (Interpolated) |
| Color Depth | 133 megabits per pixel |
| Optical Sensor Technology | CMOS |
| First Available Date | February 10, 2014 |
Warranty and Support
Information regarding product warranty and specific support contacts is not available in the provided product data. Please refer to the physical user manual included in your product packaging or visit the official Jumbl website for the most up-to-date warranty and customer support details.

