
1. Introduction
This manual provides essential information for the safe and effective use of your Manfrotto 055 Aluminum 3-Section Tripod Kit. Designed for professional photographers, this kit features a robust aluminum tripod with a unique horizontal column mechanism and a versatile 3-Way Head. Please read these instructions carefully before assembly and operation.

Figure 1: Manfrotto 055 Aluminum 3-Section Tripod Kit with 3-Way Head. This image displays the tripod fully assembled with the 3-Way head attached, ready for use.
2. Setup
2.1 Unpacking and Initial Inspection
- Carefully remove all components from the packaging.
- Verify that all parts listed in the 'What's in the Box' section are present.
- Inspect the tripod and head for any signs of damage. Do not use if damaged.
2.2 Extending the Tripod Legs
- Place the tripod on a flat, stable surface.
- Release the Quick Power Lock (QPL) levers on each leg section.
- Extend the leg sections to the desired length.
- Securely close the QPL levers to lock the leg sections in place. Ensure all levers are fully engaged before placing equipment on the tripod.
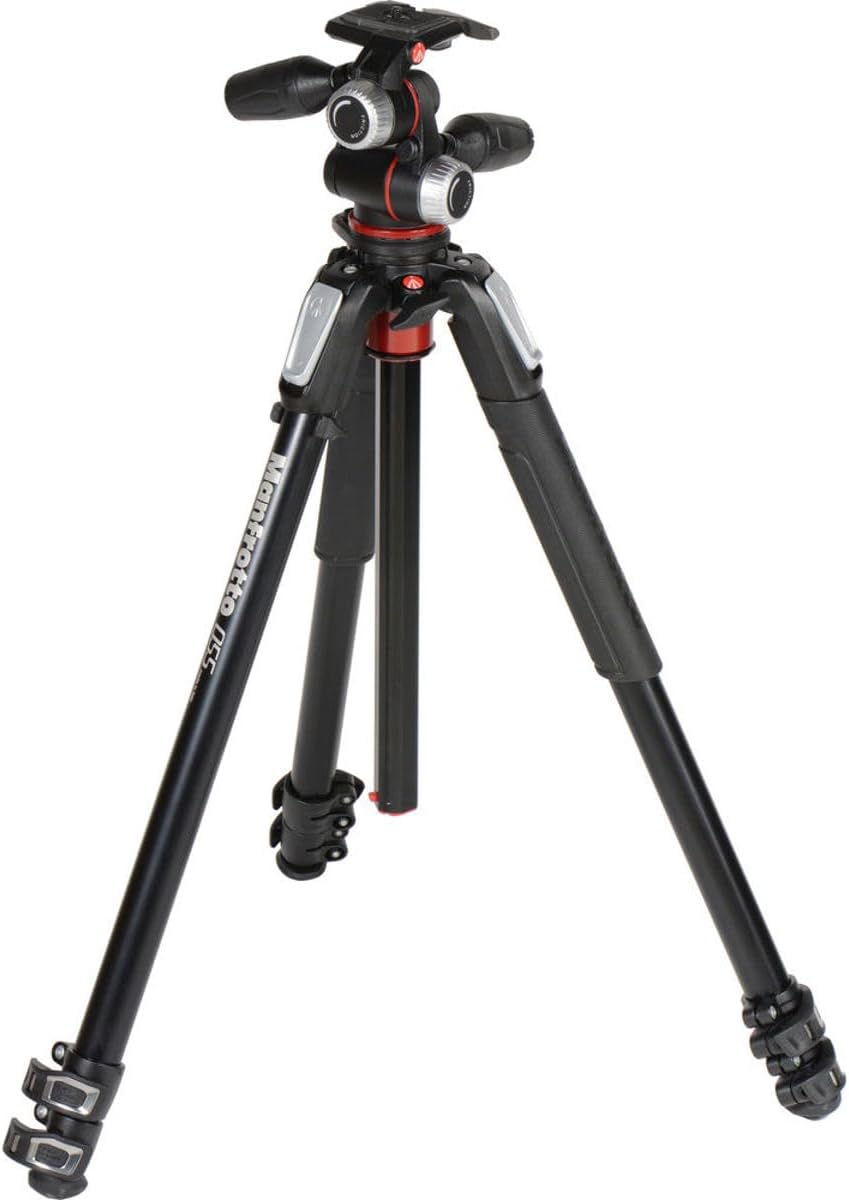
Figure 2: Manfrotto 055 Tripod with legs extended. This image shows the tripod with its legs fully extended and spread, demonstrating its stable base.
2.3 Adjusting Leg Angles
- The intuitive and ergonomic leg angle selectors allow each leg to be independently set to any of the preset angles (25°/46°/66°/88°).
- Press the leg angle selector button at the top of each leg and adjust the leg to the desired angle. Release the button to lock.
2.4 Center Column Operation
- Vertical Extension: Loosen the center column locking knob and raise or lower the column to the desired height. Tighten the knob to secure.
- Horizontal Column Mechanism: The key feature of the 055XPRO3 is its 90° column. To switch to horizontal orientation, fully extend the center column, then press the button at the base of the column to release it from its vertical lock. Pivot the column to a horizontal position and lock it in place. This can be done even with a camera attached.
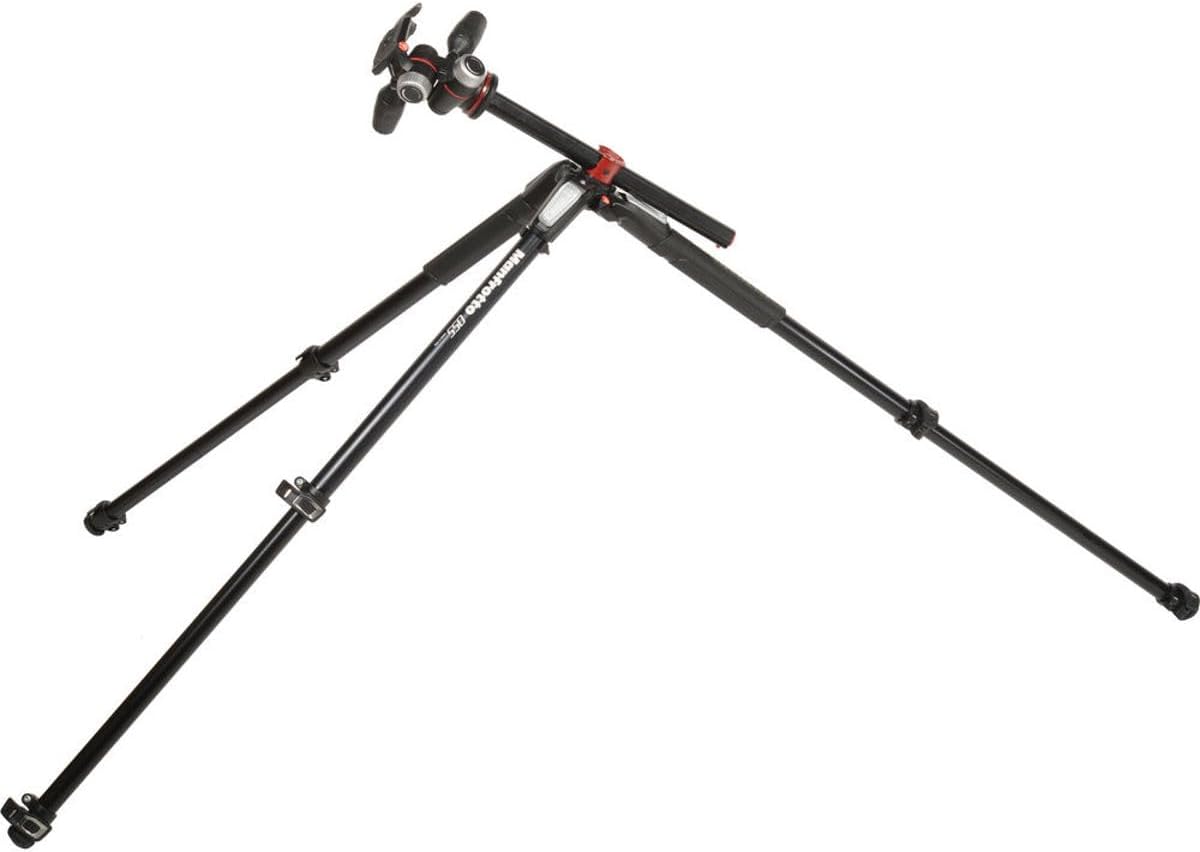
Figure 3: Manfrotto 055 Tripod with horizontal column. This image illustrates the tripod's center column extended horizontally, enabling unique shooting perspectives.
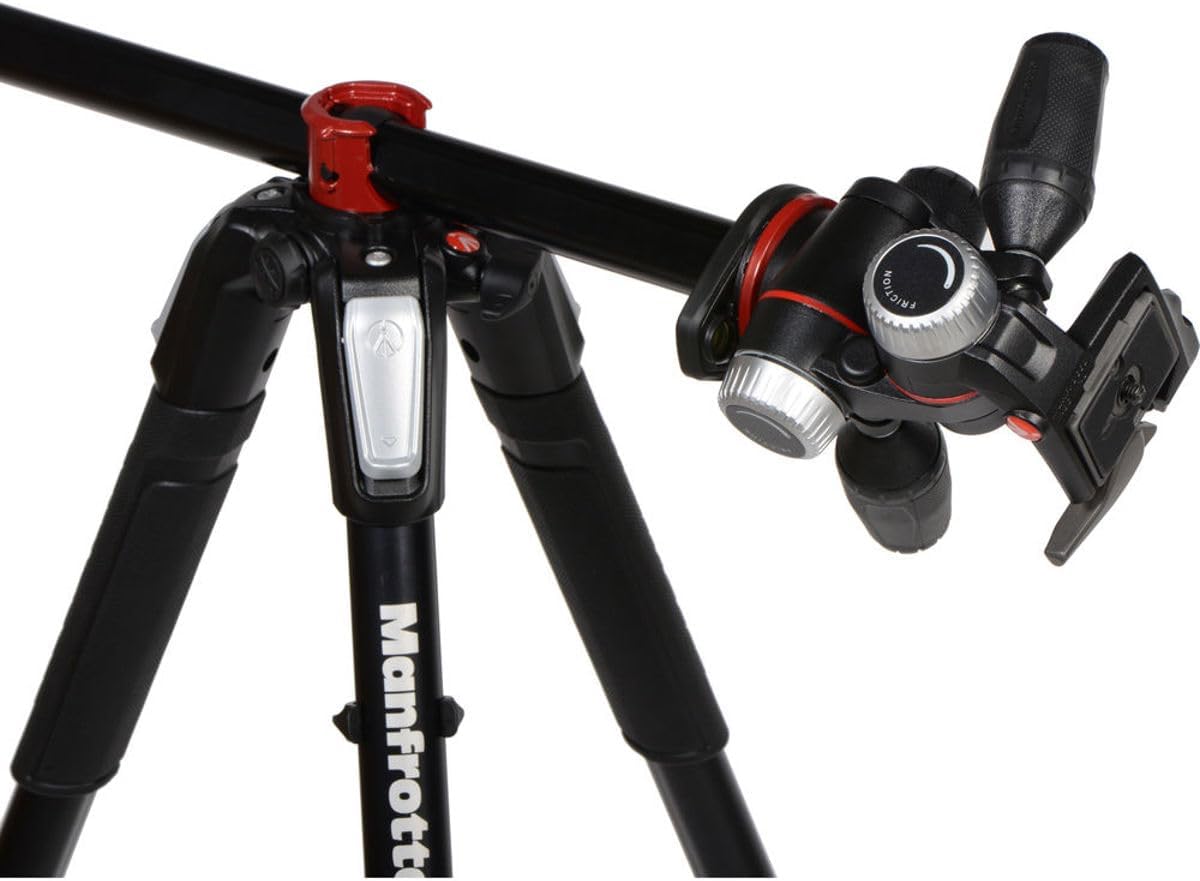
Figure 4: Close-up of Manfrotto 055 horizontal column mechanism. This detailed view highlights the pivot point and locking mechanism for the horizontal column.
2.5 Attaching the 3-Way Head
- Ensure the tripod's top plate is clear.
- Screw the 3-Way Head onto the 3/8" mounting screw on the tripod's top plate until it is secure.
- Attach your camera to the quick release plate of the 3-Way Head, then slide the plate into the head until it locks.
2.6 Leveling the Head
- The 3-Way Head features three leveling bubbles for accurate framing on all axes.
- Adjust the tripod legs and the head's tilt/pan controls until the bubbles indicate a level position.
- A bubble level is also built into the top of the center column and rotates freely for easy viewing.

Figure 5: Manfrotto 3-Way Head with bubble levels. This image highlights the integrated bubble levels on the 3-Way head for precise camera alignment.
3. Operating
3.1 Pan and Tilt Movements
- The 3-Way Head allows for independent control of pan, front-to-back tilt, and side-to-side tilt.
- Use the retractable levers and control knobs to fine-tune movements and achieve smooth, precise adjustments for both photography and video.

Figure 6: Manfrotto 3-Way Head controls. This close-up shows the various knobs and levers for adjusting pan and tilt movements on the 3-Way head.
3.2 Portrait Orientation
- The 3-Way Head is designed to easily switch your camera to portrait orientation by adjusting the tilt mechanism.
3.3 Using the Easy Link Connector
- The top casting of the 055XPRO3 has an Easy Link connector (3/8" thread) for supporting photo or video accessories.
- Attach accessories such as an LED light, flash, or reflector on an extending arm or bracket (sold separately) to transform the tripod into a practical mobile studio.

Figure 7: Manfrotto 055 Easy Link connector. This image shows the Easy Link port on the tripod's top casting, used for attaching accessories.
3.4 Load Capacity
- The tripod has a maximum load capacity of 17.64 lbs (8 kg). Ensure your equipment does not exceed this limit.
4. Maintenance
- Regularly clean the tripod legs and head with a soft, dry cloth to remove dust and dirt.
- Avoid using harsh chemicals or abrasive materials that could damage the finish.
- Periodically check all screws and locking mechanisms for tightness. Tighten if necessary, but do not overtighten.
- Store the tripod in a dry, clean environment, preferably in its protective bag, to prevent damage and prolong its lifespan.
5. Troubleshooting
- Legs not extending/retracting smoothly: Check for dirt or debris in the leg sections or around the QPL levers. Clean thoroughly. Ensure levers are fully open before adjusting.
- Head movement is stiff or loose: Adjust the tension knobs on the 3-Way Head. If still stiff, ensure no debris is obstructing movement. If too loose, ensure all locking mechanisms are fully engaged.
- Tripod instability: Ensure all leg sections are fully extended and QPL levers are securely locked. Verify that leg angles are properly set and locked. Do not exceed the maximum load capacity.
6. Specifications
| Feature | Specification |
|---|---|
| Brand | Manfrotto |
| Model Name | MK055XPRO3-3W |
| Material | Aluminum |
| Leg Sections | 3 |
| Closed Length | 29.13 inches |
| Minimum Height | 3.54 inches |
| Maximum Height (with Center Column Down) | 60.24 inches |
| Maximum Height (fully extended) | 72.05 inches |
| Load Capacity | 17.64 lbs (8 kg) |
| Item Weight | 7.71 lbs (3.1 kg) |
| Tripod Head Type | Pan Heads (3-Way Head) |
| Special Feature | Rotatable (Horizontal Column) |
| Compatible Devices | Camera |