1. Introduction
This manual provides detailed instructions for the proper use, maintenance, and care of the DMC AFM8 Crimp Tool. The AFM8 is a miniature, 8-indent crimp tool designed for precision crimping of electrical contacts within a wire range of 32-20 AWG. It is qualified to MIL-SPEC/AS M22520/2-01 standards, ensuring reliable performance for critical applications.
2. Key Features
- 8-Indent Crimp Mechanism: Ensures uniform and reliable crimps.
- Wide Wire Range: Accommodates wires from 32 AWG to 20 AWG.
- Interchangeable Positioners: Adaptable to various contact types and sizes (positioners sold separately).
- MIL-SPEC/AS Qualified: Meets M22520/2-01 standards for high-quality performance.
- Ergonomic Design: Features comfortable hand grips for extended use.

Image 2.1: The DMC AFM8 Crimp Tool highlighting its precision 8-indent crimp, 8-position selector knob, and comfortable hand grip.
3. Components Overview
The DMC AFM8 Crimp Tool consists of the following main components:
- Crimp Head: The part of the tool where the contact and wire are inserted for crimping.
- Positioner Receptacle: Area for installing interchangeable positioners.
- Selector Knob: Used to adjust the crimp depth setting (1-8) for different wire gauges and contact sizes.
- Handles: Ergonomically designed for comfortable operation.

Image 3.1: Overview of the DMC AFM8 Crimp Tool, illustrating the crimp head, positioner area, selector knob, and handles.
4. Setup
Before operating the AFM8 Crimp Tool, ensure proper setup:
- Select the Correct Positioner: Refer to the contact manufacturer's specifications or the DMC Crimp Tool Data Chart for the appropriate positioner for your specific contact and wire gauge. Positioners are sold separately.
- Install the Positioner:
- Push the positioner into the receptacle on the crimp head.
- Rotate the positioner 90 degrees until it locks securely into place.
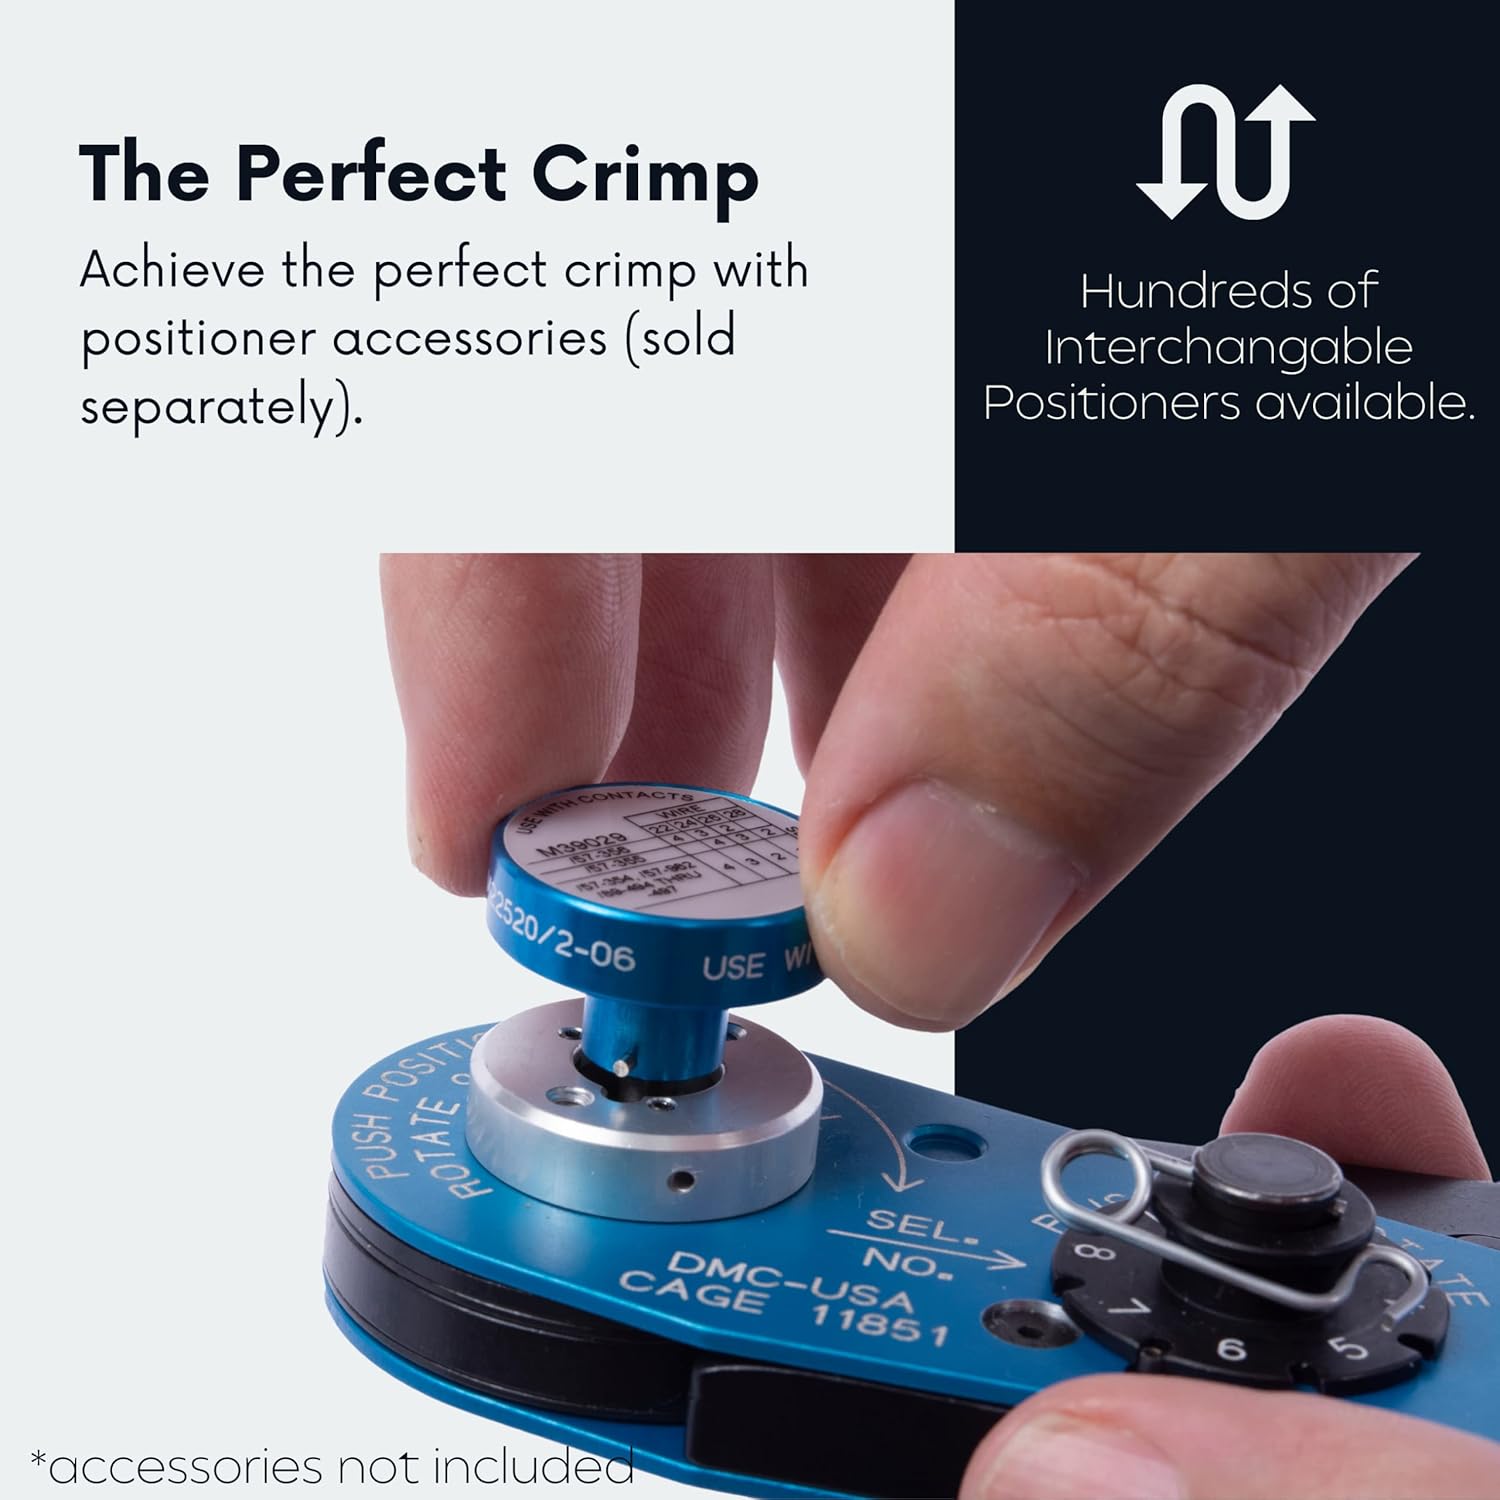
Image 4.1: A hand demonstrating the installation of a positioner into the crimp tool's receptacle.
- Set the Selector Knob:
- Consult the contact manufacturer's data or the DMC Crimp Tool Data Chart to determine the correct selector setting (1-8) for your contact and wire combination.
- Rotate the selector knob to the required setting. The numbers indicate the crimp depth, with higher numbers typically corresponding to larger wire gauges.

Image 4.2: A close-up view of the selector knob, showing the numbered settings for crimp depth adjustment.
5. Operating Instructions
Follow these steps for proper crimping:
- Prepare the Wire: Strip the wire insulation to the length specified by the contact manufacturer. Ensure the wire strands are clean and untwisted.
- Insert the Contact: Insert the contact into the positioner until it bottoms out.
- Insert the Wire: Insert the stripped wire into the contact's wire barrel. Ensure the wire is fully seated and visible through the inspection hole (if present on the contact).

Image 5.1: A hand carefully inserting a stripped wire into a contact, which is already positioned in the crimp tool.
- Perform the Crimp: Squeeze the tool handles firmly and completely until the ratchet mechanism cycles and releases. This ensures a full and proper crimp.
- Remove the Crimped Contact: Release the handles and carefully remove the crimped contact assembly from the tool.
- Inspect the Crimp: Visually inspect the crimp for proper formation, ensuring no stray wire strands and that the insulation is correctly positioned.
Demonstration Video: Daniels Manufacturing AFM8 Small Frame Crimp Tool
Video 5.2: An official video from Daniels Manufacturing Corporation demonstrating the features and operation of the AFM8 Small Frame Crimp Tool.
6. Maintenance
Regular maintenance ensures the longevity and accuracy of your AFM8 Crimp Tool:
- Cleaning: Keep the tool clean and free of dirt, dust, and debris. Use a clean, dry cloth to wipe down the tool after each use. For stubborn residue, a mild solvent can be used, ensuring it does not damage plastic or rubber components.
- Lubrication: Periodically apply a light coat of machine oil to all pivot points and moving parts to ensure smooth operation.
- Inspection: Regularly inspect the crimp head, positioner receptacle, and selector knob for any signs of wear, damage, or misalignment. Ensure the ratchet mechanism functions correctly.
- Storage: Store the tool in a clean, dry environment to prevent corrosion and damage.
7. Troubleshooting
If you encounter issues with your AFM8 Crimp Tool, consider the following:
- Poor Crimp Quality:
- Verify that the correct positioner is installed for the contact and wire size.
- Check that the selector knob is set to the appropriate crimp depth.
- Ensure the wire is stripped to the correct length and fully inserted into the contact.
- Confirm the tool's ratchet mechanism completes its cycle during crimping.
- Tool Jams or Sticks:
- Inspect for any foreign objects or debris in the crimp head or ratchet mechanism.
- Apply lubrication to moving parts as described in the Maintenance section.
- Difficulty Installing/Removing Positioner:
- Ensure the positioner is aligned correctly before pushing and rotating.
- Check for any obstructions or damage to the positioner receptacle.
If problems persist, contact DMC customer support for assistance.
8. Specifications
| Specification | Detail |
|---|---|
| Brand | DMC (Daniels Manufacturing Corporation) |
| Model Number | AFM8 |
| Qualification | MIL-SPEC/AS M22520/2-01 |
| Wire Range | 32-20 AWG |
| Crimp Type | 8-Indent |
| Material | Metal |
| Handle Material | Rubber, Plastic |
| Item Weight | 8.8 ounces (0.25 Kilograms) |
| Product Dimensions | 7.5 x 2.4 x 0.65 inches |
| UPC | 860007392382 |

Image 8.1: Front and back views of the AFM8 Crimp Tool, illustrating its compact dimensions.
9. Warranty and Support
For information regarding warranty coverage, technical support, or to purchase additional positioners and accessories, please contact Daniels Manufacturing Corporation directly or visit their official website. Always refer to the manufacturer's guidelines for specific warranty terms and conditions.
DMC Contact Information: Refer to the official DMC website or product packaging for the most current contact details.


