Introduction
Thank you for choosing the KRUPS Household Espresso Maker, Model 963/A. This manual provides essential information for the safe and efficient operation, maintenance, and care of your new espresso machine. Please read all instructions carefully before first use and retain this manual for future reference.
Important Safety Instructions
- Always ensure the appliance is unplugged before cleaning or when not in use.
- Do not immerse the appliance, cord, or plug in water or other liquids.
- Keep out of reach of children. Close supervision is necessary when the appliance is used near children.
- Do not operate any appliance with a damaged cord or plug, or after the appliance malfunctions or has been damaged in any manner.
- Use only accessories recommended by the manufacturer.
- This appliance is for household use only.
- Exercise extreme caution when handling hot steam and hot water.
Product Components
Familiarize yourself with the main parts of your KRUPS Espresso Maker.
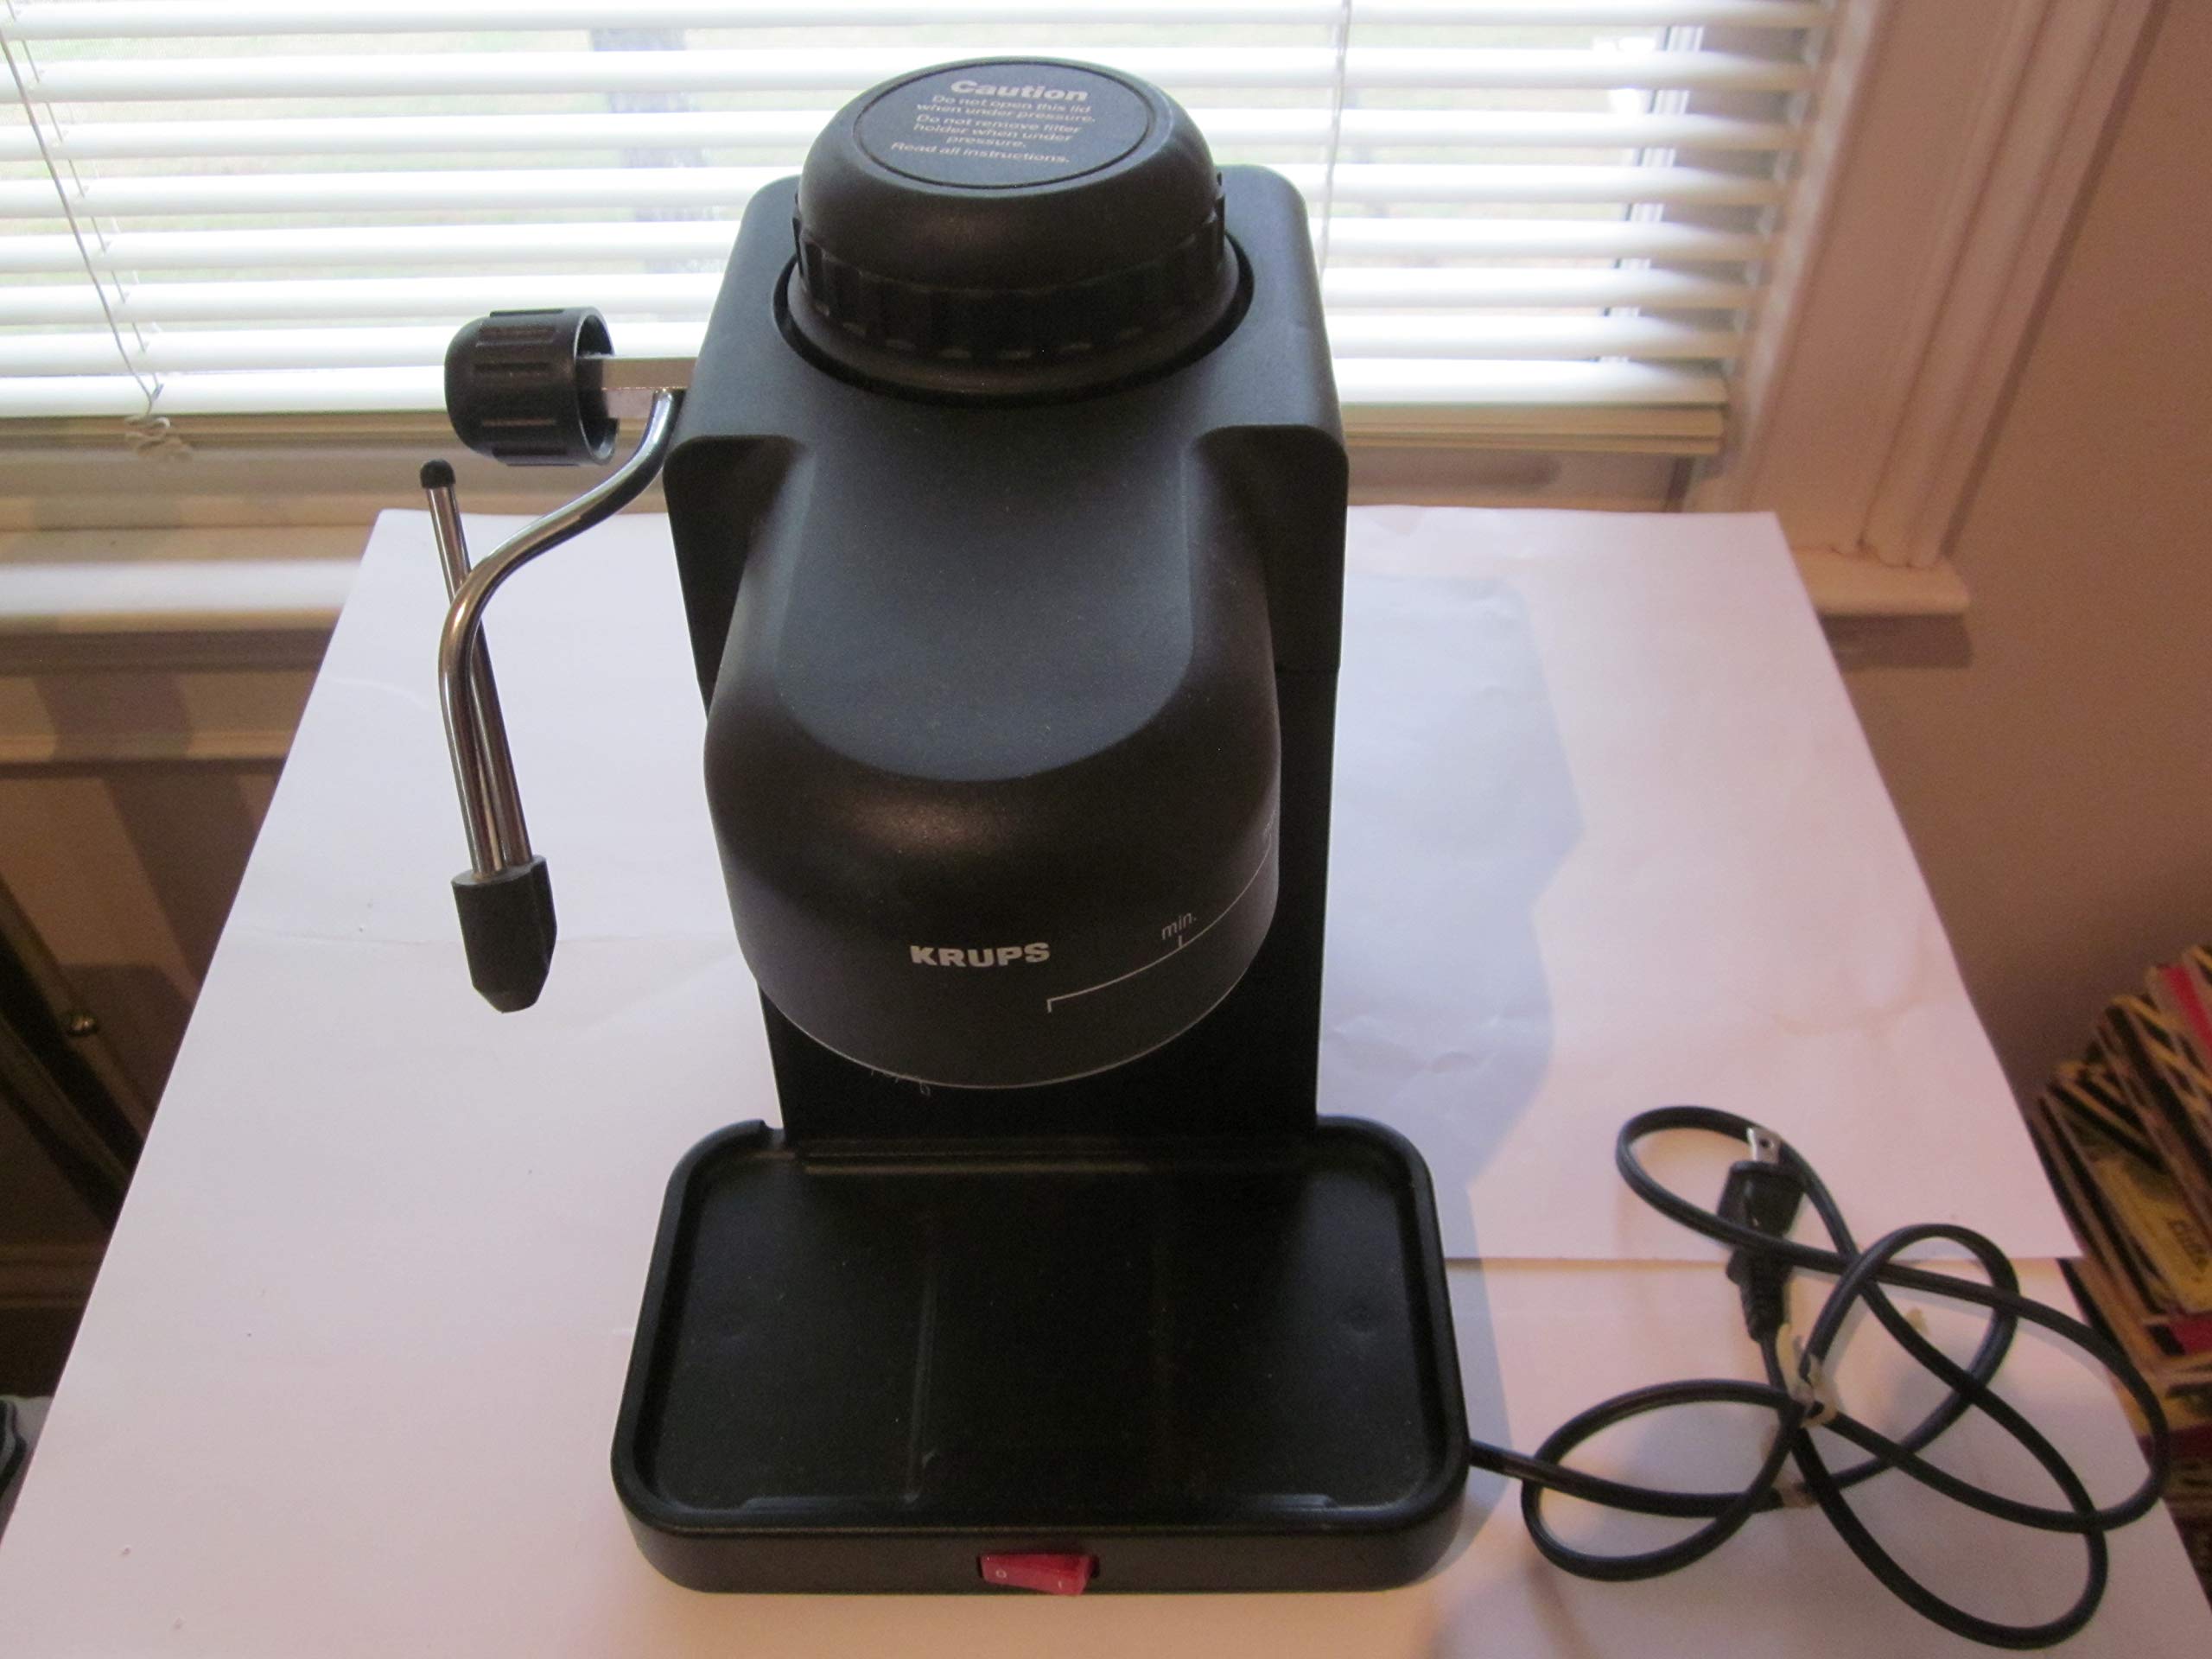
Figure 1: KRUPS Household Espresso Maker, Model 963/A. This image displays the overall design of the espresso machine.
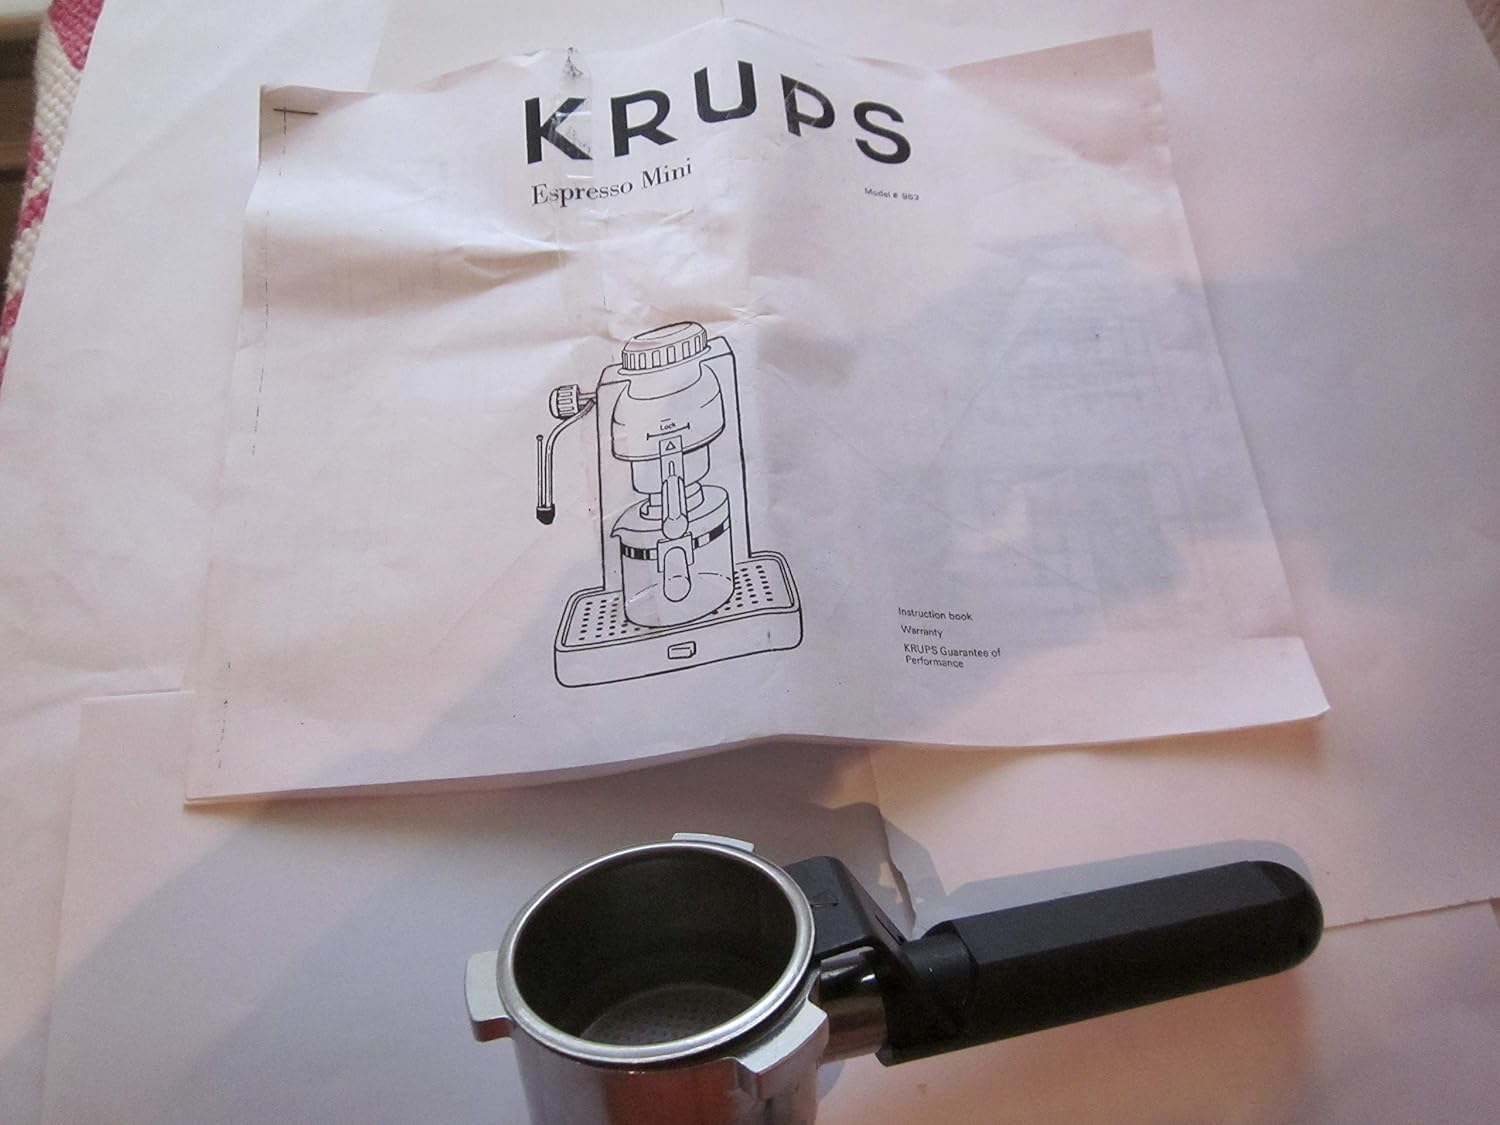
Figure 2: Included components, showing the portafilter and the cover of the instruction manual. The portafilter is a key component for holding ground coffee.
- Water Reservoir: Holds water for brewing.
- Portafilter: Holds ground coffee for brewing espresso.
- Steam Wand: Used for frothing milk.
- Drip Tray: Collects excess liquid.
- Control Knob/Switch: For selecting functions (brew, steam, off).
- Carafe: Collects brewed espresso.
Setup and First Use
1. Unpacking and Initial Cleaning
- Remove all packaging materials and stickers from the appliance.
- Wash the removable parts (portafilter, carafe, drip tray) with warm, soapy water. Rinse thoroughly and dry.
- Wipe the exterior of the machine with a damp cloth.
2. Preparing for First Use (Priming)
- Fill the water reservoir with fresh, cold water up to the "MAX" level.
- Place the carafe under the brewing head.
- Plug the machine into a 120 Volt, 60 Hz AC outlet.
- Turn the control knob to the "Brew" position (usually indicated by a coffee cup icon).
- Allow the machine to pump water through until the reservoir is empty. This primes the pump and cleans the internal components.
- Repeat this process 2-3 times with fresh water.
Operating Instructions
1. Making Espresso
- Ensure the water reservoir is filled with fresh, cold water.
- Add finely ground espresso coffee to the portafilter. Do not overfill. Tamp the coffee lightly.
- Attach the portafilter securely to the brewing head by twisting it into place.
- Place the carafe under the portafilter.
- Turn the control knob to the "Brew" position. The machine will begin to heat the water and extract espresso.
- Once the desired amount of espresso is brewed, turn the control knob to the "Off" position.
- Carefully remove the portafilter and discard the used coffee grounds.
2. Frothing Milk (Steam Function)
- Fill a small pitcher with cold milk (dairy or non-dairy).
- Turn the control knob to the "Steam" position (usually indicated by a steam icon). Allow the machine to heat up until the steam indicator light illuminates or steam starts to emit.
- Position the steam wand just below the surface of the milk in the pitcher.
- Slowly lower the pitcher as the milk froths, keeping the wand submerged to create a vortex.
- Once the desired foam consistency and temperature are reached, turn the control knob to the "Off" position.
- Immediately wipe the steam wand with a damp cloth to prevent milk residue from drying.
Maintenance and Cleaning
1. Daily Cleaning
- After each use, unplug the machine and allow it to cool.
- Remove and empty the portafilter. Rinse it under running water.
- Empty and clean the drip tray and its cover.
- Wipe the exterior of the machine with a damp cloth.
- Clean the steam wand immediately after frothing milk.
2. Descaling
Regular descaling is crucial to maintain performance and extend the life of your espresso maker. The frequency depends on water hardness and usage, typically every 2-3 months.
- Prepare a descaling solution according to the descaler manufacturer's instructions (or use a mixture of white vinegar and water, e.g., 1 part vinegar to 2 parts water).
- Fill the water reservoir with the descaling solution.
- Place a large container under the brewing head and steam wand.
- Turn the machine on and run about half of the solution through the brewing head.
- Turn the control knob to the "Steam" position and release steam through the wand for about 30 seconds.
- Turn the machine off and let it sit for 15-20 minutes.
- Repeat steps 4-6 until all the descaling solution has passed through the machine.
- Rinse the reservoir thoroughly and fill it with fresh water. Run several full reservoirs of fresh water through the machine (both brewing head and steam wand) to rinse out any descaling residue.
Troubleshooting
| Problem | Possible Cause | Solution |
|---|---|---|
| No water flows through brewing head. | Water reservoir empty; machine not primed; clogged filter. | Fill reservoir; prime the machine; clean portafilter/filter basket; descale. |
| Espresso brews too slowly or not at all. | Coffee ground too fine or tamped too hard; clogged filter. | Use coarser grind; tamp less firmly; clean portafilter/filter basket; descale. |
| Espresso brews too quickly, weak coffee. | Coffee ground too coarse or not enough coffee. | Use finer grind; use more coffee. |
| No steam from steam wand. | Steam wand clogged; machine not heated sufficiently. | Clean steam wand hole with a pin; allow machine to heat longer. |
If problems persist, please refer to the support section or contact customer service.
Specifications
- Model: 963/A
- Brand: KRUPS
- Power: 120 Volt, 60 Hz, 800 Watt
- Type: Steam Espresso Machine
- Operation Mode: Manual
- Color: Black
- Included Components: Carafe (Note: Perforated cover for drip tray may be missing and require reordering, as per product description.)
- Dimensions: Approximately 10 x 8 x 6 inches (Package Dimensions)
Warranty and Support
Warranty Information
This KRUPS product is covered by a manufacturer's warranty. Please refer to the separate warranty booklet included with your purchase for detailed terms and conditions, including warranty period and coverage. Retain your proof of purchase for warranty claims.
Customer Support
For technical assistance, spare parts, or service, please contact KRUPS customer support. Contact information can typically be found on the KRUPS official website or in the warranty documentation. When contacting support, please have your model number (963/A) and purchase date available.
Note: The product description indicates that the original carafe may be broken and the perforated cover for the drip tray may be missing. These parts would need to be reordered if not present.


