
Xprite SL-C107M-G2-WY
Contents
Xprite Upgraded 12" 72LED Rooftop Mini Strobe Lights User Manual
Model: SL-C107M-G2-WY
1. Introduction
This manual provides essential information for the safe and effective use of your Xprite Upgraded 12" 72LED Rooftop Mini Strobe Light. Designed for emergency safety and enhanced visibility, this light bar is suitable for a variety of 12V-24V vehicles including construction vehicles, trucks, snow plows, and postal cars. Please read this manual thoroughly before installation and operation.
2. Product Features
- High-Intensity LEDs: Equipped with 72 high-intensity LED chips for superior visibility day and night.
- Durable Construction: Features a robust ABS housing, crystal clear, scratch-resistant PC lens, and an IP66 waterproof rating, ensuring durability in harsh weather conditions.
- Powerful Magnetic Base: Includes 2 pods with a total of 12 strong magnets and protective rubber feet for secure attachment to any vehicle metal rooftop.
- Easy Installation: Comes with a 10-foot straight power cable for convenient setup.
- Multiple Flash Patterns: Offers 15 distinct strobe flash patterns, selectable via a dual-switch 12V cigarette plug, with a last pattern memory recall function.
- Wide Compatibility: Ideal for construction, safety, security, snowplow, postal, city service, and agricultural vehicles operating on 12V-24V systems.
3. What's in the Box
The package includes the following components:
- One (1) Xprite Upgraded 12" 72LED Rooftop Mini Strobe Light (Mix White/Amber)

Figure 3.1: Contents of the package, showing the strobe light bar and its attached power cable with cigarette lighter plug.
4. Setup and Installation
The Xprite Rooftop Mini Strobe Light is designed for quick and secure installation using its powerful magnetic base.
- Vehicle Preparation: Ensure the vehicle's rooftop surface is clean, dry, and free of debris where the light bar will be placed.
- Placement: Carefully place the light bar on a flat, metallic section of your vehicle's roof. The two magnetic pods with protective rubber feet will securely attach the unit.
- Cable Routing: Route the 10-foot power cable into the vehicle's cabin, ensuring it does not interfere with doors, windows, or other moving parts.
- Power Connection: Insert the 12V cigarette lighter plug into your vehicle's 12V-24V power outlet.

Figure 4.1: The strobe light securely mounted on a vehicle roof using its magnetic base.
Important Note for Aluminum Roofs:
For vehicles with aluminum roofs, the magnetic suction function will not work directly. In such cases, a separate metal bracket must be installed to provide a suitable mounting surface for the magnetic base.
5. Operating Instructions
The strobe light is operated via the dual-switch cigarette lighter plug.
- Power On/Off: Use the first switch (typically marked with a power symbol or a red indicator) on the cigarette plug to turn the light bar on or off.
- Change Flash Patterns: Use the second switch (typically a momentary button) to cycle through the 15 available strobe flash patterns. The unit features a last pattern memory recall, meaning it will resume the last selected pattern when powered on again.

Figure 5.1: The dual-switch controller for power and pattern selection.
Visibility and Applications:
The 72 high-intensity LEDs provide 360-degree surround light, visible up to 1/4 mile, ensuring maximum safety. The various flash patterns are designed to provide caution to potential upcoming hazards in diverse scenarios, including:
- Emergency roadside stops
- Construction zones
- Snow plowing operations
- Postal and city service routes
- Agricultural vehicle use

Figure 5.2: Illustration of the product's high visibility range.
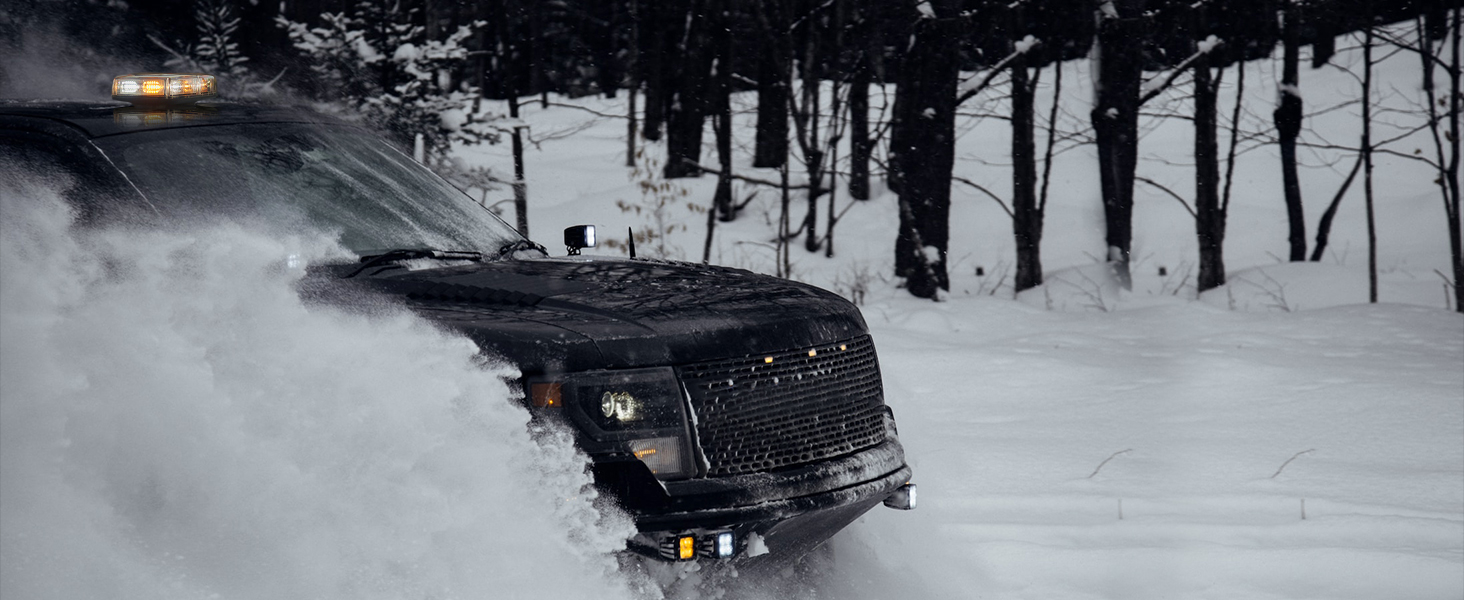
Figure 5.3: Example of the strobe light's use in an emergency roadside scenario.
6. Maintenance
Proper maintenance ensures the longevity and optimal performance of your strobe light.
- Cleaning: Regularly wipe the clear PC lens with a soft, damp cloth to remove dirt and debris. Avoid abrasive cleaners that could scratch the lens.
- Inspection: Periodically inspect the power cable for any signs of wear, fraying, or damage. Ensure the cigarette lighter plug is clean and free of corrosion.
- Magnetic Base: Check the magnetic pods and their rubber feet for any damage or excessive wear. Ensure they are clean to maintain strong adhesion.
- Waterproof Integrity: While the unit is IP66 waterproof, avoid submerging it. Ensure the housing remains sealed and free of cracks.

Figure 6.1: The waterproof design of the strobe light, suitable for various weather conditions.
7. Troubleshooting
If you encounter issues with your Xprite strobe light, refer to the following common troubleshooting steps:
| Problem | Possible Cause | Solution |
|---|---|---|
| Light does not turn on. |
|
|
| Flash patterns do not change. |
|
|
| Light is dim or flickers. |
|
|
| Magnetic base not holding securely. |
|
|
8. Specifications
| Attribute | Detail |
|---|---|
| Brand | Xprite |
| Model | 12" Rooftop Mini Strobe Lights (SL-C107M-G2-WY) |
| Color | Mix White/Amber |
| LED Quantity | 72 high-intensity LED chips |
| Wattage | 36 watts |
| Voltage | 12V-24V DC |
| Waterproof Rate | IP66 |
| Lens Material | Polycarbonate (PC) |
| Housing Material | ABS |
| Cable Length | 10 feet |
| Dimensions (L x W x H) | 13 x 8 x 4 inches |
| Item Weight | 1.2 pounds |
| Lifespan | Over 50,000 hours |
| Mounting Type | Magnetic Base |
| UPC | 799418334097, 632138622795 |
9. Warranty and Support
Specific warranty details for the Xprite Upgraded 12" 72LED Rooftop Mini Strobe Light are not provided within this manual. For warranty information, technical support, or any product-related inquiries, please refer to the official Xprite website or contact their customer service directly.
You can visit the Xprite Store on Amazon for more information: Xprite Amazon Store
Ask a question about this manual
Ask about setup, troubleshooting, compatibility, parts, safety, or missing instructions. Manuals+ will review the question and use this page’s manual context to help answer it.