
1. Introduction
This manual provides detailed instructions for the safe and effective operation of your Tekpower TP3003D-3 Digital Variable Triple Outputs Linear-Type DC Power Supply. This instrument is designed for laboratory, research, and testing applications, offering stable and adjustable DC voltage and current outputs. Please read this manual thoroughly before use and retain it for future reference.
2. Safety Instructions
WARNING: Failure to follow these safety instructions may result in electric shock, fire, or personal injury.
- Always connect the power supply to a grounded AC power outlet.
- Do not operate the device in wet or damp conditions. Keep it away from liquids.
- Ensure adequate ventilation around the unit. Do not block ventilation openings.
- Do not open the casing of the power supply. There are no user-serviceable parts inside. Refer all servicing to qualified service personnel.
- Before connecting or disconnecting any load, ensure the power supply is turned OFF.
- Verify the input voltage matches your local power supply (110V/AC, 60Hz).
- Avoid short-circuiting the output terminals for extended periods, even though the unit has current limiting protection.
- Use only the provided power cord and test leads, or suitable replacements that meet safety standards.
3. Package Contents
Carefully unpack the power supply and check for the following items:
- Tekpower TP3003D-3 DC Power Supply Unit
- AC Power Cord
- Test Leads with Alligator Clips (28 inches long)
- Warranty Registration Card
- User Manual (this document)

Image: The Tekpower TP3003D-3 power supply unit shown with its included accessories, including the power cord and test leads.
4. Product Overview
4.1 Front Panel

Image: Front view of the Tekpower TP3003D-3 power supply, showing the digital displays, control knobs, and output terminals.
- Digital Displays: Two sets of displays show real-time voltage (V) and current (A) for Output I and Output II.
- Current Adjustment Knobs (Coarse/Fine): Used to set the maximum output current limit for Output I and Output II.
- Voltage Adjustment Knobs (Coarse/Fine): Used to set the output voltage for Output I and Output II.
- C.C. (Constant Current) Indicator: Illuminates when the power supply is operating in Constant Current mode.
- C.V. (Constant Voltage) Indicator: Illuminates when the power supply is operating in Constant Voltage mode.
- Output Terminals (GND, +, -): Connect your load here. Red for positive (+), Black for negative (-), Green for ground (GND).
- Power Switch: Turns the unit ON or OFF.
- Mode Selection Switches (INDEP, SERIES, PARALLEL): Selects the operating mode for Output I and Output II.
- Fixed 5V/3A Output: Dedicated output terminals for a fixed 5V DC at up to 3A.
4.2 Rear Panel
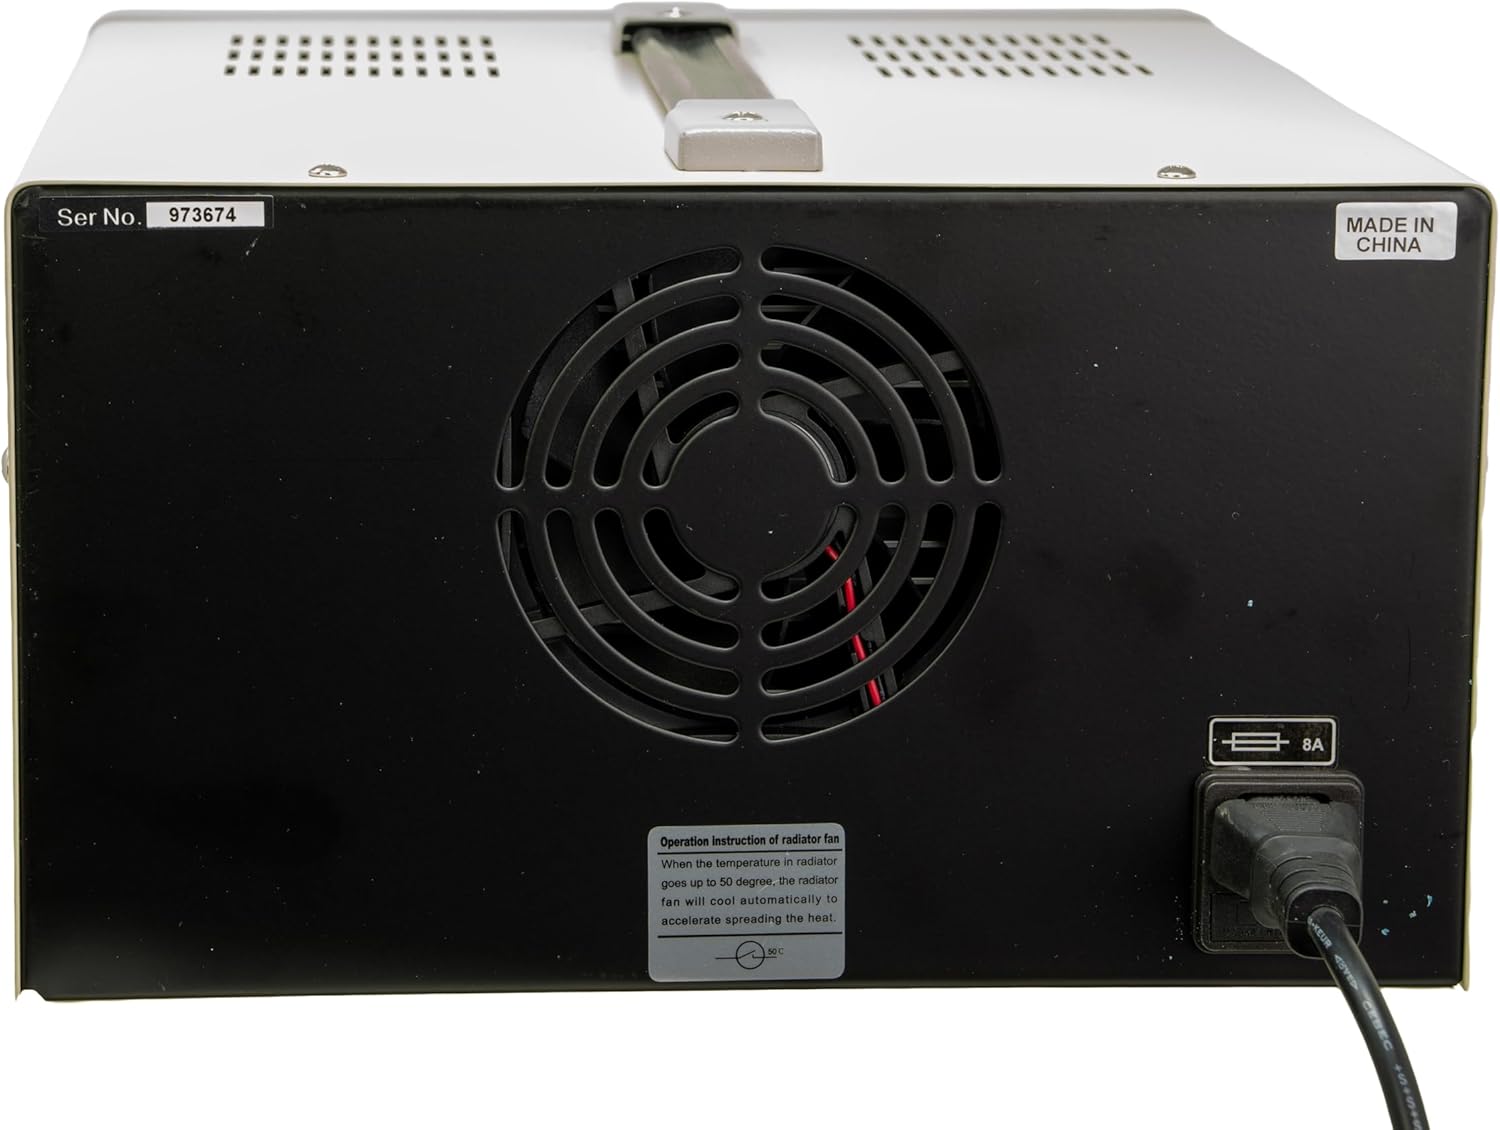
Image: Rear view of the Tekpower TP3003D-3 power supply, showing the cooling fan, power input, and serial number label.
- AC Power Input: Connector for the AC power cord.
- Cooling Fan: Automatically activates when the internal temperature reaches approximately 50°C (122°F) to dissipate heat.
- Serial Number Label: Contains the unit's unique serial number and basic model information.
5. Setup
- Unpacking: Carefully remove the power supply and all accessories from the packaging. Inspect for any signs of damage.
- Placement: Place the unit on a stable, level surface with sufficient space for ventilation, especially around the rear cooling fan. Avoid direct sunlight or heat sources.
- Power Connection: Ensure the power switch on the front panel is in the OFF position. Connect the provided AC power cord to the AC power input on the rear panel and then to a grounded 110V/AC, 60Hz wall outlet.
- Initial Check: Before connecting any load, turn the power switch ON. The digital displays should illuminate. Verify that the voltage and current displays show reasonable values (e.g., 0.00V, 0.00A). Turn the power switch OFF.
6. Operating Instructions
6.1 Independent Operation (Outputs I & II)
In this mode, Output I and Output II function as two separate, independent power supplies.
- Ensure the mode selection switch is set to INDEP.
- With the power OFF, connect your load to the output terminals of either Output I or Output II (Red to positive, Black to negative).
- Turn the power ON.
- Adjust the Voltage Adjustment Knobs (Coarse and Fine) for the desired output voltage (0-30V).
- Adjust the Current Adjustment Knobs (Coarse and Fine) for the desired maximum current limit (0-3A). It is recommended to set the current limit before connecting a sensitive load. You can do this by shorting the output terminals briefly and adjusting the current knob until the desired current is displayed.
- The C.V. indicator will light when the output voltage is stable. If the load draws current exceeding the set limit, the C.C. indicator will light, and the output will operate in Constant Current mode.
6.2 Series Operation (Outputs I & II)
To achieve a higher output voltage (up to 60V), Outputs I and II can be connected in series.
- Ensure the mode selection switch is set to SERIES.
- With the power OFF, connect the positive (+) terminal of Output I to the negative (-) terminal of Output II using a short test lead.
- Connect your load to the negative (-) terminal of Output I and the positive (+) terminal of Output II.
- Turn the power ON.
- Adjust the Voltage and Current knobs for Output I. Output II will automatically track Output I's settings, effectively doubling the voltage. The maximum current remains 3A.
6.3 Parallel Operation (Outputs I & II)
To achieve a higher output current (up to 6A), Outputs I and II can be connected in parallel.
- Ensure the mode selection switch is set to PARALLEL.
- With the power OFF, connect the positive (+) terminal of Output I to the positive (+) terminal of Output II.
- Connect the negative (-) terminal of Output I to the negative (-) terminal of Output II.
- Connect your load to the combined positive and negative terminals.
- Turn the power ON.
- Adjust the Voltage and Current knobs for Output I. Output II will automatically track Output I's settings, effectively doubling the current. The maximum voltage remains 30V.
6.4 Fixed 5V/3A Output
The power supply includes a dedicated fixed 5V DC output, capable of supplying up to 3 Amperes.
- With the power OFF, connect your load to the dedicated 5V/3A output terminals (Red to positive, Black to negative).
- Turn the power ON. The 5V output is immediately available. No adjustment is needed or possible for this output.
7. Maintenance
- Cleaning: Disconnect the power supply from the AC outlet before cleaning. Use a soft, dry cloth to wipe the exterior. Do not use abrasive cleaners, solvents, or liquids that could enter the unit.
- Ventilation: Regularly check that the ventilation openings on the rear and sides are free from dust and obstructions.
- Storage: When not in use for extended periods, store the power supply in a cool, dry environment, away from direct sunlight and extreme temperatures.
8. Troubleshooting
| Problem | Possible Cause | Solution |
|---|---|---|
| No power, displays are off. | Power cord not connected, wall outlet faulty, internal fuse blown. | Check power cord connection. Test wall outlet with another device. If fuse is suspected, contact service personnel. |
| No output voltage/current. | Power supply OFF, output terminals not connected, voltage/current knobs set to zero. | Ensure power is ON. Verify load connections. Adjust voltage/current knobs to desired settings. |
| C.C. indicator is lit, voltage is lower than set. | Load is drawing more current than the set limit. | This is normal operation for Constant Current mode. Increase the current limit or reduce the load resistance. |
| Unit feels hot, fan is running loudly. | Normal operation under heavy load, or blocked ventilation. | Ensure ventilation openings are clear. If fan noise is excessive or unit overheats quickly under light load, contact support. |
9. Specifications
| Parameter | Value |
|---|---|
| Output DC Voltage (Outputs I & II) | 0.0 – 30.0V |
| Output DC Current (Outputs I & II) | 0.00 – 3.00 A |
| Fixed Output | 5V / 3A |
| Input Voltage | 110V/AC, 60Hz |
| Voltage Regulation (CV) | <0.01% + 3mV |
| Current Regulation (CC) | <0.01% + 6 mA |
| Load Regulation (CV) | <0.01% + 2mV |
| Load Regulation (CC) | <0.01% + 6mA |
| Ripple and Noise (CV) | <1 mV rms |
| Ripple and Noise (CC) | <3 mA rms |
| Protection | High current limiting |
| Operating Temperature | 0 - 40 °C (32 - 104 °F) |
| Relative Humidity | <80% |
| LCD Accuracy | +/- 2.5% |
| Dimensions (L x W x H) | 360 x 265 x 165 mm (14.17 x 10.43 x 6.5 inches) |
| Weight | Approx. 12.7 kg (28 lbs) |
10. Warranty Information
The Tekpower TP3003D-3 Digital Variable Triple Outputs Linear-Type DC Power Supply comes with a 1-year manufacturer's warranty from the date of purchase. This warranty covers defects in materials and workmanship under normal use. It does not cover damage caused by misuse, accident, unauthorized modification, or improper operation.
Please retain your proof of purchase and the warranty registration card for any warranty claims. For detailed terms and conditions, refer to the included warranty registration card.
11. Customer Support
Should you encounter any issues or require technical assistance with your Tekpower TP3003D-3 power supply, please contact Tekpower customer support. Contact information can typically be found on the warranty registration card or the official Tekpower website.
When contacting support, please have your model number (TP3003D-3) and serial number ready, as this will help expedite the service process.


