1. Product Overview
The Sharp R-75MT(S) is a 25-liter microwave oven with an integrated grill function, designed for use in 220-240 volt countries (not for USA). It offers 900 watts of microwave power and 1000 watts of grill power, making it suitable for heating, defrosting, reheating, and grilling various food items. Key features include a large turntable, 11 power levels, an LED display, and a child lock function.
Key Features:
- 25 Liter Capacity: Accommodates large dishes.
- 900W Microwave Power: Efficient and quick cooking.
- 1000W Grill Function: Ideal for grilling and browning.
- 11 Power Levels: Customizable cooking intensity.
- 6 Auto Cooking Menus: Pre-programmed settings for common foods.
- Digital LED Display: Easy to read and set cooking levels.
- Child Safety Lock: Prevents unintended operation.
- 315mm Diameter Turntable: Ensures even cooking.
- Mirror Finish Door: Modern aesthetic.
- Included Electrical Adapters: For international use (2-round and 3-pin).
2. Important Safety Information
Please read all instructions carefully before using the appliance. Retain this manual for future reference.
General Safety Precautions:
- Electrical Safety: This appliance operates on 220-240 volts. Do not attempt to use it with a different voltage supply. Ensure proper grounding.
- Placement: Place the microwave on a flat, stable surface. Ensure adequate ventilation around the unit.
- Child Safety Lock: Utilize the child lock feature to prevent accidental operation by children. Refer to the "Operating Instructions" section for details on activating/deactivating this feature.
- Food Safety: Do not overheat liquids or food. Always use microwave-safe cookware.
- No Metal in Microwave: Do not use metal containers or utensils in microwave mode. Metal is safe for grill mode only.
- Door Operation: Do not operate the oven if the door is damaged or does not close properly.
- Maintenance: Only qualified service personnel should perform repairs.
WARNING: This appliance is designed for 220-240V regions and is NOT suitable for use in North America (USA, Canada) due to voltage incompatibility.
3. Setup and Installation
Unpacking:
- Carefully remove the microwave oven and all packing materials from the carton.
- Remove any protective film or tape from the exterior and interior surfaces.
- Check the oven for any damage, such as a misaligned or bent door, damaged door seals and sealing surface, broken or loose door hinges and latches, or dents inside the cavity or on the door. If any damage is present, do not operate the oven and contact customer service.
Component Assembly:
The microwave comes with a glass turntable and a roller ring. For grill function, a wire rack is also included.
- Place the roller ring securely in the center of the microwave cavity.
- Position the glass turntable on top of the roller ring, ensuring it sits properly on the central hub.
- For grilling, place the wire rack on the glass turntable.

Figure 1: Interior of the microwave showing the glass turntable and metal grill rack. The rack is positioned on the turntable for grilling.
Electrical Connection:
- Ensure the power outlet is properly grounded and matches the voltage requirements (220-240V) of the microwave.
- Use the provided 2-round or 3-pin electrical adapters as needed for your region.
- Plug the microwave into a dedicated wall outlet. Do not use extension cords or multi-plugs.
4. Operating Instructions
Control Panel Overview:
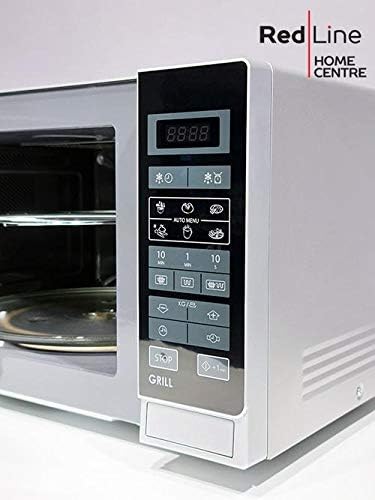
Figure 2: The control panel features an LED display, numeric keypad, and dedicated buttons for functions like Popcorn, Potato, Frozen Pizza, Meat, Beverage, Reheat, Defrost, Grill/Combo, Power, and Time Cook.
Basic Microwave Cooking:
- Place food in a microwave-safe container on the glass turntable.
- Close the oven door.
- Press the "Time Cook" button, then use the numeric keypad to enter the desired cooking time.
- Press the "Power Level" button to select the desired power level (1-11).
- Press "Start/+30Sec" to begin cooking.
Grill Function:
- Place food on the wire rack (ensure it's on the glass turntable).
- Close the oven door.
- Press the "Grill/Combo" button once for grill mode.
- Enter the desired grilling time using the numeric keypad.
- Press "Start/+30Sec" to begin grilling.
Auto Cook Menus:
The microwave features 6 auto-cook menus for convenience:
- Popcorn
- Potato
- Frozen Pizza
- Meat
- Beverage
- Frozen Vegetable
To use an auto-cook menu, press the corresponding button (e.g., "Popcorn"), then select the quantity or weight if prompted, and press "Start/+30Sec".
Defrosting:
The oven offers both weight and time defrost options.
- Weight Defrost: Press "Weight/Time Defrost" once, enter the food's weight, and press "Start/+30Sec".
- Time Defrost: Press "Weight/Time Defrost" twice, enter the desired defrosting time, and press "Start/+30Sec".
Child Lock:
To activate the child lock, press and hold the "Stop/Clear" button for 3 seconds until "LOCK" appears on the display. To deactivate, repeat the process.
Video: Demonstrates the child lock feature and how to activate/deactivate it on a similar Sharp microwave model. The video shows pressing the "Unlock" button to enable or disable the door lock.
5. Maintenance and Cleaning
Regular cleaning and maintenance will ensure the longevity and optimal performance of your Sharp microwave oven.
Cleaning the Exterior:
- Wipe the exterior with a soft, damp cloth and mild detergent.
- Avoid abrasive cleaners or scouring pads, as they can scratch the mirror finish.
Cleaning the Interior:
- Remove the glass turntable and roller ring. Wash them in warm, soapy water or in a dishwasher.
- Wipe the interior cavity with a soft, damp cloth. For stubborn food residue, place a bowl of water with lemon slices inside and microwave for a few minutes to loosen the grime, then wipe clean.
- Ensure the interior is dry before reassembling components and using the oven.
Cleaning the Grill Rack:
- The metal grill rack can be washed with warm, soapy water or in a dishwasher. Ensure it is completely dry before storage or reuse.
6. Troubleshooting Guide
If you encounter any issues with your microwave oven, refer to the following common problems and solutions:
| Problem | Possible Cause | Solution |
|---|---|---|
| Oven does not start. | Power cord not securely plugged in. Door not closed properly. Fuse blown or circuit breaker tripped. | Plug in securely. Close door firmly. Replace fuse or reset circuit breaker. |
| Food not heating. | Incorrect cooking time/power level set. Door not closed properly. | Adjust time/power. Close door firmly. |
| Turntable not rotating. | Turntable or roller ring not correctly placed. Food too large/heavy. | Re-position turntable/ring. Use smaller dish or reduce food quantity. |
| Sparking inside oven. | Metal objects inside. Food residue or grease buildup. | Remove all metal. Clean oven interior thoroughly. |
| Child lock activated. | Child lock feature is engaged. | Press and hold "Stop/Clear" for 3 seconds to deactivate. |
If the problem persists after attempting these solutions, please contact Sharp customer support.
7. Product Specifications
| Feature | Detail |
|---|---|
| Brand | Sharp |
| Model | R-75MT(S) |
| Capacity | 25 Liters |
| Microwave Power Output | 900 Watts |
| Grill Power Output | 1000 Watts |
| Voltage | 220-240 Volts |
| Installation Type | Countertop |
| Color | Silver |
| Item Weight | 25 Pounds |
| Product Dimensions | 26 x 22 x 18 inches |
| Inner Material Type | Stainless Steel |
| Special Features | Child Safety Lock, Digital Display, Grill Function, 11 Power Levels, 6 Auto Cooking Menus, Time Defrost |
| Included Components | Electrical Adapters |
8. Warranty and Support
Warranty Information:
For specific warranty details, please refer to the warranty card included with your product packaging or visit the official Sharp website. Keep your purchase receipt as proof of purchase for any warranty claims.
Customer Support:
If you have any questions, require technical assistance, or need to schedule service, please contact Sharp customer support. Contact information can typically be found in your product manual or on the official Sharp website.
You can also visit the Sharp Store on Amazon for more product information and support resources.


