
Product Overview
The Molex 63819-0000 Crimp Tool is a precision hand tool designed for crimping loose piece terminals. This tool ensures reliable electrical connections by securely joining wires to terminals through a mechanical deformation process. Its ergonomic design facilitates comfortable and efficient operation for various crimping applications.
Safety Information
Always observe the following safety precautions when using the crimp tool:
- Wear appropriate personal protective equipment (PPE), including safety glasses, to protect against flying debris.
- Ensure the work area is clean, well-lit, and free from obstructions.
- Do not use the tool for purposes other than its intended use (crimping loose piece terminals).
- Inspect the tool for any damage before each use. Do not use a damaged tool.
- Keep fingers and other body parts clear of the crimping jaws during operation.
- Store the tool in a dry, secure place, out of reach of children.
Setup
Before first use, unpack the crimp tool and inspect it for any signs of damage during transit. Ensure all components are present and the tool operates smoothly.
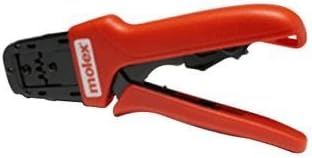
An image showing the Molex 63819-0000 crimp tool, featuring its red ergonomic handles and black crimping jaws. This tool is designed for precision crimping of loose piece terminals.
No assembly is required for this hand tool. It is ready for use directly out of the packaging.
Operating Instructions
Follow these steps for proper crimping:
- Select the Correct Terminal: Ensure you are using the appropriate loose piece terminal for your wire gauge and application.
- Prepare the Wire: Strip the insulation from the end of the wire to the recommended length for the terminal. Avoid damaging the wire strands.
- Insert Terminal: Place the loose piece terminal into the designated crimping cavity of the tool. The tool's jaws are designed to hold the terminal securely.
- Insert Wire: Carefully insert the stripped wire into the terminal, ensuring all wire strands are fully seated within the terminal's crimp barrel.
- Actuate the Tool: Squeeze the handles of the crimp tool firmly and completely until the crimping cycle is finished. The tool's ratcheting mechanism (if present) will ensure a full crimp before releasing.
- Inspect the Crimp: After crimping, remove the terminal and inspect the connection. The crimp should be tight and secure, with no loose strands and the insulation crimp (if applicable) holding the wire insulation firmly. Perform a gentle pull test to verify mechanical integrity.
Refer to the specific terminal manufacturer's guidelines for optimal wire stripping lengths and crimp specifications.
Maintenance
Proper maintenance will extend the life of your crimp tool:
- Cleaning: After each use, wipe down the tool with a clean, dry cloth to remove any dirt, dust, or debris. For stubborn grime, a slightly damp cloth can be used, followed by thorough drying.
- Lubrication: Periodically apply a light machine oil to the pivot points and moving parts of the tool to ensure smooth operation. Do not over-lubricate.
- Storage: Store the tool in a dry environment to prevent rust and corrosion. Keep the jaws closed when not in use to protect the crimping surfaces.
- Inspection: Regularly inspect the crimping jaws for wear or damage. Worn jaws can lead to poor crimps.
Troubleshooting
If you encounter issues with your crimp tool, consider the following:
- Poor Crimp Quality (Loose or Damaged):
- Ensure the correct terminal and wire gauge are being used for the tool's specific crimping cavity.
- Verify the wire is stripped to the correct length and fully inserted into the terminal.
- Check if the tool's jaws are worn or damaged.
- Ensure the tool handles are fully squeezed during the crimping cycle.
- Tool Jams or Sticks:
- Clean any debris from the crimping mechanism.
- Apply a small amount of lubricant to the pivot points.
- Do not force the tool if it resists. Inspect for foreign objects.
- Difficulty Opening/Closing Handles:
- Lubricate the pivot points.
- Check for any obstructions preventing full movement.
If problems persist, contact Molex customer support or a qualified technician.
Specifications
| Attribute | Value |
|---|---|
| Brand | Molex |
| Model Number | 63819-0000 |
| Item Weight | 0.01 Ounces |
| Grip Type | Ergonomic |
| Color | Red |
| Product Dimensions | 16 x 6 x 4 inches |
| UPC | 013227018079 |
Warranty and Support
Specific warranty details for the Molex 63819-0000 Crimp Tool are typically provided at the time of purchase or can be found on the official Molex website. Please retain your proof of purchase for warranty claims.
For technical support, service, or inquiries regarding replacement parts, please contact Molex customer service directly through their official website or the contact information provided with your product packaging.
