
VTech 1126-VT-LS6425-3
VTech DECT 6.0 Cordless Answering System User Manual
Model: 1126-VT-LS6425-3
Introduction
This user manual provides comprehensive instructions for the setup, operation, and maintenance of your VTech DECT 6.0 Cordless Answering System. Please read this manual thoroughly before using your new telephone system to ensure proper functionality and to take full advantage of its features.
The VTech 3-handset DECT 6.0 system offers advanced features such as voice announce caller ID, push-to-talk intercom, and HD audio for clear communication. It includes a digital answering system with 14 minutes of recording time, caller ID/call waiting, and a 50-name/number phonebook directory. The system is expandable and features a blue backlit keypad and display, with trilingual prompts (English, Spanish, French).
Package Contents
Verify that your package contains the following items:
- 1 x Main Base Unit with Digital Answering System
- 3 x Cordless Handsets
- 3 x Handset Chargers
- 3 x Rechargeable Battery Packs
- 1 x Telephone Line Cord
- 1 x AC Power Adapter for Base Unit
- 3 x AC Power Adapters for Handset Chargers
- 1 x Wall Mount Bracket
- 1 x User Manual (this document)
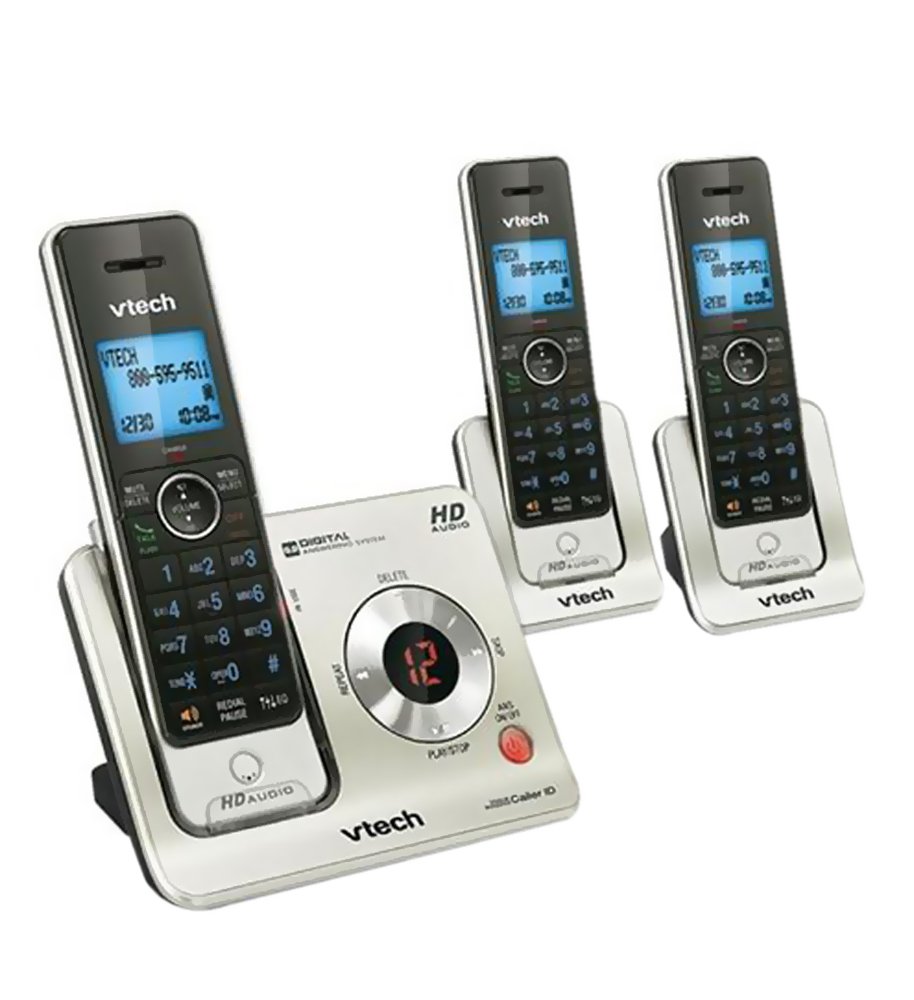
Image: The VTech DECT 6.0 Cordless Answering System, showing the main base unit with one handset docked, and two additional handsets with their respective charging cradles. The base unit features a digital answering system display and controls. All handsets have backlit keypads and displays.
Setup
1. Battery Installation
Each cordless handset requires a rechargeable battery pack. Open the battery compartment cover on the back of the handset. Connect the battery pack connector securely into the jack inside the compartment. Place the battery pack into the compartment and close the cover.
2. Charging the Handsets
Place each handset face forward into its respective charger or the main base unit. The charge indicator light on the handset or base will illuminate. Allow the handsets to charge for at least 16 hours before initial use to ensure optimal battery performance.
3. Connecting the Base Unit
- Connect one end of the telephone line cord to the TEL LINE jack on the back of the base unit.
- Connect the other end of the telephone line cord to a telephone wall jack.
- Connect the small end of the AC power adapter to the POWER jack on the back of the base unit.
- Plug the large end of the AC power adapter into a standard electrical outlet not controlled by a wall switch.
4. Connecting Handset Chargers
For each additional handset charger, connect the small end of its AC power adapter to the POWER jack on the charger and plug the large end into a standard electrical outlet not controlled by a wall switch.
5. Date and Time Setting
After the base unit is powered on, the display will prompt you to set the date and time. Follow the on-screen instructions on any handset to configure these settings. This is important for accurate caller ID and answering system timestamps.
Operating Instructions
Making and Receiving Calls
- To Make a Call: Press TALK/FLASH or SPEAKER, then dial the number.
- To Answer a Call: Press TALK/FLASH or SPEAKER when the phone rings.
- To End a Call: Press OFF/CLEAR or place the handset back in the charger.
Digital Answering System
The base unit features a digital answering system with 14 minutes of recording time. You can access messages from the base unit or any handset.
- Playing Messages: Press PLAY/STOP on the base unit or navigate to the Answering System menu on a handset.
- Deleting Messages: Press DELETE on the base unit during message playback, or use the handset menu.
- Setting Up Answering System: Access the Answering System menu on a handset to record your outgoing announcement and set the number of rings.
Caller ID and Call Waiting
The system stores up to 50 caller ID entries. When a call comes in, the handset will audibly announce the caller's name and number (if available and subscribed to caller ID service).
- Reviewing Caller ID Log: Press CID on the handset to scroll through the caller ID list.
- Dialing from Caller ID: Select an entry from the caller ID log and press TALK/FLASH to dial.
Phonebook Directory
Store up to 50 names and numbers in the phonebook directory for quick dialing.
- Adding an Entry: Press MENU/SELECT, navigate to Phonebook, then Add New Entry.
- Searching for an Entry: Press PHONEBOOK button on the handset.
Intercom Function
Use the push-to-talk intercom feature to communicate between handsets.
- Initiating Intercom: Press INT on a handset, then select the desired handset or "All" to broadcast.
Maintenance
Cleaning
Clean the telephone system with a soft, damp cloth. Do not use cleaning sprays or liquid cleaners as they may damage the finish or electrical components.
Battery Care
- Only use the supplied rechargeable battery packs.
- If the handset will not be used for an extended period, remove the battery to prevent leakage.
- Dispose of batteries properly according to local regulations.
Environmental Considerations
Avoid placing the telephone system in direct sunlight, near heating appliances, or in areas with excessive moisture or dust. Ensure adequate ventilation around the base unit and chargers.
Troubleshooting
| Problem | Solution |
|---|---|
| No dial tone. |
|
| Handset displays "No Link to Base" or similar. |
|
| Poor audio quality or static. |
|
| Answering system not recording messages. |
|
Specifications
- Model: 1126-VT-LS6425-3
- Technology: DECT 6.0 Digital
- Number of Handsets: 3 (expandable up to 12 cordless handsets and 2 cordless headsets)
- Answering System: Digital, 14 minutes recording time
- Caller ID Memory: 50 calls
- Phonebook Directory: 50 names and numbers
- Display: Blue backlit LCD
- Keypad: Blue backlit
- Intercom: Push-to-talk between handsets
- Dimensions (Base Unit): Approximately 5" L x 9" W x 6" H
- Weight (Item): 2.8 pounds
- Power: AC power adapters (included)
- Country of Origin: China
Warranty Information
This VTech product is covered by a 1-year limited warranty from the date of purchase. This warranty covers defects in material and workmanship under normal use. For full warranty terms and conditions, please refer to the warranty card included in your product packaging or visit the official VTech support website.
Customer Support
For technical assistance, product registration, or to purchase accessories, please visit the official VTech support website or contact VTech customer service.
- VTech Support Website: www.vtechphones.com/support (Example link, actual link may vary)
- Customer Service: Refer to your product packaging or the VTech website for current contact numbers.
When contacting support, please have your product model number (1126-VT-LS6425-3) and purchase date available.
Related documents1126-VT-LS6425-3


Ask a question about this manual
Ask about setup, troubleshooting, compatibility, parts, safety, or missing instructions. Manuals+ will review the question and use this page’s manual context to help answer it.