
1. Introduction
The Retevis H-777 2 Way Radios are designed for reliable and efficient communication in various environments. These compact, shock-resistant walkie-talkies feature a short antenna, making them suitable for business, education, and other group activities requiring instant communication. This manual provides detailed instructions for setup, operation, and maintenance to ensure optimal performance of your H-777 radios.

Image: Overview of Retevis H-777 features including VOX, Type-C charging, and compatibility.
2. Package Contents
Please check the package carefully to ensure all items are present:
- 10 x Retevis H-777 Walkie Talkies
- 10 x 1000mAh Li-ion Batteries
- 10 x Belt Clips
- 10 x Type-C Charging Cables
- 10 x Charging Docks
- 5 x 2-in-1 Charger Adapters
- 1 x User Manual

Image: All items included in the Retevis H-777 package.
3. Product Overview
Familiarize yourself with the components of your Retevis H-777 radio.
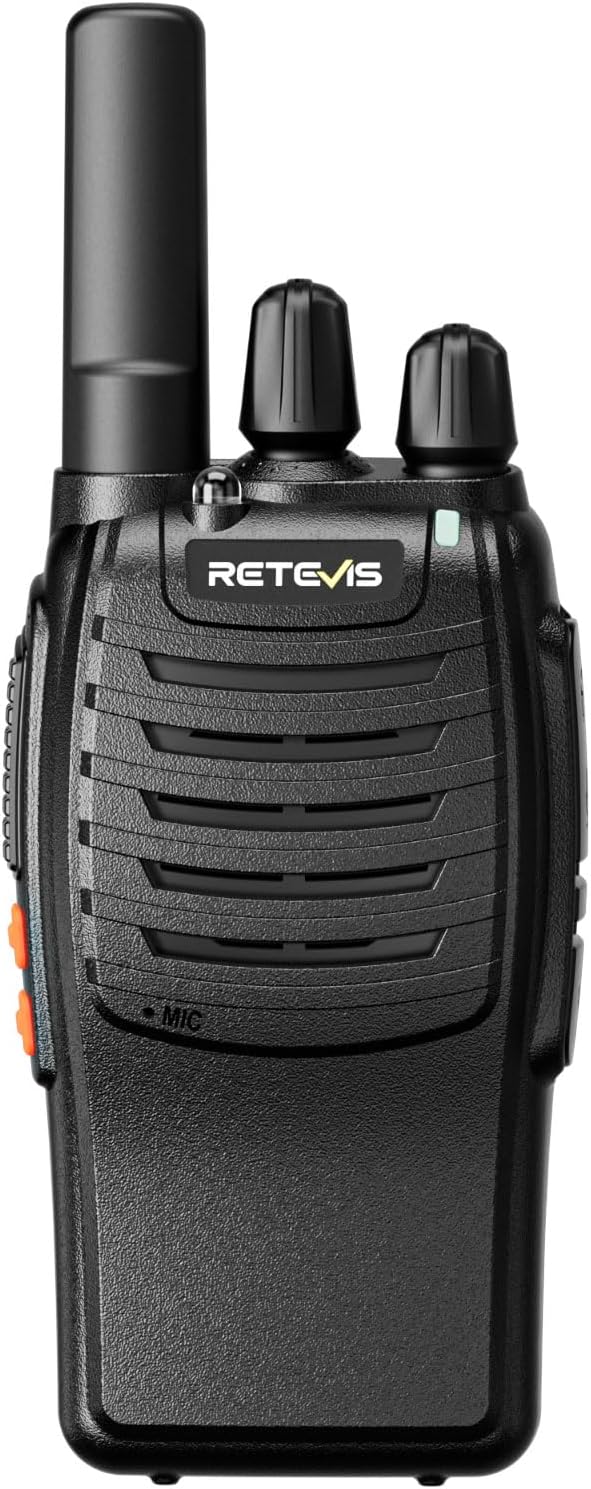
Front View: Speaker, Microphone, and Retevis logo.

Side View: PTT button, accessory jack, and Type-C charging port.

Back View: Battery compartment and belt clip attachment point.
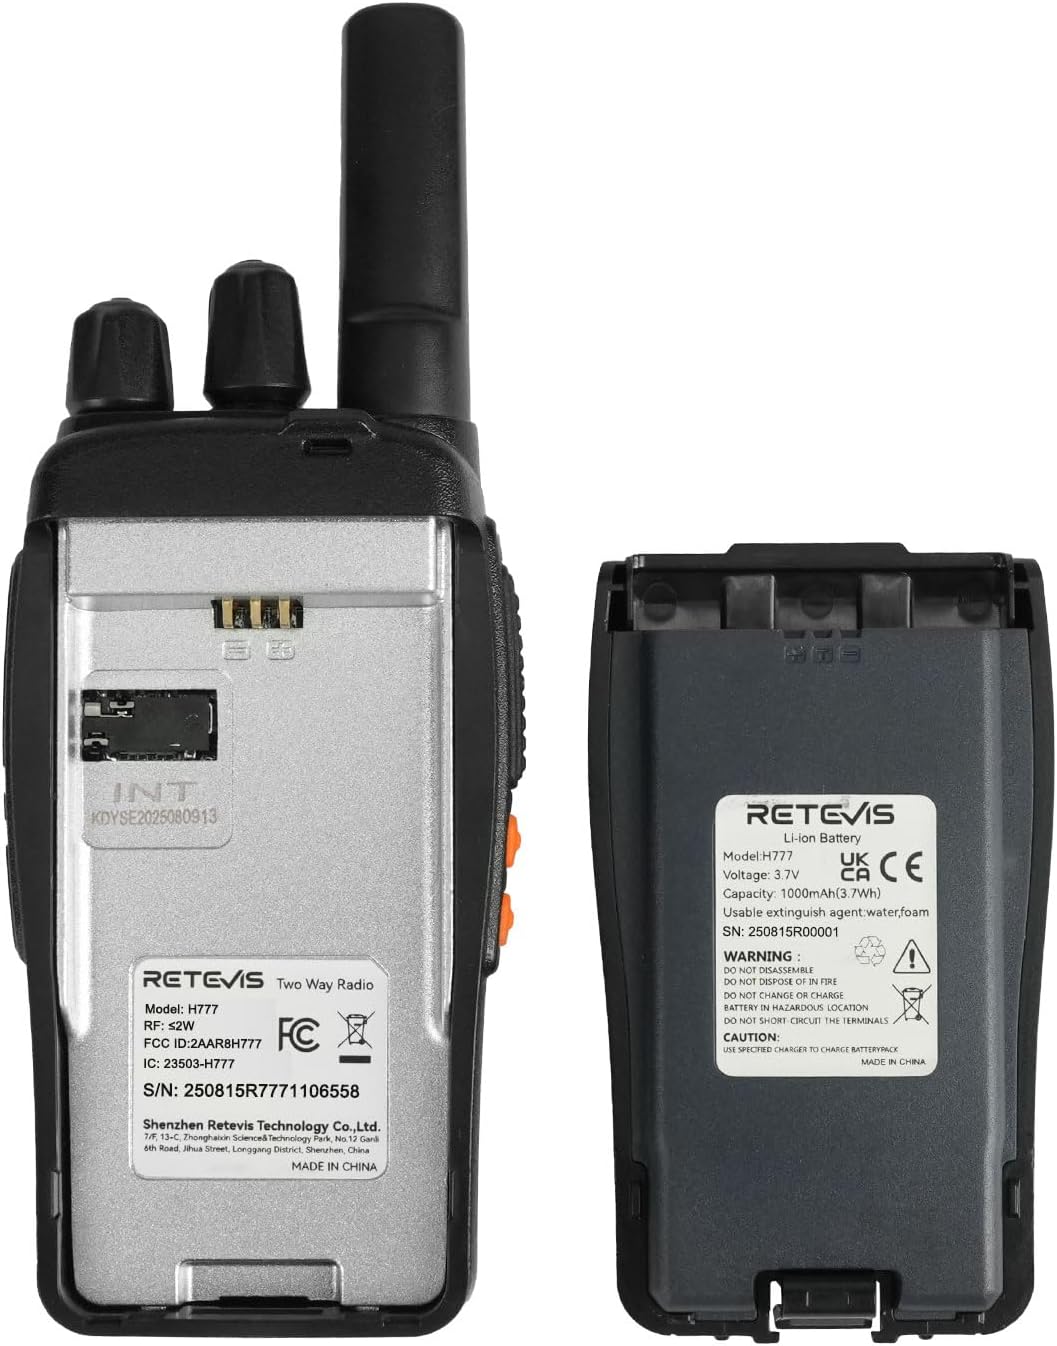
Internal View: Battery contacts and FCC ID label.
Key Components:
- Antenna: For transmitting and receiving signals.
- Power/Volume Knob: Rotate to turn the radio on/off and adjust volume.
- Channel Selector Knob: Rotate to select one of the 16 available channels.
- PTT (Push-to-Talk) Button: Press and hold to transmit, release to receive.
- Monitor Button: Briefly press to listen for weak signals.
- Function Button (Side Button): Can be programmed for various functions like VOX, Emergency Alarm, or LED Flashlight.
- Speaker/Microphone: For audio output and input.
- Accessory Jack: For connecting external audio accessories (earpiece, speaker mic).
- Type-C Charging Port: For direct charging.
- Battery Compartment: Houses the 1000mAh Li-ion battery.
4. Setup
4.1. Battery Installation
- Ensure the radio is turned off.
- Locate the battery compartment on the back of the radio.
- Align the battery with the compartment contacts and press firmly until it clicks into place.
- To remove, slide the battery release latch (if present) and pull the battery away from the radio.
4.2. Charging the Battery
The H-777 radios can be charged using the provided charging dock or directly via the Type-C port.
Using the Charging Dock:
- Connect the Type-C charging cable to the charging dock and then to a 2-in-1 charger adapter or a compatible USB power source.
- Place the radio (with battery installed) into the charging dock.
- The indicator light on the dock will show charging status (typically red for charging, green for fully charged).
Using the Type-C Direct Charging Port:
- Open the rubber cover protecting the Type-C port on the side of the radio.
- Connect the Type-C charging cable directly to the radio and then to a 2-in-1 charger adapter or a compatible USB power source.
- The radio's indicator light will show charging status.
A full charge typically takes several hours. The 1000mAh lithium-ion battery provides approximately 12 hours of continuous operation and up to 60 hours of standby time.

Image: Charging options for the Retevis H-777 radio, including dock and direct Type-C connection.

Image: Battery capacity and usage duration of the H-777 radio.
4.3. Attaching the Belt Clip
Align the belt clip with the grooves on the back of the radio and slide it down until it locks into place. To remove, lift the tab and slide the clip upwards.
5. Operating Instructions
5.1. Power On/Off and Volume Adjustment
Rotate the Power/Volume knob clockwise to turn the radio on. Continue rotating clockwise to increase the volume. Rotate counter-clockwise to decrease the volume and turn the radio off.
5.2. Channel Selection
Rotate the Channel Selector knob to choose one of the 16 available channels. Ensure all radios in your group are set to the same channel for communication.
5.3. Transmitting and Receiving
- To Transmit: Press and hold the PTT (Push-to-Talk) button on the side of the radio. Speak clearly into the microphone. Release the PTT button to stop transmitting.
- To Receive: Ensure the PTT button is not pressed. The radio will automatically receive transmissions on the selected channel.
5.4. VOX (Voice Operated Exchange) Function
The VOX function allows for hands-free operation, transmitting automatically when it detects your voice. This feature can be enabled or disabled via programming software or by using the programmable side button if configured.

Image: Hands-free communication using the VOX function with an earpiece.
5.5. Emergency Alarm
The emergency alarm function can be activated to send an alert signal. This feature is typically assigned to the programmable side button. Consult your radio's programming for specific activation methods.

Image: The emergency alarm feature of the H-777 radio.
5.6. LED Flashlight
The built-in LED flashlight provides illumination in low-light conditions. This feature is usually activated by a short press of the programmable side button.

Image: The LED flashlight feature of the H-777 radio.
5.7. Squelch Function
The H-777 features a 0-9 level squelch, which filters out weak background noise to ensure clear audio. Higher squelch levels reduce static but may also filter out very weak signals.

Image: Visual representation of the squelch function.
5.8. Compatibility and One-Key Pairing
The H-777 4.0 radios are designed for strong compatibility with previous H-777 versions (2.0 & 3.0) and other Retevis FRS two-way radios like RT22, RT68, H777H, H-777S, and B3H. This facilitates seamless team communication. Some models may support one-key pairing for quick setup with compatible devices.

Image: H-777 radio showing compatibility with previous versions.

Image: One-key pairing feature for rapid communication setup.
6. Maintenance
6.1. General Care
- Keep the radio dry. If it gets wet, wipe it immediately.
- Avoid exposing the radio to extreme temperatures.
- Do not use harsh chemicals or abrasive cleaners. Use a soft, damp cloth for cleaning.
- Do not disassemble the radio; this will void the warranty.
6.2. Battery Care
- Charge the battery fully before first use.
- Do not overcharge or deep discharge the battery.
- Store batteries in a cool, dry place when not in use.
- If the battery performance significantly degrades, replace it with an original Retevis battery.
7. Troubleshooting
| Problem | Possible Cause | Solution |
|---|---|---|
| No power | Battery not installed correctly or discharged. | Reinstall battery, charge battery. |
| Cannot transmit or receive | Incorrect channel, out of range, low battery. | Verify channel, move closer to other radios, charge battery. |
| Poor audio quality/static | Weak signal, interference, squelch level too low. | Move to an open area, adjust squelch level, check for obstructions. |
| Short battery life | Battery old or not fully charged. | Ensure full charge, replace battery if necessary. |
8. Specifications
| Feature | Detail |
|---|---|
| Model Number | A9104HX10 |
| Item Weight | 4.1 ounces (approx. 0.26 lb) |
| Product Dimensions | 2.34 x 4.49 x 1.25 inches |
| Battery Type | 1 Lithium Ion battery (1000mAh) |
| Number of Channels | 16 |
| Frequency Range | FRS (Family Radio Service) |
| Talking Range Maximum | 2.5 Kilometers (under optimal conditions) |
| Voltage | 3.7 Volts |
| Water Resistance Level | Water Repellent |
| Special Features | Clear sound quality, Long Range, Portable, Quick access features, Upgrade Type C rechargeable |
9. Safety Information
FCC Compliance:
The Retevis H-777 walkie-talkies are FRS (Family Radio Service) compliant, with FCC ID 2AAR8H777. These radios meet FCC rule part 95. Please use them in accordance with local regulations.
General Safety Precautions:
- Do not operate the radio in explosive atmospheres (e.g., near flammable gas, dust particles, metallic powders).
- Do not modify the radio or its accessories. Unauthorized modifications can void your warranty and violate regulations.
- Keep the radio away from medical devices to avoid interference.
- Use only Retevis-approved batteries and chargers.
- Avoid prolonged exposure to direct sunlight or extreme heat.
10. Warranty and Support
Warranty Information:
- Radio Body: 3-year warranty.
- Accessories: 1-year warranty.
- Return Policy: 30 days no-reason return.
Beyond the warranty period, Retevis offers maintenance services. Buyers are responsible for associated costs. For any warranty claims or service requests, please contact Retevis customer support.
Customer Support:
For assistance, please contact Retevis customer support via Amazon. We aim to reply within 12 hours to address your concerns and provide hassle-free support.


