
Introduction
This manual provides detailed instructions for the installation, operation, and maintenance of your Thermaltake Extreme Speed 3.0 Plus USB3.0 Multi-Card Reader. Please read this manual thoroughly before using the device to ensure proper functionality and to prevent damage.
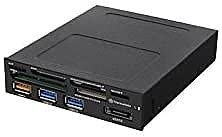
Image: Front view of the Thermaltake Extreme Speed 3.0 Plus USB3.0 Multi-Card Reader, showing various card slots and USB ports.
Safety Information
Observe the following safety precautions to avoid injury or damage to the device:
- Do not expose the device to moisture, extreme temperatures, or direct sunlight.
- Do not attempt to disassemble or modify the device. This will void the warranty.
- Ensure proper ventilation around the device during operation.
- Use only compatible cables and connectors.
- Keep the device away from strong magnetic fields.
Package Contents
Verify that all items are present in the package:
- Thermaltake Extreme Speed 3.0 Plus USB3.0 Multi-Card Reader (AC0031)
- Mounting screws (for 5.25" bay installation)
- USB 3.0 internal header cable(s)
- SATA power cable (if applicable for eSATA functionality)
- User Manual (this document)
Product Overview
The Thermaltake Extreme Speed 3.0 Plus Multi-Card Reader is designed to fit into a standard 5.25-inch drive bay of your computer case. It provides convenient access to various memory card formats and expands your system's connectivity with additional USB 3.0 ports and an eSATA port.
Front Panel Features:
- Multiple Card Slots: Supports various memory card formats including SD, Micro SD, CompactFlash, Memory Stick, and more.
- USB 3.0 Ports: Two high-speed USB 3.0 ports for connecting peripherals and external storage devices.
- eSATA Port: An external SATA port for connecting eSATA-compatible devices.
Rear Connections:
- USB 3.0 Internal Header Connector(s): Connects to your motherboard's internal USB 3.0 header(s).
- SATA Data Connector: For eSATA functionality, connects to a SATA port on your motherboard.
- SATA Power Connector: Provides power to the unit, connects to a SATA power cable from your power supply.
Setup
Follow these steps to install the multi-card reader into your computer system:
- Prepare Your System: Power off your computer and unplug all cables. Open the computer case.
- Install into 5.25" Bay: Locate an available 5.25-inch drive bay. Remove the front panel cover. Slide the card reader into the bay from the front until the screw holes align. Secure the reader with the provided mounting screws.
- Connect USB 3.0 Internal Headers: The unit requires internal USB 3.0 connections. Depending on your motherboard, you may need one or two 20-pin USB 3.0 internal headers. Connect the USB 3.0 cable(s) from the card reader to the corresponding headers on your motherboard. Note: Some configurations may require additional adapters or PCI-e expansion cards if your motherboard lacks sufficient internal USB 3.0 headers. Ensure your motherboard provides the necessary 20-pin connectors for all USB 3.0 ports on the reader.
- Connect eSATA (Optional): If you plan to use the eSATA port, connect a SATA data cable from the card reader to an available SATA port on your motherboard.
- Connect Power: Connect a SATA power cable from your power supply unit to the SATA power connector on the card reader.
- Close Case and Power On: Once all connections are secure, close your computer case, plug in all cables, and power on your computer. The device is typically plug-and-play and should be recognized automatically by your operating system.
Operating
Using your Thermaltake Multi-Card Reader is straightforward:
Inserting Memory Cards:
- Identify the correct slot for your memory card type (e.g., SD, Micro SD, CF, MS).
- Gently insert the memory card into the slot until it clicks into place or is fully seated. Ensure the card is oriented correctly. For Micro SD cards, align carefully to prevent the card from missing the slot and getting stuck inside the case.
- Your operating system should detect the card as a removable drive.
Removing Memory Cards:
- Always safely eject the memory card through your operating system before physically removing it.
- Once safely ejected, gently pull the card out of its slot. For spring-loaded slots, push the card in slightly to release it.
Using USB 3.0 Ports:
- Connect any USB 3.0 or USB 2.0 compatible device (e.g., external hard drives, USB flash drives, smartphones) to the front USB 3.0 ports.
- The ports provide high-speed data transfer for compatible devices.
Using the eSATA Port:
- Connect eSATA-compatible external storage devices to the eSATA port for high-speed data transfer.
Maintenance
Proper maintenance ensures the longevity and performance of your card reader:
- Cleaning: Use a soft, dry cloth to clean the exterior of the device. Do not use liquid cleaners or solvents. For card slots, use compressed air to remove dust or debris.
- Storage: When not in use for extended periods, store the device in a cool, dry place away from direct sunlight.
- Cable Management: Ensure internal cables are neatly routed and not obstructing airflow or other components.
Troubleshooting
If you encounter issues with your card reader, refer to the following common problems and solutions:
- Device Not Detected:
- Check all internal USB 3.0 and power connections. Ensure they are securely seated on both the card reader and the motherboard/PSU.
- Verify that your motherboard's USB 3.0 headers are enabled in the BIOS/UEFI settings.
- Ensure your operating system has the latest USB 3.0 drivers installed for your motherboard.
- Memory Card Not Recognized:
- Ensure the memory card is fully and correctly inserted into the appropriate slot.
- Try a different memory card to rule out a faulty card.
- Check if the card is locked (write-protected).
- For Micro SD cards, ensure careful alignment during insertion to prevent it from getting stuck or misaligned.
- Slow Data Transfer Speeds:
- Ensure you are using USB 3.0 compatible devices and cables.
- Verify that the card reader is connected to a USB 3.0 header on your motherboard.
- The actual transfer speed may vary depending on the memory card's speed class and the connected device.
- USB Port Not Functioning:
- Test with a different USB device.
- Recheck the internal USB 3.0 header connections. A loose or incorrect connection can cause individual ports to fail.
Specifications
| Feature | Specification |
|---|---|
| Brand | Thermaltake |
| Model | AC0031 |
| Hardware Interface | USB 3.0 |
| Data Transfer Rate | Up to 3000 Megabits Per Second (USB 3.0) |
| Total USB Ports | 2 (USB 3.0) |
| Media Slots | 6 (supporting various formats like SD, Micro SD, CF, MS) |
| Additional Ports | 1 x eSATA |
| Product Dimensions | 15 x 10.2 x 2.6 cm |
| Item Weight | 294.83 g |
| Installation | 5.25-inch drive bay |
Warranty and Support
Thermaltake products are designed for reliability and performance. For warranty information, please refer to the warranty card included with your product or visit the official Thermaltake website. If you require technical assistance or have questions not covered in this manual, please contact Thermaltake customer support through their official channels.
Please have your product model number (AC0031) and purchase information ready when contacting support.