
Introduction
This manual provides instructions for the safe and efficient operation, maintenance, and troubleshooting of your SPT IM-123S Portable Ice Maker. Please read this manual thoroughly before using the appliance and retain it for future reference.
The SPT IM-123S is a compact, self-contained ice maker designed for convenience. It produces ice cubes in three selectable sizes and features a 1.8-liter water tank capacity and 1.5 lbs ice storage. It is suitable for various settings where portable ice production is desired.
Important Safety Instructions
To reduce the risk of fire, electric shock, or injury when using your ice maker, follow these basic precautions:
- Read all instructions before use.
- Do not touch the evaporator or ice basket when the unit is operating.
- Do not immerse the appliance, power cord, or plug in water or other liquids.
- Supervise children when the appliance is in use.
- Unplug the ice maker from the outlet when not in use, before cleaning, and before servicing.
- Do not operate any appliance with a damaged cord or plug, or after the appliance malfunctions or has been damaged in any manner.
- Do not use outdoors.
- Do not place the ice maker on or near a hot gas or electric burner, or in a heated oven.
- Ensure proper ventilation. Maintain a minimum of 5 inches of clearance around the unit.
- Use only potable water.
- Do not use the appliance for other than its intended purpose.
Product Overview
Familiarize yourself with the components of your SPT IM-123S Portable Ice Maker.
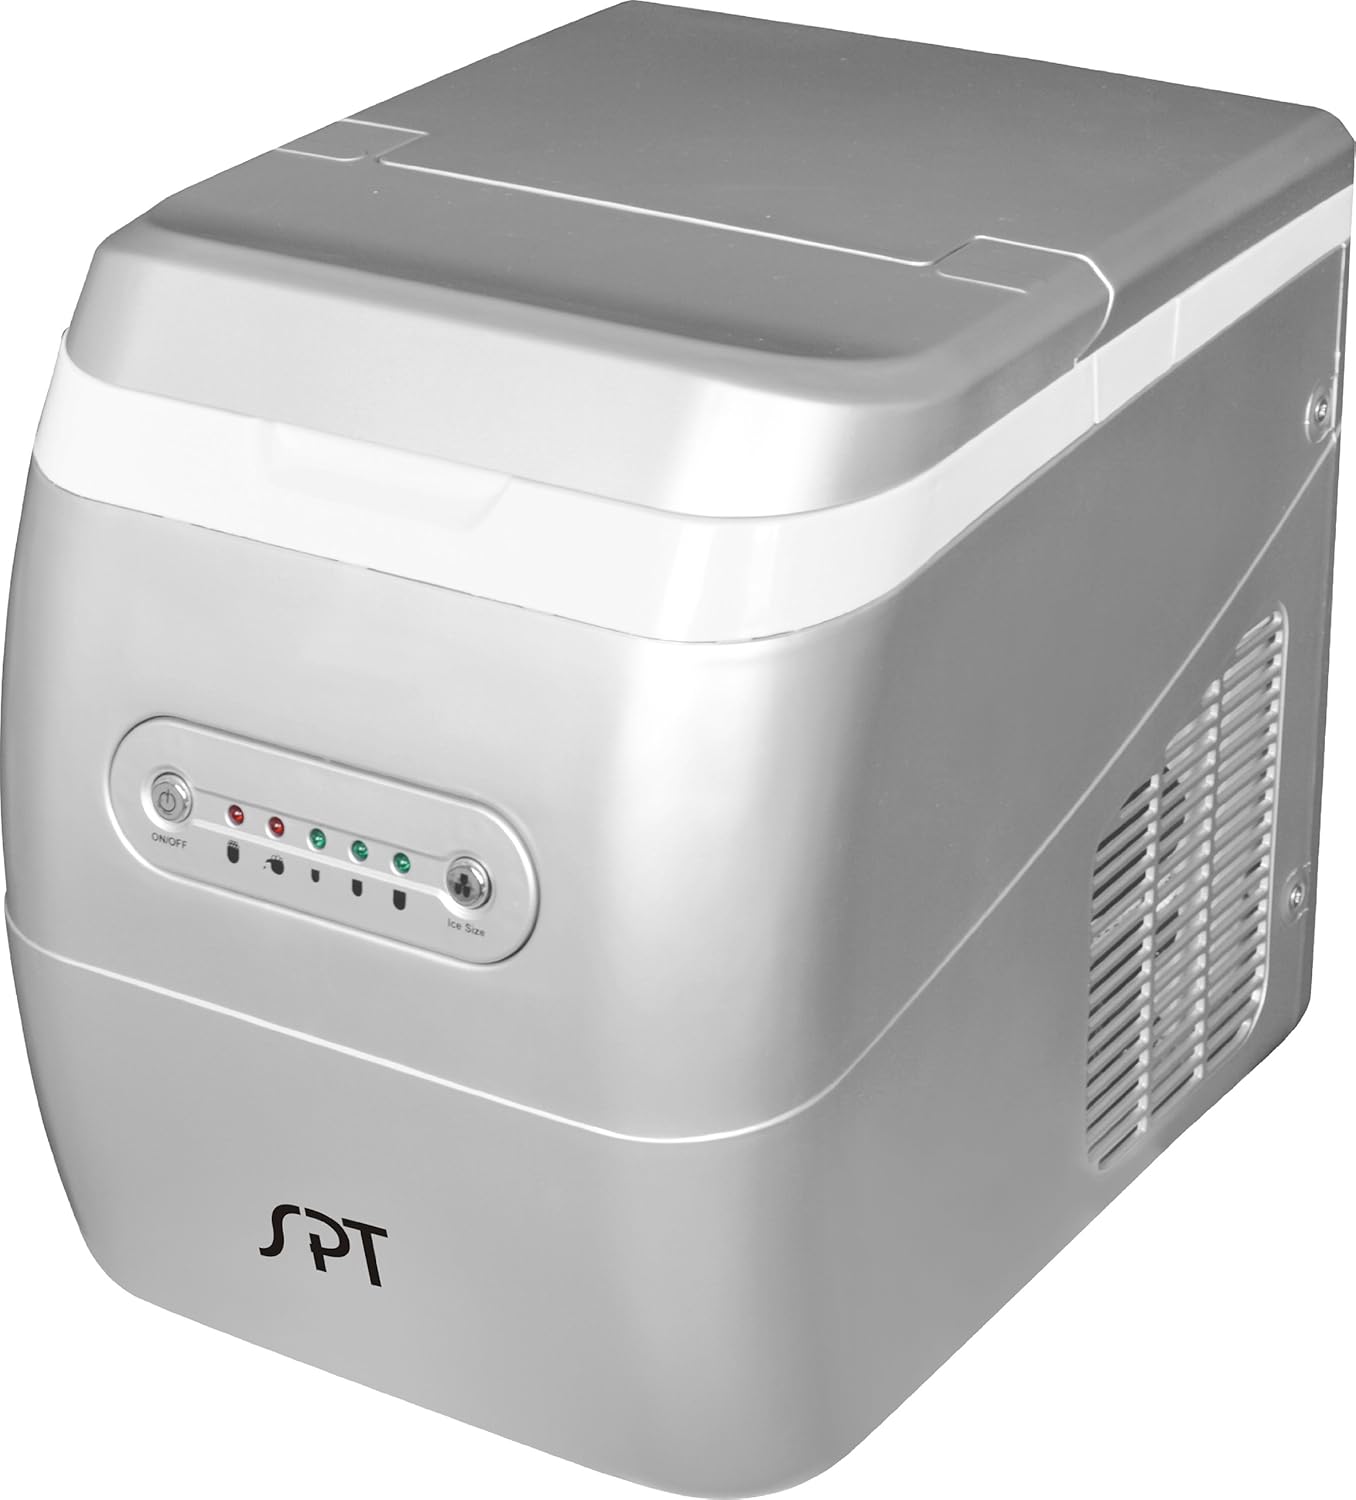
Figure 1: Front view of the SPT IM-123S Portable Ice Maker. The silver unit features a control panel with indicator lights and buttons for operation and ice size selection.

Figure 2: The SPT IM-123S Portable Ice Maker positioned on a kitchen counter, demonstrating its compact size and freestanding application.
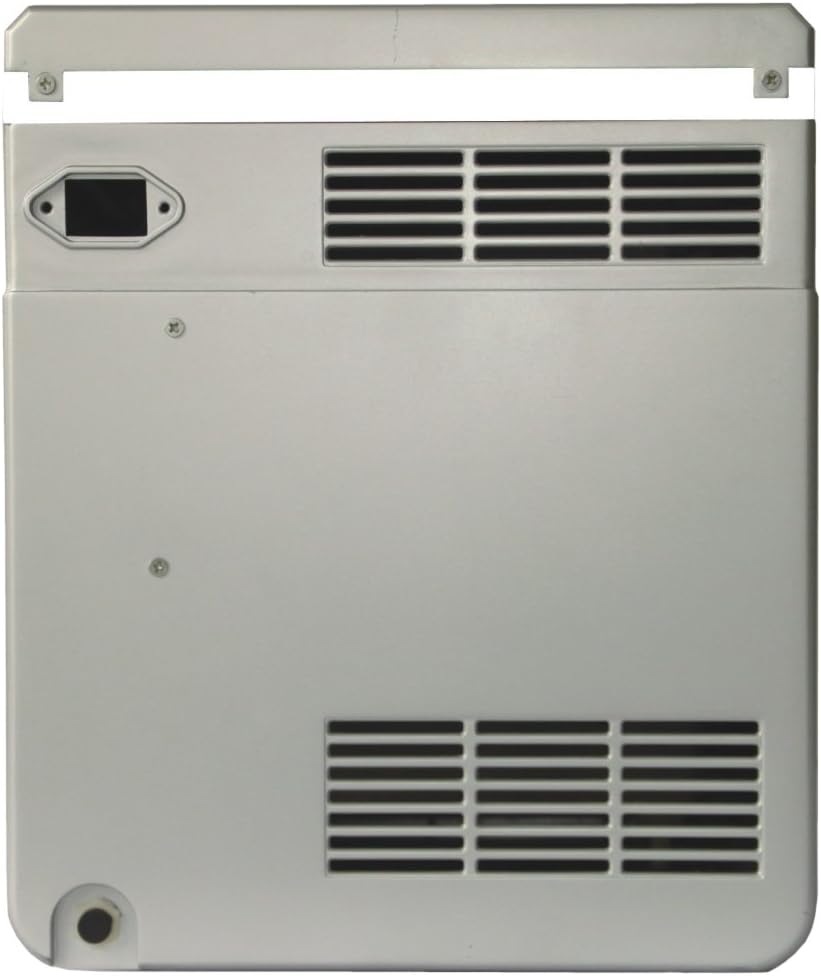
Figure 3: Rear view of the ice maker, highlighting the ventilation grilles and the drain plug located at the bottom left.
Setup
- Unpacking: Remove all exterior and interior packaging. Ensure all accessories are present.
- Placement: Place the ice maker on a flat, stable surface away from direct sunlight and heat sources. Ensure at least 5 inches of clearance around the unit for proper ventilation.
- Initial Cleaning: Clean the interior of the unit with a soft cloth and warm water. Rinse and drain any water.
- Power Connection: Plug the unit into a grounded electrical outlet.
- First Use: For optimal performance, allow the unit to rest for at least 1 hour after transport before plugging it in. Discard the first few batches of ice to ensure the system is clean.
Operating Instructions
- Fill Water Reservoir: Open the lid and fill the water reservoir with potable water up to the MAX fill line. Do not overfill.
- Select Ice Size: Press the "ICE SIZE" button to cycle through the available ice cube sizes (Small, Medium, Large). The corresponding indicator light will illuminate.
- Start Ice Production: Press the "ON/OFF" button to begin the ice-making cycle. The "ON/OFF" indicator light will turn green.
- Monitor Ice Production: The unit will produce ice in approximately 13 minutes for the first batch. Subsequent batches may be faster.
- Ice Full Indicator: When the ice basket is full, the "ICE FULL" indicator light will illuminate, and the unit will pause ice production. Remove ice from the basket to resume.
- Add Water Indicator: If the water level is too low, the "ADD WATER" indicator light will illuminate. Add more water to the reservoir to continue ice production.
- Stop Ice Production: Press the "ON/OFF" button to stop the ice-making cycle.
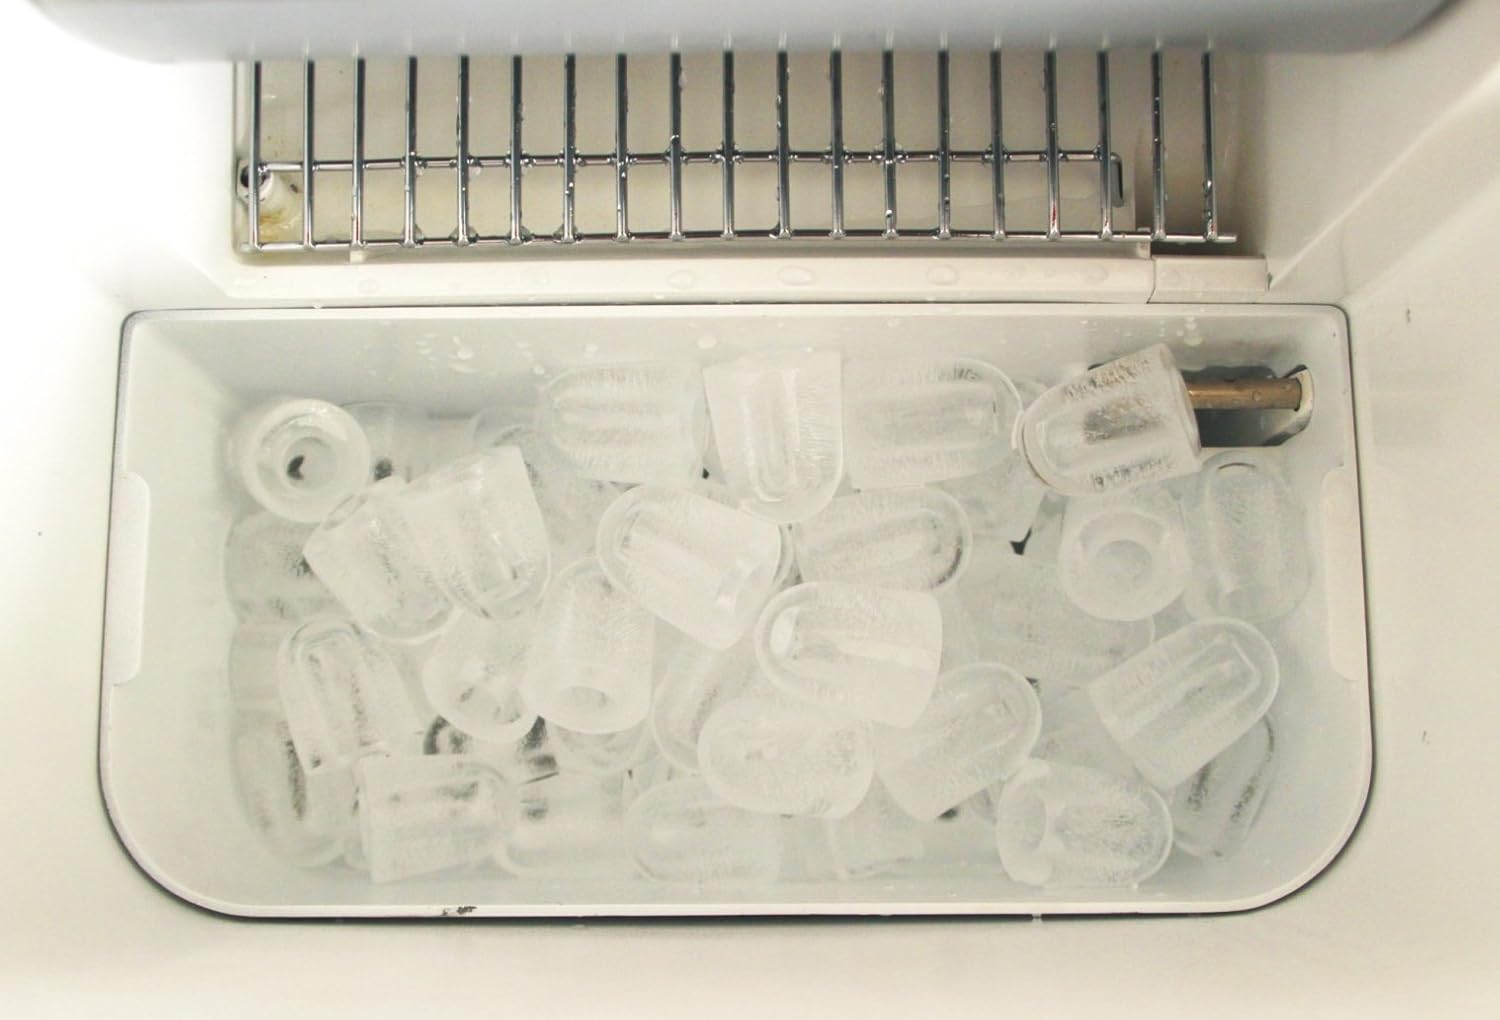
Figure 4: The ice basket inside the unit, containing freshly made bullet-shaped ice cubes.

Figure 5: The ice maker with its lid open, revealing the internal ice-making mechanism and the empty ice basket.
Maintenance
Cleaning
- Always unplug the unit before cleaning.
- Clean the interior with a diluted solution of warm water and mild detergent.
- Wipe down all surfaces with a soft cloth.
- Rinse the interior thoroughly with clean water and drain.
- Clean the exterior with a soft, damp cloth.
- Do not use abrasive cleaners or sharp objects.
Draining
To drain the water from the reservoir:
- Unplug the ice maker.
- Locate the drain plug at the bottom rear of the unit (refer to Figure 3).
- Place a container under the drain plug.
- Remove the drain plug to allow water to flow out.
- Once drained, replace the drain plug securely.
Storage
If the ice maker will not be used for an extended period:
- Drain all water from the reservoir.
- Clean and dry the interior thoroughly.
- Store the unit in a cool, dry place, away from direct sunlight.
Troubleshooting
| Problem | Possible Cause | Solution |
|---|---|---|
| Ice maker not working. | Unit not plugged in; power outage; fuse blown/circuit breaker tripped. | Ensure unit is plugged in; check power supply; reset circuit breaker. |
| "ADD WATER" indicator is on. | Water reservoir is empty or water level is too low. | Add potable water to the reservoir up to the MAX fill line. |
| "ICE FULL" indicator is on. | Ice basket is full. | Remove ice from the basket. |
| Ice cubes are too small or not forming properly. | Water temperature is too high; ambient temperature is too high; unit needs cleaning. | Use colder water; ensure unit is in a cool environment; clean the unit as per maintenance instructions. |
| Unusual noise during operation. | Normal operation sounds (compressor, water pump); unit not level. | Ensure unit is on a level surface. If noise is excessive or unusual, contact customer support. |
Specifications

Figure 6: Diagram illustrating the dimensions of the SPT IM-123S Portable Ice Maker.
| Feature | Detail |
|---|---|
| Model | IM-123S |
| Voltage | 110-120V/60Hz |
| Power | 140W |
| Rated Current | 1.8 A |
| Climate Type | N |
| Refrigerant | R134a/50g |
| Ice Making Capacity | 26 lbs./24 hrs. |
| Ice Storage Capacity | 1.5 lbs. |
| Water Tank Capacity | 1.8 liters |
| Unit Dimensions (W x D x H) | 11.02" x 14.57" x 13.19" |
| Net Weight | 24.25 lbs. |
| Certification | ETL certified |
Warranty and Support
This product is covered by a manufacturer's warranty. Please refer to the warranty card included with your purchase for specific terms, conditions, and duration. Retain your proof of purchase for warranty claims.
For technical assistance, troubleshooting beyond this manual, or warranty inquiries, please contact SPT customer support. Contact information is typically provided in the product packaging or on the manufacturer's official website.


