Introduction
This manual provides comprehensive instructions for the safe installation, operation, and maintenance of your Commercial Electric 1-Light Brushed Nickel Mini-Pendant (3-Pack). Please read this manual thoroughly before beginning installation and retain it for future reference.
Safety Information
WARNING: Risk of electric shock. Disconnect power at the fuse box or circuit breaker before installation or servicing.
- All electrical connections must be in accordance with local codes, ordinances, or the National Electric Code (NEC). Contact a qualified electrician if you are unfamiliar with proper electrical wiring connections.
- Use UL-listed wire connectors suitable for the size, type, and number of conductors.
- Do not exceed the maximum wattage specified for this fixture.
- Ensure the fixture is properly grounded.
- Handle glass components with care to prevent breakage.
Package Contents
Verify that all components are present before beginning installation:
- Pendant Light Fixture (x3)
- Frosted White Glass Shade (x3)
- Mounting Hardware (x3 sets)
- Instruction Manual (this document)
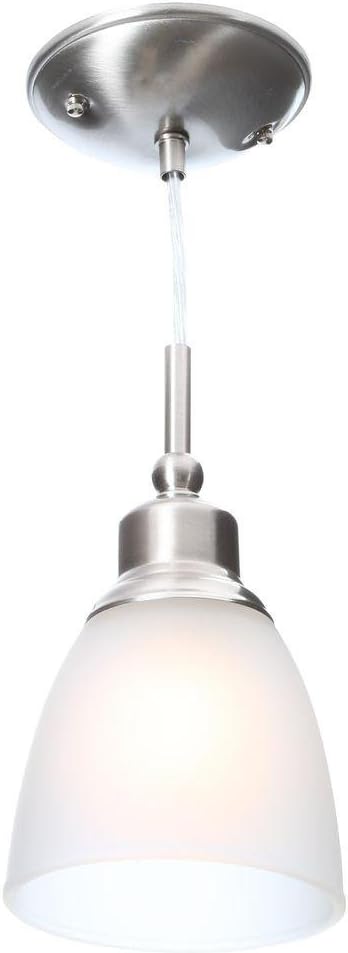
Figure 1: A single Commercial Electric 1-Light Brushed Nickel Mini-Pendant with its frosted white glass shade.
Setup and Installation
These mini-pendant lights are designed for hardwired, semi-flush mount installation. Professional installation is recommended if you are not familiar with electrical wiring.
- Turn Off Power: Before starting, ensure the power to the circuit at the main fuse box or circuit breaker is completely off.
- Prepare Mounting: Attach the mounting bracket (part of the included hardware) to the junction box in the ceiling. Ensure it is securely fastened.
- Adjust Hanging Length: The pendant features an adjustable hanging length. Carefully adjust the wire length to your desired height before making electrical connections.
- Make Electrical Connections:
- Connect the fixture's ground wire (usually bare copper or green) to the house ground wire.
- Connect the fixture's neutral wire (usually white) to the house neutral wire.
- Connect the fixture's hot wire (usually black) to the house hot wire.
- Secure all connections with UL-listed wire connectors.
- Mount Canopy: Carefully tuck all wires into the junction box. Align the fixture's canopy with the mounting bracket and secure it using the provided screws or nuts.
- Install Glass Shade: Gently attach the frosted white glass shade to the fixture body. Ensure it is seated correctly and secured according to the specific design of the fixture.
- Install Bulb: Insert one E26 medium base bulb (not included) into each fixture. Do not exceed 60 watts per bulb.
- Restore Power: Once installation is complete and all components are secure, restore power at the circuit breaker.

Figure 2: Detail of the brushed nickel canopy, showing the mounting points and wire entry.

Figure 3: Close-up view of the brushed nickel fixture body, where the glass shade attaches.
Operating Instructions
Once installed and powered, the mini-pendant lights operate via a standard wall switch. They are compatible with standard wall dimmers, allowing you to adjust the light intensity (dimmer switch and compatible bulbs sold separately).
- Bulb Type: Uses one E26 medium base bulb per fixture.
- Maximum Wattage: Do not exceed 60 watts per bulb.
- Recommended Bulb: Incandescent or CFL equivalent. LED bulbs compatible with dimmers can also be used.

Figure 4: Example of multiple mini-pendant lights installed, demonstrating their appearance in a room setting.
Maintenance
To maintain the appearance and functionality of your pendant lights:
- Cleaning: Disconnect power before cleaning. Wipe the fixture with a soft, dry cloth. Do not use abrasive cleaners or solvents, as they may damage the finish.
- Glass Shade: The frosted glass shade can be removed for cleaning. Wash with mild soap and water, rinse thoroughly, and dry completely before reattaching.
- Bulb Replacement: Ensure power is off before replacing bulbs. Allow bulbs to cool before handling.
Troubleshooting
| Problem | Possible Cause | Solution |
|---|---|---|
| Light does not turn on. |
|
|
| Light flickers. |
|
|
Specifications
- Brand: Commercial Electric
- Model Number: 387 495
- Fixture Color/Finish: Brushed Nickel
- Shade Color: Frosted White
- Material: Alloy Steel, Glass
- Number of Lights: 1 per pendant (3-pack)
- Light Source Type: Incandescent (compatible with CFL/LED)
- Bulb Base: E26 Medium
- Maximum Wattage: 60 Watts per bulb
- Voltage: 120 Volts
- Installation Type: Hardwired, Semi Flush Mount
- Adjustable Hanging Length: Yes (Maximum 75.8 inches)
- Certifications: UL Listed
- Product Dimensions (single pendant): 5.5 inches (Depth) x 75.8 inches (Height) x 5.5 inches (Width)
- Canopy Diameter: 5-1/16 inches
- Product Weight (3-pack): 5.58 lbs
Warranty and Support
For warranty information or technical support, please refer to the contact details provided at the point of purchase or visit the official Commercial Electric website. Keep your purchase receipt as proof of purchase.


