
1. Introduction
The NOYAFA NF-806R is a versatile cable testing device designed for professionals and enthusiasts to efficiently manage and troubleshoot network and telephone cables. This device allows for quick identification, tracing, and verification of cable integrity, ensuring reliable network and communication setups.
Key functions include:
- Examine and locate specific cables among multiple cables.
- Test continuity for LAN network cables, identifying breaks, opens, shorts, and cross-connections.
- Provide a visual end-to-end cable map for individual wires.
- Equipped with an RJ11 connector and alligator clips for diverse applications.
- Suitable for testing individual connectors, twisted pairs, phone cables, and powered electrical wires.
2. Safety Information
Please read and understand all safety instructions before operating the device. Failure to follow these instructions may result in electric shock, fire, or damage to the device.
- Do not use the device near water or in damp environments.
- Ensure batteries are inserted correctly according to polarity markings.
- Do not attempt to test live circuits with voltages exceeding the device's specified limits.
- Keep the device away from children.
- If the device is damaged, do not use it. Contact support for assistance.
3. Package Contents
Verify that all items are present in your package:
- NOYAFA NF-806R Transmitter Unit
- NOYAFA NF-806R Receiver Unit (Probe)
- RJ11 Cable
- Alligator Clip Cable Pair
- Headset (for noisy environments)
- Carrying Pouch
- User Manual
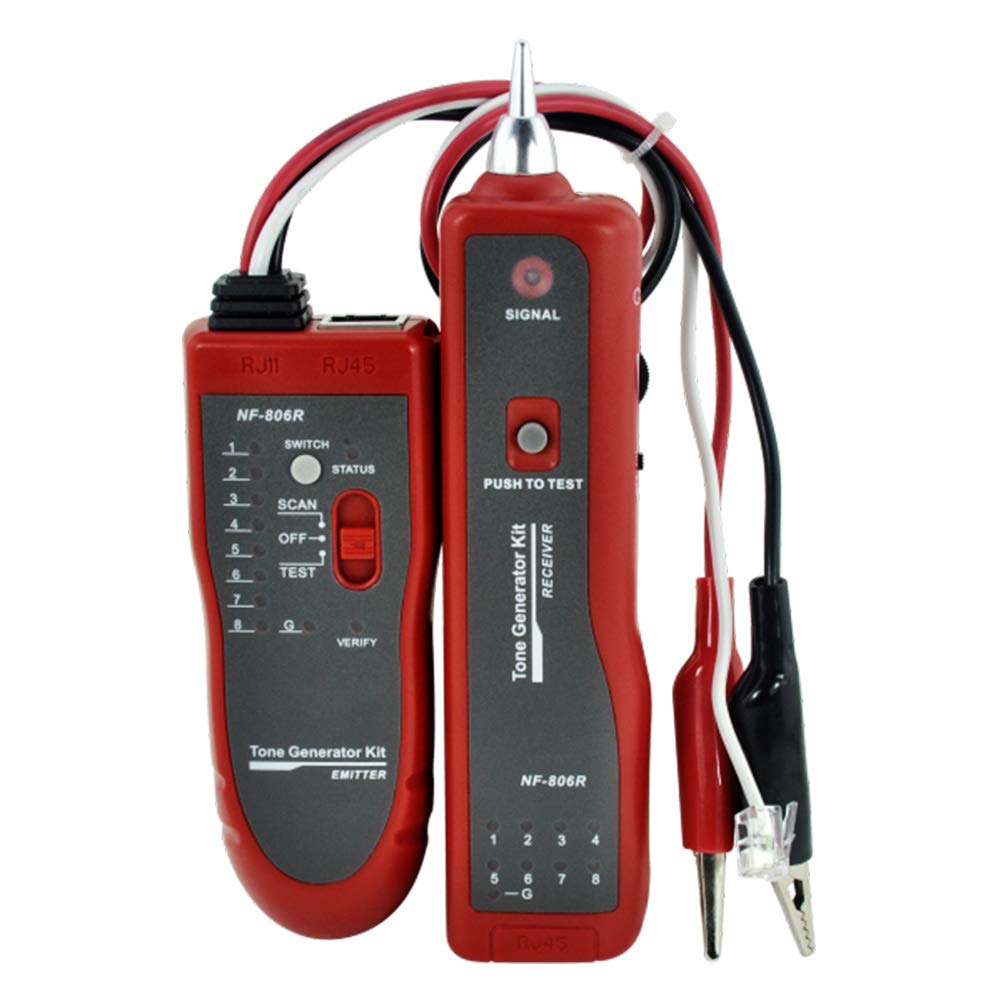
Image: Main components of the NOYAFA NF-806R cable tester, showing the red transmitter and receiver units along with the included RJ11 and alligator clip cables.
4. Product Overview
The NF-806R consists of two main parts: the Transmitter and the Receiver.
Transmitter Unit
- RJ45 Port: For connecting LAN network cables for continuity testing.
- RJ11 Port: For connecting phone cables or using the RJ11 cable with alligator clips.
- LED Indicators: Display cable status (open, short, cross, normal).
- Function Switch: To select between SCAN (tracing) and TEST (continuity).
- Power Switch: On/Off.
Receiver Unit (Probe)
- Probe Tip: Used to detect the signal from the transmitter.
- Volume Control: Adjusts the sound level of the detected signal.
- Headset Jack: For connecting the included headset.
- LED Indicator: Visual confirmation of signal detection.
- Power Switch: On/Off.
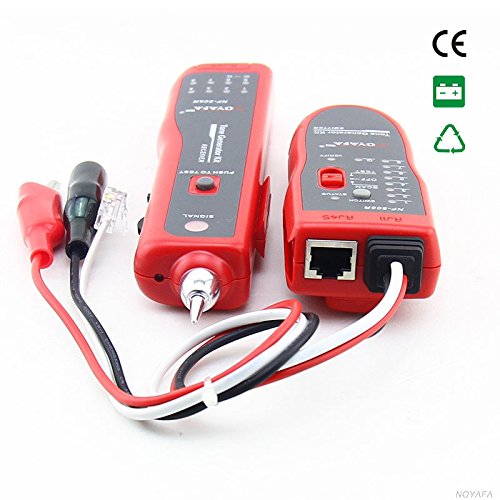
Image: A side view of the NOYAFA NF-806R receiver unit, highlighting the probe tip and various ports for connectivity.
5. Setup
5.1 Battery Installation
Both the transmitter and receiver units require batteries (not included). Locate the battery compartments on the back of each unit. Open the cover, insert the required batteries (typically 9V batteries for each unit) observing the correct polarity, and close the cover securely.
5.2 Connecting Cables
Depending on the test, connect the cable to be tested to the appropriate port on the transmitter unit (RJ45 for network cables, RJ11 for phone cables or alligator clips). For cable tracing, only the transmitter needs to be connected to one end of the cable.
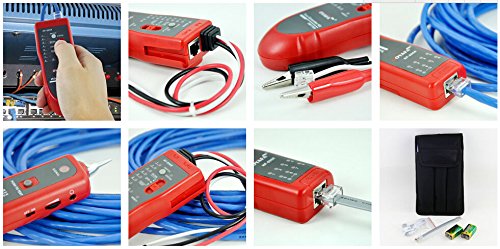
Image: A collage showing the NOYAFA NF-806R in various operational scenarios, including connecting an RJ45 cable, using the alligator clips, and the device being held for tracing.
6. Operating Instructions
6.1 Cable Tracing/Locating
- Connect one end of the target cable to the RJ45 or RJ11 port on the transmitter unit.
- Turn on the transmitter unit and set the function switch to SCAN mode.
- Turn on the receiver unit.
- Use the receiver's probe to scan along the cable path. The receiver will emit an audible tone when it detects the signal from the transmitter. The tone will be loudest when the probe is directly over the correct cable.
- Adjust the volume control on the receiver for optimal listening. For noisy environments, connect the headset.
6.2 LAN Cable Continuity Testing (RJ45)
- Connect one end of the RJ45 network cable to the RJ45 port on the transmitter unit.
- Connect the other end of the RJ45 network cable to the RJ45 port on the receiver unit.
- Turn on both the transmitter and receiver units. Set the transmitter's function switch to TEST mode.
- Observe the LED indicators on both units. The LEDs will light up sequentially, indicating the status of each wire pair.
- Normal Connection: LEDs on both units light up in the same sequence (1-8).
- Open Circuit/Break: An LED fails to light up on either unit.
- Short Circuit: Two or more LEDs light up simultaneously or in an incorrect sequence.
- Cross-Connection: LEDs light up in a different but consistent sequence on the receiver compared to the transmitter.
6.3 Phone Cable Continuity Testing (RJ11)
- Connect one end of the RJ11 phone cable to the RJ11 port on the transmitter unit.
- Connect the other end of the RJ11 phone cable to the RJ11 port on the receiver unit.
- Follow steps 3-5 from the LAN Cable Continuity Testing section, observing the RJ11 specific LED indicators.
7. Maintenance
- Cleaning: Use a soft, dry cloth to clean the device. Do not use abrasive cleaners or solvents.
- Storage: Store the device in a cool, dry place, away from direct sunlight and extreme temperatures. If storing for extended periods, remove the batteries to prevent leakage.
- Battery Replacement: Replace batteries when the low battery indicator lights up or when the device's performance degrades.
8. Troubleshooting
| Problem | Possible Cause | Solution |
|---|---|---|
| No power | Dead batteries; Incorrect battery installation | Replace batteries; Check battery polarity |
| No signal during tracing | Transmitter off or in wrong mode; Receiver off or too far; Cable fault | Ensure transmitter is ON and in SCAN mode; Ensure receiver is ON; Move receiver closer; Check cable for damage |
| Incorrect continuity test results | Poor cable connection; Damaged cable; Wrong test mode | Ensure cables are fully inserted; Inspect cable for damage; Ensure transmitter is in TEST mode |
| Faint or distorted tracing tone | Low battery on receiver; High ambient noise; Receiver volume too low | Replace receiver batteries; Use headset; Increase receiver volume |
9. Specifications
| Feature | Detail |
|---|---|
| Brand | NOYAFA |
| Model Number | D3IN0009 (NF-806R) |
| Measurement Type | Wire Tracker, Continuity Tester |
| Cable Types Tested | RJ45 (LAN), RJ11 (Phone), Individual Wires, Twisted Pairs, Powered Electrical Wires |
| Power Source | Battery Powered (typically 9V for each unit) |
| Style | Lightweight |
| Color | Red |
| Shipping Dimensions | 27.9 x 15 x 4.6 cm |
| Weight | 272 grams (approx.) |
| ASIN | B00F5W9VIK |
| GTIN | 06920548147750 |
10. Warranty Information
NOYAFA products are manufactured to high-quality standards. This product comes with a standard manufacturer's warranty against defects in materials and workmanship. Please refer to the warranty card included in your package or visit the official NOYAFA website for detailed warranty terms and conditions. Keep your purchase receipt as proof of purchase.
11. Support
For technical support, troubleshooting assistance, or service inquiries, please contact NOYAFA customer service. Contact information can typically be found on the product packaging, the official NOYAFA website, or through your retailer.
When contacting support, please have your product model (NF-806R) and purchase details ready.


