1. Introduction and Overview
The Draminski Hay & Straw High-Moisture Meter with Probe Plus Temperature Display is a precision instrument designed for accurate measurement of moisture content in hay and silage, as well as displaying temperature. This manual provides essential information for the proper setup, operation, maintenance, and troubleshooting of your device to ensure reliable performance and longevity.
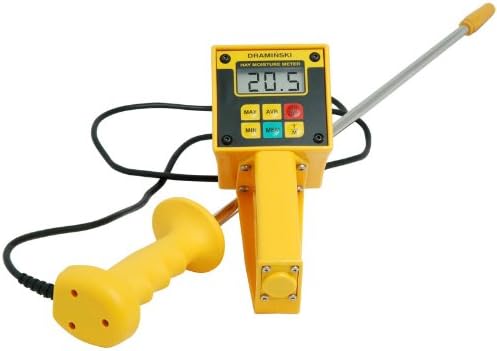
Figure 1: Draminski Hay & Straw High-Moisture Meter. The image shows the yellow main unit with a digital display, connected to a long metal probe and a separate yellow handle for stability during measurement.
2. Product Features
- Designed for Hay & Silage High-Moisture Measurement.
- Moisture Range: 10-80%.
- Functions include Minimum, Maximum, and Average readings.
- Temperature Display in Degrees Fahrenheit.
- Large Number LCD for easy reading.
- Probe Length: 22 Inches (56 cm).
- Powered by one 9 Volt Battery.
3. Safety Information
Please read and understand all safety instructions before operating the device. Failure to do so may result in injury or damage to the meter.
- Probe Handling: The probe is sharp. Handle with care to prevent injury. Keep out of reach of children.
- Electrical Safety: Do not expose the meter or probe to excessive moisture or liquids beyond its intended use. Avoid using the device in wet conditions that could compromise electrical components.
- Battery Safety: Use only the specified battery type (9V). Ensure correct polarity when installing. Do not mix old and new batteries. Remove batteries if the device will not be used for an extended period to prevent leakage.
- Storage: Store the meter in a dry, cool place, away from direct sunlight and extreme temperatures.
4. Setup
4.1. Battery Installation
- Locate the battery compartment on the back of the main unit.
- Open the battery compartment cover.
- Insert one 9V battery, ensuring the correct polarity (+/-) as indicated inside the compartment.
- Close the battery compartment cover securely.
4.2. Probe Connection
The probe is typically pre-connected. If it needs to be reconnected or checked:
- Ensure the meter is turned off.
- Connect the probe cable securely into the designated port on the main meter unit.
- Ensure the handle is also securely attached to its respective port, if applicable.
5. Operating Instructions
5.1. Powering On/Off
- To turn on the meter, press the POWER button. The LCD will illuminate and display the current reading or a default screen.
- To turn off the meter, press and hold the POWER button until the display turns off. The meter may also have an auto-off feature to conserve battery life.
5.2. Taking a Moisture Measurement
- Ensure the meter is powered on.
- Carefully insert the probe into the hay or silage bale. For best results, insert the probe deeply into the material, ensuring good contact.
- The moisture content will be displayed on the LCD screen. Allow a few seconds for the reading to stabilize.
- Take multiple readings in different locations within the bale for a more representative average.
5.3. Using MIN/MAX/AVG Functions
The meter is equipped with functions to display the minimum, maximum, and average moisture readings taken during a session.
- Press the MIN button to display the lowest moisture reading recorded.
- Press the MAX button to display the highest moisture reading recorded.
- Press the AVG button to display the average of all moisture readings taken.
- Consult the meter's specific button labels for exact function activation.
5.4. Temperature Display
In addition to moisture, the meter can display the temperature of the material. This reading is typically shown alongside the moisture content or can be toggled using a dedicated button (refer to your meter's specific controls).
- The temperature is displayed in Degrees Fahrenheit.
6. Maintenance
6.1. Cleaning
- After each use, wipe the probe clean with a dry cloth to remove any residue.
- Do not use abrasive cleaners or solvents on the meter or probe.
- Keep the display and buttons free from dust and debris.
6.2. Battery Replacement
When the battery indicator appears on the display or the meter fails to power on, replace the 9V battery following the instructions in Section 4.1.
6.3. Storage
When not in use, store the meter and probe in a protective case (if provided) in a dry, cool environment. Avoid storing in areas with extreme temperature fluctuations or high humidity.
7. Troubleshooting
| Problem | Possible Cause | Solution |
|---|---|---|
| Meter does not turn on. | Dead or improperly installed battery. | Replace the 9V battery, ensuring correct polarity. |
| Inaccurate or fluctuating readings. | Poor probe contact with material; probe dirty; material too dense/loose. | Ensure probe is fully inserted and making good contact. Clean the probe. Take multiple readings. |
| Display shows "Err" or similar error message. | Measurement out of range; internal malfunction. | Ensure moisture content is within 10-80% range. If problem persists, contact support. |
8. Specifications
| Brand | Draminski |
| Model Number | DSHMM |
| Moisture Range | 10-80% |
| Probe Length | 22 Inches (56 cm) |
| Temperature Display | Degrees Fahrenheit |
| Temperature Accuracy | 1.0 Degrees Fahrenheit |
| Lower Temperature Rating | 32 Degrees Fahrenheit |
| Upper Temperature Rating | 100 Degrees Fahrenheit |
| Power Source | One 9V Battery |
| Item Weight | 2.99 pounds (1.36 Kilograms) |
| Package Dimensions | 28.14 x 6.4 x 3.7 inches |
| Color | Yellow |
9. Warranty and Support
The Draminski Hay & Straw High-Moisture Meter comes with a 2-Year Warranty from the date of purchase, covering defects in materials and workmanship under normal use.
For technical support, warranty claims, or service inquiries, please contact the manufacturer or your authorized dealer. Keep your purchase receipt as proof of purchase for warranty purposes.
