1. Introduction
This manual provides detailed instructions for the installation and maintenance of the Johnson Evinrude OMC OEM Carburetor Repair Kit, part number 0398453. This kit is designed to restore optimal performance to compatible 9.9HP and 15HP Johnson and Evinrude outboard engines manufactured between 1975 and 1988. Proper installation of these components is crucial for the correct functioning of your engine's fuel system.
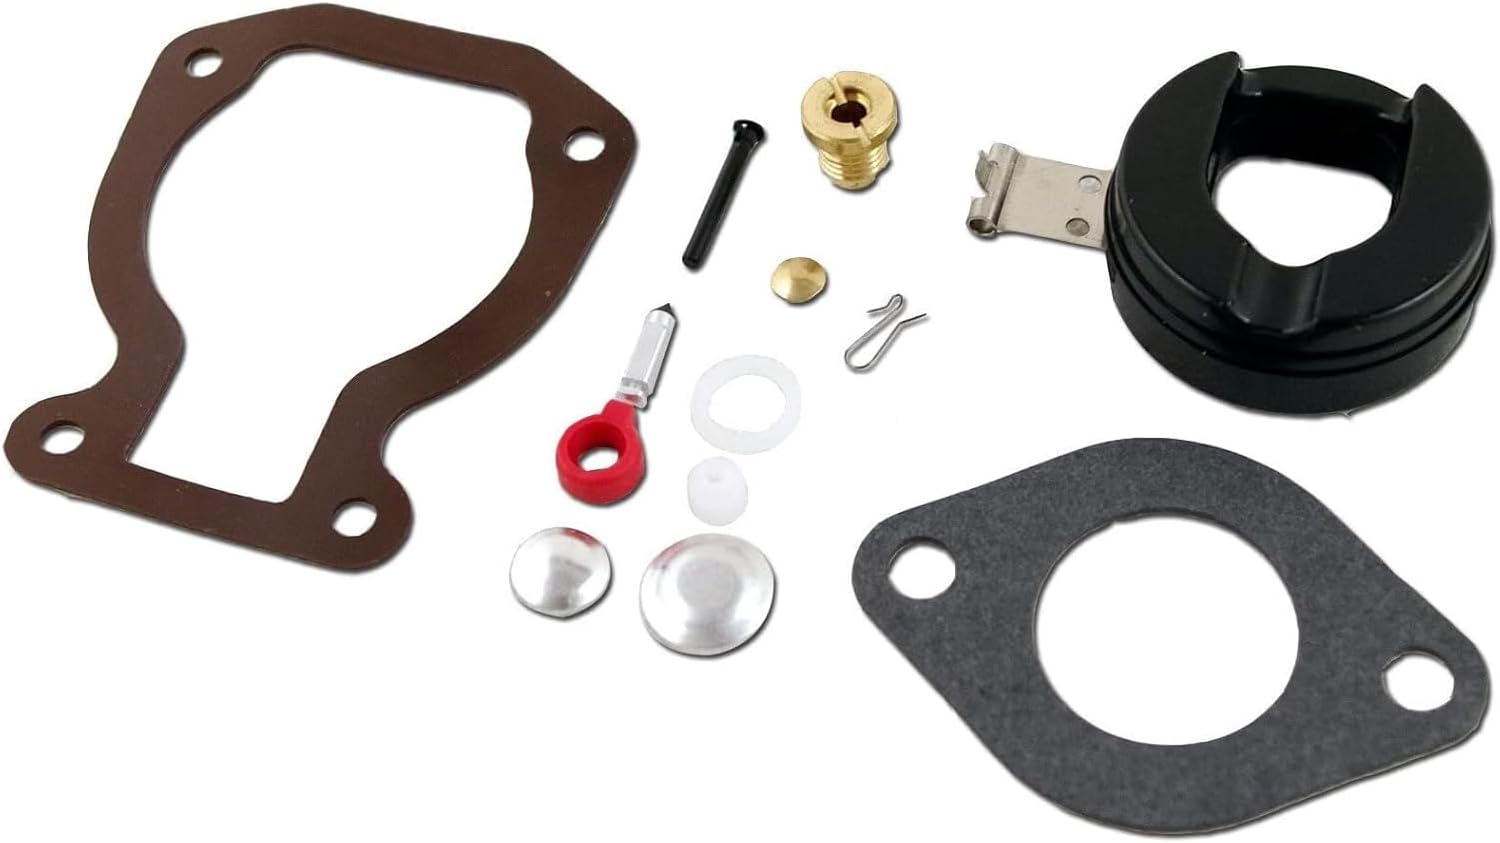
Figure 1: Overview of the Johnson Evinrude OMC OEM Carburetor Repair Kit 0398453 components.
2. Safety Information
Always prioritize safety when working with fuel systems and engine components. Failure to follow safety precautions can result in injury or damage to equipment.
- Ensure the engine is turned off and cooled down before beginning any work.
- Disconnect the battery to prevent accidental starting.
- Work in a well-ventilated area to avoid inhaling fuel fumes.
- Wear appropriate personal protective equipment (PPE), including safety glasses and gloves.
- Have a fire extinguisher readily available.
- Dispose of old fuel and parts according to local regulations.
3. Engine Compatibility
This carburetor repair kit is compatible with the following Johnson and Evinrude outboard engine models and years:
- Evinrude 9.9HP: 1975-1986, 1988
- Evinrude 15HP: 1975-1986, 1988
- Johnson 9.9HP: 1975-1977, 1979-1986, 1988
- Johnson 15HP: 1975-1977, 1979-1986, 1988
- Johnson 75HP: 1975 (Note: Verify specific carburetor model for 75HP.)
It is recommended to verify your specific engine's carburetor model number against the kit's part number (0398453) to ensure proper fitment before beginning the repair.
4. Setup and Preparation
Before starting the carburetor rebuild, gather all necessary tools and prepare your workspace.
4.1 Required Tools
- Screwdrivers (flathead and Phillips)
- Wrenches or socket set
- Pliers
- Carburetor cleaner
- Compressed air
- Clean rags or shop towels
- Small containers for organizing parts
- Service manual for your specific engine model (recommended)
4.2 Workspace Preparation
- Work on a clean, well-lit surface.
- Place a drop cloth or newspaper to catch spills.
- Ensure adequate ventilation.
5. Carburetor Rebuild Procedure
This section outlines the general steps for rebuilding your carburetor using the 0398453 kit. Refer to your engine's specific service manual for detailed diagrams and torque specifications.
5.1 Disassembly
- Carefully remove the carburetor from the engine. Note the position of all hoses and linkages.
- Place the carburetor on a clean workbench.
- Remove the float bowl. Inspect for debris or corrosion.
- Remove the float pin and float.
- Remove the needle valve and seat.
- Carefully remove all jets, emulsion tubes, and other small components. Keep them organized.
- Remove all old gaskets and O-rings.

Figure 2: Various components included in the repair kit, essential for a complete rebuild.
5.2 Cleaning
- Spray all metal carburetor components with carburetor cleaner. Allow to soak as directed by the cleaner manufacturer.
- Use small brushes (often included in kits or available separately) to clean all passages, jets, and orifices.
- Rinse thoroughly with clean carburetor cleaner or appropriate solvent.
- Blow out all passages with compressed air. Ensure no debris remains.
- Inspect all components for wear, damage, or corrosion. Replace any damaged parts not included in the kit if necessary.
5.3 Reassembly
- Install new needle valve seat and needle from the kit.
- Install the new float and float pin. Adjust float height according to your engine's service manual specifications.
- Install all new gaskets and O-rings from the kit. Ensure they are correctly seated.
- Reinstall all jets, emulsion tubes, and other small components.
- Attach the float bowl with a new gasket.
- Reinstall the carburetor onto the engine, ensuring all linkages and hoses are correctly connected.
- Tighten all fasteners to the manufacturer's specified torque.

Figure 3: Detailed view of gaskets and seals, crucial for preventing fuel leaks and ensuring proper vacuum.
Video 1: A visual overview of the 0398453 Carburetor Rebuild Kit components and their general application. This video provides a helpful visual aid for identifying parts.
6. Post-Rebuild Maintenance
After rebuilding and reinstalling the carburetor, proper maintenance will ensure its longevity and optimal engine performance.
- Fuel Quality: Always use fresh, high-quality fuel. Stale or contaminated fuel is a primary cause of carburetor issues.
- Fuel Stabilizer: Use a marine-grade fuel stabilizer, especially during storage periods, to prevent fuel degradation and gum formation.
- Fuel Filter: Regularly inspect and replace the fuel filter to prevent debris from reaching the carburetor.
- Engine Storage: Before long-term storage, run the engine until the fuel in the carburetor is consumed, or drain the float bowl to prevent varnish buildup.
7. Troubleshooting Common Issues
If you encounter problems after rebuilding your carburetor, consider the following common issues and their potential solutions:
| Symptom | Possible Cause | Solution |
|---|---|---|
| Engine won't start or starts with difficulty | Incorrect float height, clogged jet, air leak, fuel delivery issue | Verify float height, re-clean jets, check for proper gasket seating, inspect fuel lines. |
| Engine runs rough or stalls at idle | Idle mixture screw misadjusted, clogged idle jet, air leak | Adjust idle mixture screw (refer to service manual), clean idle circuit, check manifold gaskets. |
| Fuel leaks from carburetor | Damaged or improperly seated gaskets/O-rings, stuck float, loose screws | Inspect and replace gaskets/O-rings, check float for free movement, tighten all screws. |
| Poor acceleration or lack of power | Main jet partially clogged, incorrect float height, fuel pump issue | Clean main jet, verify float height, check fuel pump operation. |

Figure 4: A comprehensive display of all parts within the kit, aiding in identification during assembly.
8. Product Specifications
- Part Number: 0398453
- Brand: Evinrude (OEM)
- Manufacturer: EMP
- Item Weight: Approximately 0.845 ounces
- Product Dimensions: Approximately 4 x 4 x 4 inches (packaging)
- UPC: 000130001427, 745419012434
- Compatibility: Johnson/Evinrude 9.9-15HP (1975-1988)
Video 2: A general promotional video showcasing various JLM Marine boat engine carburetor parts. While not specific to this kit's installation, it illustrates the range of components available from the manufacturer.
9. Warranty and Support
For specific warranty information regarding the Johnson Evinrude OMC OEM Carburetor Repair Kit 0398453, please refer to the documentation provided with your purchase or contact the seller directly. As this is an OEM part, manufacturer warranty terms typically apply.
For technical support or further assistance with installation, it is recommended to consult a qualified marine mechanic or refer to the official service manual for your specific engine model.