
1. Introduction
The Aerocool X-Vision is a sophisticated 5-channel fan controller designed to enhance your computer's cooling system. It provides real-time monitoring and control over fan speeds and temperatures, ensuring optimal performance and system stability. This manual provides detailed instructions for installation, operation, and maintenance of your X-Vision unit.
2. Product Features
- ABS construction with a clear LCD display.
- Monitors and controls five independent fan speeds and corresponding temperatures.
- Switchable temperature display between Celsius (°C) and Fahrenheit (°F).
- Integrated overheat alarm warning system.
- LCD backlight on/off function for user preference.
- Real-time fan RPM (Revolutions Per Minute) display.
- Fan voltage display for each channel.
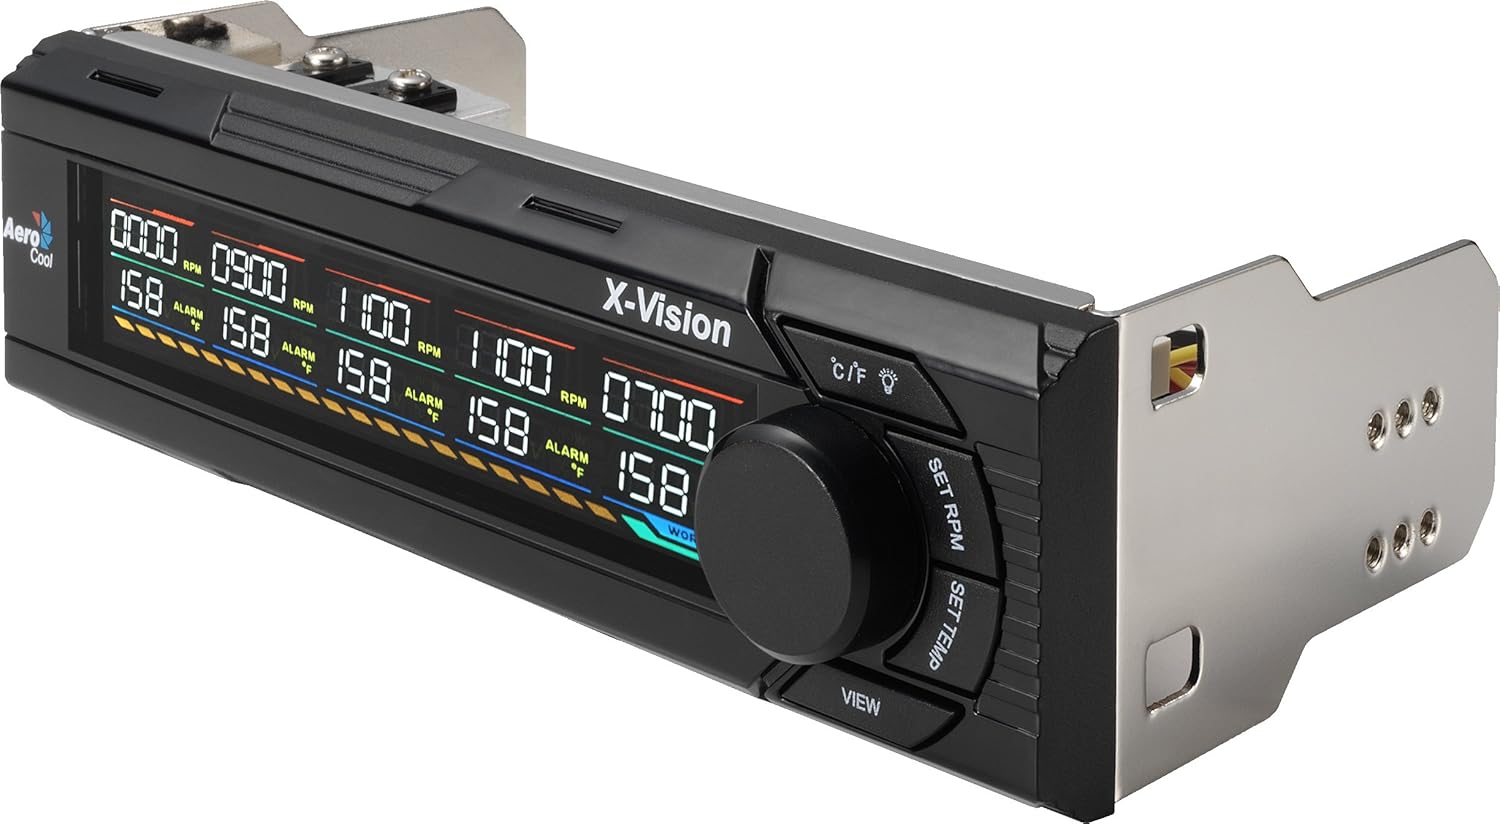
Figure 1: Front view of the Aerocool X-Vision fan controller, displaying its LCD screen with fan speed (RPM), temperature (°C/°F), and control buttons.
3. Package Contents
Please verify that all items are present in the package:
- Aerocool X-Vision 5-Channel Fan Controller Unit
- Temperature Sensors (5x)
- Fan Extension Cables (5x)
- Mounting Screws
- User Manual (this document)

Figure 2: Rear view of the Aerocool X-Vision, illustrating the internal components and connection points for fans and temperature sensors.
4. Installation
4.1 Safety Precautions
- Ensure your computer is powered off and unplugged from the wall outlet before installation.
- Discharge any static electricity by touching a grounded metal object to prevent damage to components.
- Handle all computer components carefully to avoid physical damage.
4.2 Hardware Installation
- Open your computer case.
- Locate an available 5.25-inch drive bay at the front of your computer case.
- Slide the Aerocool X-Vision unit into the chosen drive bay from the front of the case until it is flush with the bezel.
- Secure the unit with the provided mounting screws on both sides of the drive bay.
- Connect the 4-pin Molex power connector from your power supply to the corresponding port on the X-Vision unit.
- Connect your case fans to the fan headers on the X-Vision unit. Each header is typically labeled for a specific channel (FAN1-FAN5).
- Attach the temperature sensors to the components you wish to monitor (e.g., CPU heatsink, GPU, hard drive, case interior). Ensure good physical contact for accurate temperature readings.
- Carefully route all cables to maintain good airflow within the case.
- Close your computer case.
5. Operating Instructions
5.1 Initial Power On
After completing the installation, power on your computer. The X-Vision LCD display will illuminate, showing current fan speeds (RPM) and temperatures (°C/°F) for each connected channel.
5.2 Button Functions
- C/F Button: Toggles the temperature display unit between Celsius (°C) and Fahrenheit (°F).
- Light Bulb Icon Button: Turns the LCD backlight on or off.
- SET RPM Button: Used to select a fan channel and then adjust its speed. Press repeatedly to cycle through channels.
- SET TEMP Button: Used to select a temperature channel and then set its alarm threshold. Press repeatedly to cycle through channels.
- VIEW Button: Cycles through the display of different channels or modes, if applicable.
- Rotary Knob: Adjusts values (fan RPM, temperature alarm threshold) when in setting mode. Turn clockwise to increase, counter-clockwise to decrease.
5.3 Setting Fan Speeds
- Press the SET RPM button. The display will highlight the fan channel currently being adjusted.
- Press SET RPM repeatedly to cycle through the five fan channels (FAN1 to FAN5).
- Once the desired channel is selected, rotate the Rotary Knob to increase or decrease the fan speed (RPM).
- The new setting will be saved automatically after a few seconds of inactivity or by pressing another function button.
5.4 Setting Temperature Alarms
- Press the SET TEMP button. The display will highlight the temperature alarm setting for the currently selected channel.
- Press SET TEMP repeatedly to cycle through the five temperature channels (TEMP1 to TEMP5).
- Once the desired channel is selected, rotate the Rotary Knob to set the desired temperature threshold.
- If the monitored temperature exceeds this threshold, an audible alarm will sound, and the corresponding temperature display will flash.
- The new setting will be saved automatically after a few seconds of inactivity or by pressing another function button.
6. Maintenance
- Keep the front panel clean using a soft, dry, lint-free cloth. Avoid using abrasive cleaners or solvents, which may damage the display or finish.
- Periodically check all fan and temperature sensor connections to ensure they are secure and have not come loose.
- Ensure temperature sensors maintain good contact with the monitored components for accurate readings.
- Dust accumulation inside the computer case can significantly affect cooling performance. Clean your computer's interior regularly to maintain optimal temperatures.
7. Troubleshooting
| Problem | Possible Cause | Solution |
|---|---|---|
| Display is off or not illuminating. | No power connection or loose power cable. | Ensure the 4-pin Molex power connector is securely attached to both the X-Vision unit and the power supply. Check that the computer is powered on. |
| Fan not spinning or RPM not displayed for a channel. | Fan not connected, faulty fan, or incorrect fan type. | Check the fan connection to the X-Vision unit for the specific channel. Test the fan by connecting it directly to the motherboard or another known working power source. Ensure the fan is compatible. |
| Temperature reading is inaccurate or missing for a channel. | Temperature sensor not properly attached, faulty sensor, or loose cable. | Ensure the temperature sensor is making good, direct contact with the component being monitored. Check the sensor cable connection to the X-Vision unit. Replace the sensor if suspected faulty. |
| Overheat alarm sounds frequently. | Alarm threshold set too low or actual component overheating. | Adjust the temperature alarm threshold using the SET TEMP button to a more appropriate level. Verify system cooling and component temperatures using other monitoring software to confirm if actual overheating is occurring. |
8. Specifications
- Model: Aerocool X-Vision (EN55529)
- Channels: 5 (Independent Fan Speed & Temperature Monitoring)
- Display: LCD (Liquid Crystal Display)
- Temperature Units: Celsius (°C) / Fahrenheit (°F) selectable
- Alarm: Overheat Warning Alarm
- Power Connector: 4-pin Molex
- Drive Bay Size: Standard 5.25-inch
- Material: ABS Plastic
9. Warranty and Support
Aerocool products are manufactured to high-quality standards and undergo rigorous testing. For detailed warranty information, technical support, or service inquiries, please refer to the official Aerocool website or contact your local retailer where the product was purchased. Please retain your proof of purchase for any warranty claims.
Official Website: www.aerocool.io


