
1. Introduction
This manual provides essential information for the proper installation, operation, and maintenance of your Toro P-220 Pressure Regulating Electric Valve. Designed for commercial applications, this heavy-duty valve features a glass-filled nylon construction and is capable of handling pressures up to 220 PSI (15.2 bar) while offering precise pressure regulation from 5-100 PSI (0.3 - 6.9 bar).
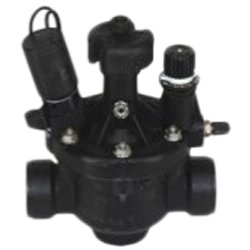
Figure 1: Toro P-220 Pressure Regulating Electric Valve. This image shows the compact design of the valve with its electrical components and NPT connections.
Key Features:
- Heavy-Duty Construction: Glass-filled nylon for durability in commercial environments.
- High Pressure Capability: Withstands pressures up to 220 PSI (15.2 bar).
- Adjustable Pressure Regulation: Regulates flow pressure from 5-100 PSI (0.3 - 6.9 bar).
- 1" NPT Connections: Standard National Pipe Tapered threads for easy integration.
- DC Latching Solenoid: Efficient and reliable electrical control.
2. Safety Information
Please read and understand all safety instructions before installing or operating the Toro P-220 valve. Failure to follow these instructions may result in property damage, injury, or death.
- WARNING: Always depressurize the system before attempting any installation, maintenance, or repair.
- CAUTION: Electrical connections should only be performed by qualified personnel in accordance with local electrical codes.
- Ensure proper sealing of all NPT connections to prevent leaks.
- Do not exceed the maximum operating pressure of 220 PSI (15.2 bar).
- Keep children and unauthorized personnel away from the installation area.
3. Setup and Installation
Proper installation is crucial for the optimal performance and longevity of your Toro P-220 valve. It is recommended that installation be performed by a professional familiar with irrigation or plumbing systems.
3.1 Pre-Installation Checks
- Verify that the system pressure does not exceed 220 PSI (15.2 bar).
- Ensure the water supply is clean and free of debris. Install a filter upstream if necessary.
- Confirm that the electrical supply matches the requirements of the DC latching solenoid.
3.2 Mounting the Valve
- Turn off the main water supply and depressurize the system.
- Identify the inlet and outlet ports on the valve. The valve typically has an arrow indicating flow direction.
- Apply appropriate thread sealant (e.g., PTFE tape or pipe dope) to the 1" NPT male threads of your piping.
- Thread the valve onto the pipes, ensuring a tight, leak-free connection. Do not overtighten, as this can damage the valve body.
- Ensure the valve is installed in an accessible location for future maintenance.
3.3 Electrical Connections
- Connect the wires from your irrigation controller or power source to the DC latching solenoid wires.
- Ensure polarity is correct if specified by your controller. Latching solenoids typically require a pulse of power to open and a reverse pulse to close. Refer to your controller's manual for specific wiring instructions.
- Use waterproof connectors for all outdoor electrical connections to prevent corrosion and short circuits.
- Secure all wiring to prevent accidental damage.
4. Operation
The Toro P-220 valve is designed for automatic operation via an irrigation controller. It also features manual override capabilities and adjustable pressure regulation.
4.1 Automatic Operation
- Once wired to a compatible DC latching controller, the valve will open and close according to the programmed schedule.
- A brief electrical pulse from the controller will open the valve, and another pulse (often with reversed polarity) will close it.
4.2 Manual Operation
- The valve typically includes a manual bleed screw or lever. Turning this counter-clockwise will manually open the valve, allowing water to flow.
- Turn clockwise to close the valve manually. Always ensure the manual override is fully closed for automatic operation.
4.3 Pressure Regulation Adjustment
The P-220 valve allows for outlet pressure regulation between 5-100 PSI (0.3 - 6.9 bar).
- Locate the pressure adjustment screw on the valve body (often under a cap).
- With the valve open and water flowing, slowly turn the adjustment screw clockwise to increase pressure or counter-clockwise to decrease pressure.
- Use a pressure gauge downstream of the valve to accurately set the desired pressure.
- Once the desired pressure is set, replace any protective caps.
5. Maintenance
Regular maintenance ensures the reliable performance and extends the lifespan of your Toro P-220 valve.
- Periodic Inspection: Annually inspect the valve for any signs of leaks, cracks, or damage to the wiring.
- Cleanliness: If the water source contains sediment, periodically clean the internal components of the valve. This may involve disassembling the top of the valve to access the diaphragm and filter screen. Always turn off the water supply and depressurize the system before disassembly.
- Winterization: In freezing climates, ensure the valve and associated piping are properly drained or protected from freezing temperatures to prevent damage.
6. Troubleshooting
This section provides solutions to common issues you might encounter with your Toro P-220 valve.
| Problem | Possible Cause | Solution |
|---|---|---|
| Valve does not open. | No electrical signal; faulty solenoid; clogged diaphragm; manual override engaged. | Check controller wiring and programming; test solenoid; clean internal components; ensure manual override is closed. |
| Valve does not close. | No electrical signal to close; debris in valve; damaged diaphragm; manual override engaged. | Check controller wiring; flush valve to clear debris; inspect/replace diaphragm; ensure manual override is closed. |
| Incorrect or fluctuating pressure. | Improper pressure adjustment; debris in valve; faulty pressure gauge. | Re-adjust pressure setting; clean valve internals; verify pressure with a known good gauge. |
| Water leaks from valve. | Loose connections; damaged O-rings or seals; cracked valve body. | Tighten connections; replace O-rings/seals; replace valve if body is cracked. |
7. Specifications
| Model Number | P220-27-94 |
| Brand | Toro |
| Material | Glass-filled Nylon |
| Inlet Connection Type | 1" National Pipe Tapered (NPT) |
| Outlet Connection Type | 1" MNPT |
| Maximum Operating Pressure | 220 PSI (15.2 bar) |
| Pressure Regulation Range | 5-100 PSI (0.3 - 6.9 bar) |
| Solenoid Type | DC Latching |
| Item Dimensions (L x W x H) | 6.75 x 4 x 4 inches |
| Item Weight | 16 ounces (1 lb) |
| UPC / GTIN | 090258058052 |
8. Warranty and Support
For specific warranty details and terms, please refer to the documentation included with your purchase or visit the official Toro website. If you require technical assistance, replacement parts, or have questions regarding your Toro P-220 valve, please contact Toro customer support.
Toro Customer Support:
- Visit Toro Support Website
- Refer to your product packaging for contact phone numbers.