1. Introduction
This manual provides essential instructions for the safe and efficient operation of your JVC HR-J610U Video Cassette Recorder (VCR). Please read this manual thoroughly before using the unit and retain it for future reference. Proper understanding of these instructions will ensure optimal performance and longevity of your VCR.
2. Safety Information
To prevent fire or electric shock, and to ensure safe operation, observe the following precautions:
- Power Source: Connect the VCR only to an AC 120V, 60Hz power outlet.
- Ventilation: Do not block ventilation openings. Ensure adequate space around the unit for proper airflow to prevent overheating.
- Liquids: Do not expose the VCR to rain or moisture. Do not place objects filled with liquids, such as vases, on the unit.
- Foreign Objects: Do not insert any objects into the VCR's openings, as they may touch dangerous voltage points or short-out parts.
- Cleaning: Unplug the VCR from the wall outlet before cleaning. Use a dry cloth only.
- Servicing: Do not attempt to service this product yourself. Refer all servicing to qualified service personnel.
3. Product Overview
3.1 Front Panel Controls and Indicators
The front panel provides access to essential controls for operating the VCR, including power, tape transport functions, and input selection.
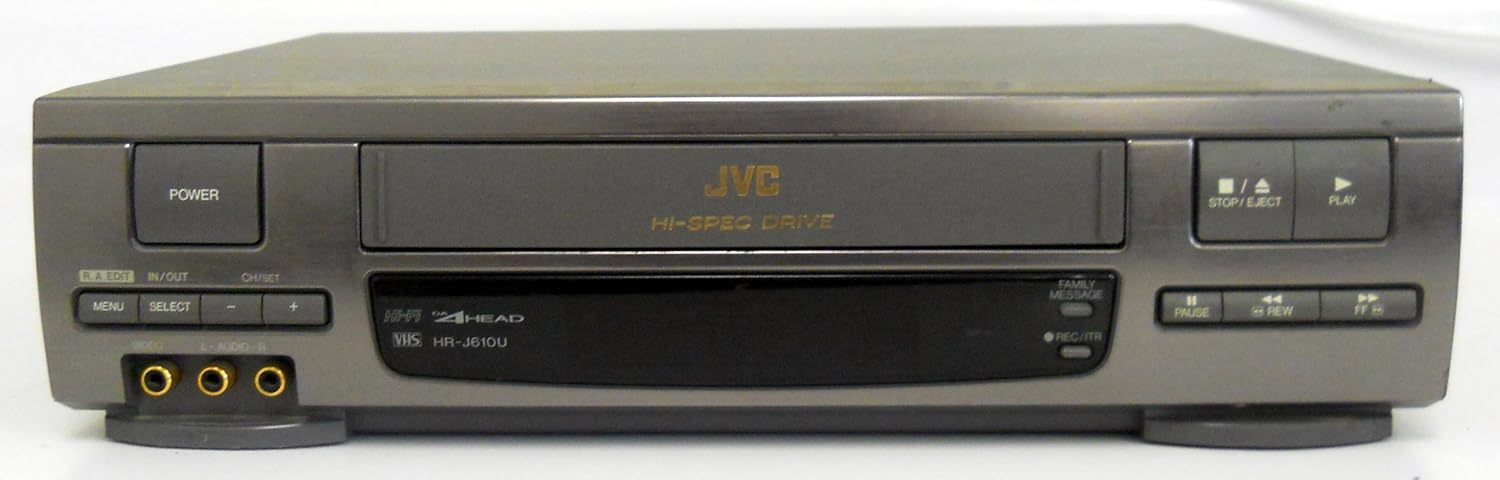
Figure 3.1: Front view of the JVC HR-J610U VCR, showing the cassette slot, power button, and various control buttons.

Figure 3.2: Left side of the front panel, featuring the POWER button, R.A. EDIT, IN/OUT, CH/SET, MENU, SELECT, channel adjustment buttons (-/+), VIDEO input, and L-AUDIO-R input jacks.
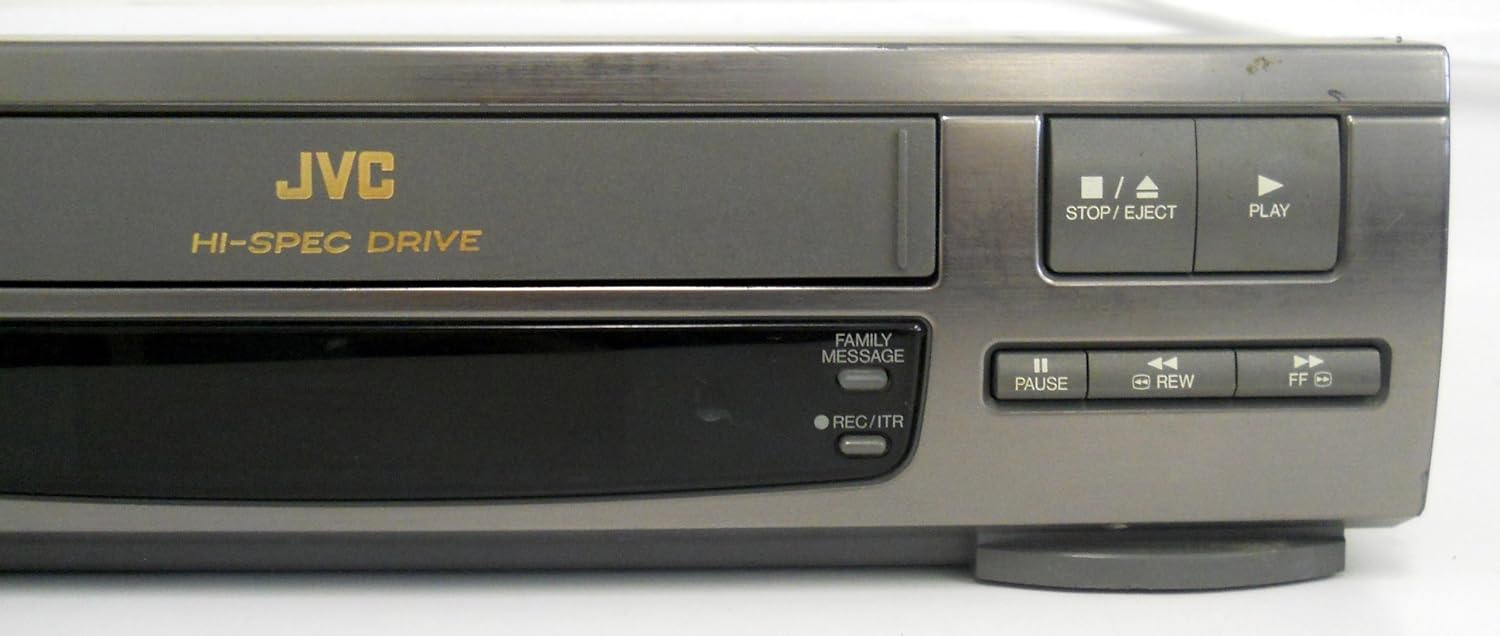
Figure 3.3: Right side of the front panel, showing the STOP/EJECT, PLAY, PAUSE, REW (Rewind), FF (Fast Forward) buttons, FAMILY MESSAGE indicator, and REC/ITR (Record/Instant Timer Recording) button.
3.2 Rear Panel Connections
The rear panel provides various input and output terminals for connecting the VCR to a television, antenna, or other audio/video equipment.

Figure 3.4: Rear panel connections, including AUDIO R/L IN/OUT, VIDEO IN/OUT, R.A. EDIT, AV COMPU LINK, ANT. IN, RF OUT, and the CH3/CH4 switch.
3.3 Model Information Label
The product label, typically located on the rear or bottom of the unit, contains important regulatory and model information.

Figure 3.5: Model information label, displaying the brand JVC, model number HR-J610U, power requirements (AC 120V, 60Hz, 19W), serial number, UL listing, and FCC ID.
4. Setup
4.1 Unpacking and Placement
- Carefully remove the VCR from its packaging.
- Place the VCR on a stable, level surface.
- Ensure there is adequate ventilation space (at least 10 cm or 4 inches) around the top, sides, and rear of the unit to prevent heat buildup. Do not place the VCR in an enclosed cabinet without proper airflow.
- Avoid placing the VCR near heat sources, direct sunlight, or areas with excessive dust or humidity.
4.2 Connecting to a Television
There are two primary methods for connecting your VCR to a television:
Method 1: Using RF (Coaxial) Cable
- Connect your antenna or cable TV signal to the ANT. IN jack on the VCR's rear panel.
- Connect a coaxial cable from the RF OUT jack on the VCR to the Antenna In or RF In jack on your television.
- Set the CH3/CH4 switch on the VCR's rear panel to either CH3 or CH4, matching the channel you will tune your TV to for VCR output.
- Tune your television to the corresponding channel (CH3 or CH4) to view the VCR's output.
Method 2: Using Audio/Video (RCA) Cables
- Connect a yellow RCA cable from the VIDEO OUT jack on the VCR to the Video In jack on your television.
- Connect red and white RCA cables from the AUDIO R OUT and AUDIO L OUT jacks on the VCR to the corresponding Audio R In and Audio L In jacks on your television.
- Select the appropriate AV input on your television (e.g., Video 1, AV1, Input 1) to view the VCR's output.
4.3 Connecting External Devices (e.g., Camcorder)
To connect an external device like a camcorder for recording to VHS:
- Connect a yellow RCA cable from the external device's Video Out to the VIDEO IN jack on the VCR's front panel.
- Connect red and white RCA cables from the external device's Audio R Out and Audio L Out to the L-AUDIO-R IN jacks on the VCR's front panel.
- Ensure the VCR is set to the correct input source (usually automatically detected when using front inputs, or selected via the MENU).
4.4 Initial Power On and Channel Setup
- Plug the VCR's power cord into a wall outlet.
- Press the POWER button on the VCR's front panel.
- If connecting via RF, ensure your TV is tuned to CH3 or CH4. If connecting via AV cables, select the correct AV input on your TV.
- Access the VCR's on-screen menu (using the MENU button) to perform initial channel setup or auto-tuning, if required for recording TV broadcasts. Follow the on-screen prompts.
5. Operating Instructions
5.1 Loading and Ejecting a VHS Cassette
- Loading: Insert a VHS cassette into the cassette slot with the tape window facing forward. Push gently until the VCR automatically pulls the tape in.
- Ejecting: Press the STOP/EJECT button. The cassette will be ejected from the slot.
5.2 Playing a VHS Tape
- Load a VHS cassette into the VCR.
- Press the PLAY button. The VCR will begin playing the tape.
- Use the PAUSE button to temporarily stop playback. Press PLAY again to resume.
- Press the STOP/EJECT button to stop playback.
5.3 Recording Television Programs
Instant Timer Recording (ITR)
- Ensure a blank or recordable VHS tape is loaded.
- Tune the VCR to the desired TV channel using the CH/SET buttons.
- Press the REC/ITR button. The VCR will begin recording. Each press of the button typically adds 30 minutes to the recording time.
- To stop recording, press the STOP/EJECT button.
Timer Recording (Advanced)
For scheduled recordings, access the VCR's on-screen menu using the MENU button. Navigate to the Timer Recording or Program Recording section. Follow the on-screen instructions to set the start time, end time, channel, and date for your recording. Ensure the VCR is powered on or in standby mode for timer recording to activate.
5.4 Using On-Screen Display (OSD) and Menu
- Press the MENU button on the front panel to display the on-screen menu.
- Use the CH/SET buttons (up/down) to navigate through menu options.
- Use the SELECT button to confirm a selection or enter a sub-menu.
- Press the MENU button again to exit the menu.
6. Maintenance
6.1 Cleaning the VCR
- Exterior: Wipe the exterior of the VCR with a soft, dry cloth. For stubborn dirt, slightly dampen the cloth with water and a mild detergent, then wipe dry. Do not use abrasive cleaners or solvents.
- Video Heads: Over time, video heads can accumulate dirt, leading to poor picture quality. Use a specialized VHS head cleaning cassette according to its instructions. For persistent issues, professional servicing may be required. Avoid attempting to clean the internal components manually.
6.2 Tape Care
- Store VHS tapes in their cases, away from direct sunlight, extreme temperatures, and strong magnetic fields.
- Avoid using damaged or moldy tapes, as they can damage the VCR's internal mechanisms.
- Rewind tapes fully before storing them.
7. Troubleshooting
If you encounter problems with your VCR, refer to the following table for common issues and their solutions.
| Problem | Possible Cause | Solution |
|---|---|---|
| No power | Power cord unplugged; Power outlet faulty; VCR power switch off. | Check power cord connection; Test outlet with another device; Press the POWER button. |
| No picture/sound on TV | Incorrect TV input selected; Loose AV/RF cables; VCR not playing. | Select correct TV input (e.g., AV1, CH3/CH4); Check all cable connections; Ensure VCR is in PLAY mode. |
| Tape won't play or eject | Tape jammed; VCR malfunction; Power issue. | Try pressing STOP/EJECT multiple times; Power cycle the VCR (unplug, wait 30s, plug back in); Do not force the tape. If problem persists, seek professional service. |
| Poor picture quality (snowy, distorted) | Dirty video heads; Damaged tape; Weak signal (for recording/live TV). | Use a head cleaning cassette; Try a different tape; Check antenna/cable connections. |
| Remote control not working | Dead batteries; Obstruction between remote and VCR; Incorrect remote mode. | Replace batteries; Remove obstructions; Ensure remote is in VCR mode (if universal). |
8. Specifications
The following are the technical specifications for the JVC HR-J610U VCR:
- Model: HR-J610U
- Video System: VHS
- Video Heads: 4-Head DA (Dynamic Azimuth)
- Audio System: Hi-Fi Stereo
- Power Requirements: AC 120V, 60Hz
- Power Consumption: 19W
- Approximate Dimensions (W x H x D): 14.3 x 3.7 x 11.9 inches (based on package dimensions)
- Approximate Weight: 9.2 pounds
- FCC ID: ASIPBD026
9. Warranty Information
Specific warranty details for the JVC HR-J610U are not provided within this document. Please refer to the warranty card included with your original purchase, the product packaging, or the official JVC website for the most current and accurate warranty terms and conditions.
10. Customer Support
For further assistance, technical support, or service inquiries regarding your JVC HR-J610U VCR, please visit the official JVC website or contact their customer service department. Contact information and support resources are typically available on the manufacturer's website.


