1. Introduction and Safety Information
Thank you for choosing the SCHEPPACH BASA1 Electric Wood Band Saw. This manual provides essential information for the safe and efficient operation, maintenance, and troubleshooting of your new tool. Please read this manual thoroughly before initial use and keep it for future reference. Adherence to all safety instructions is crucial to prevent injury and ensure optimal performance.
General Safety Warnings
- Always wear appropriate personal protective equipment (PPE), including safety glasses, hearing protection, and dust mask.
- Ensure the work area is clean, well-lit, and free from obstructions.
- Keep children and bystanders away from the operating machine.
- Never operate the band saw if you are tired, under the influence of drugs, alcohol, or medication.
- Disconnect the power supply before making any adjustments, changing blades, or performing maintenance.
- Use the correct blade for the material being cut.
- Do not force the tool; let the blade do the work.
- Ensure all guards and safety devices are in place and functioning correctly before operation.
2. Product Overview
The SCHEPPACH BASA1 is a compact and versatile electric band saw designed for woodworking tasks. It features a robust construction and precision components for accurate cutting.
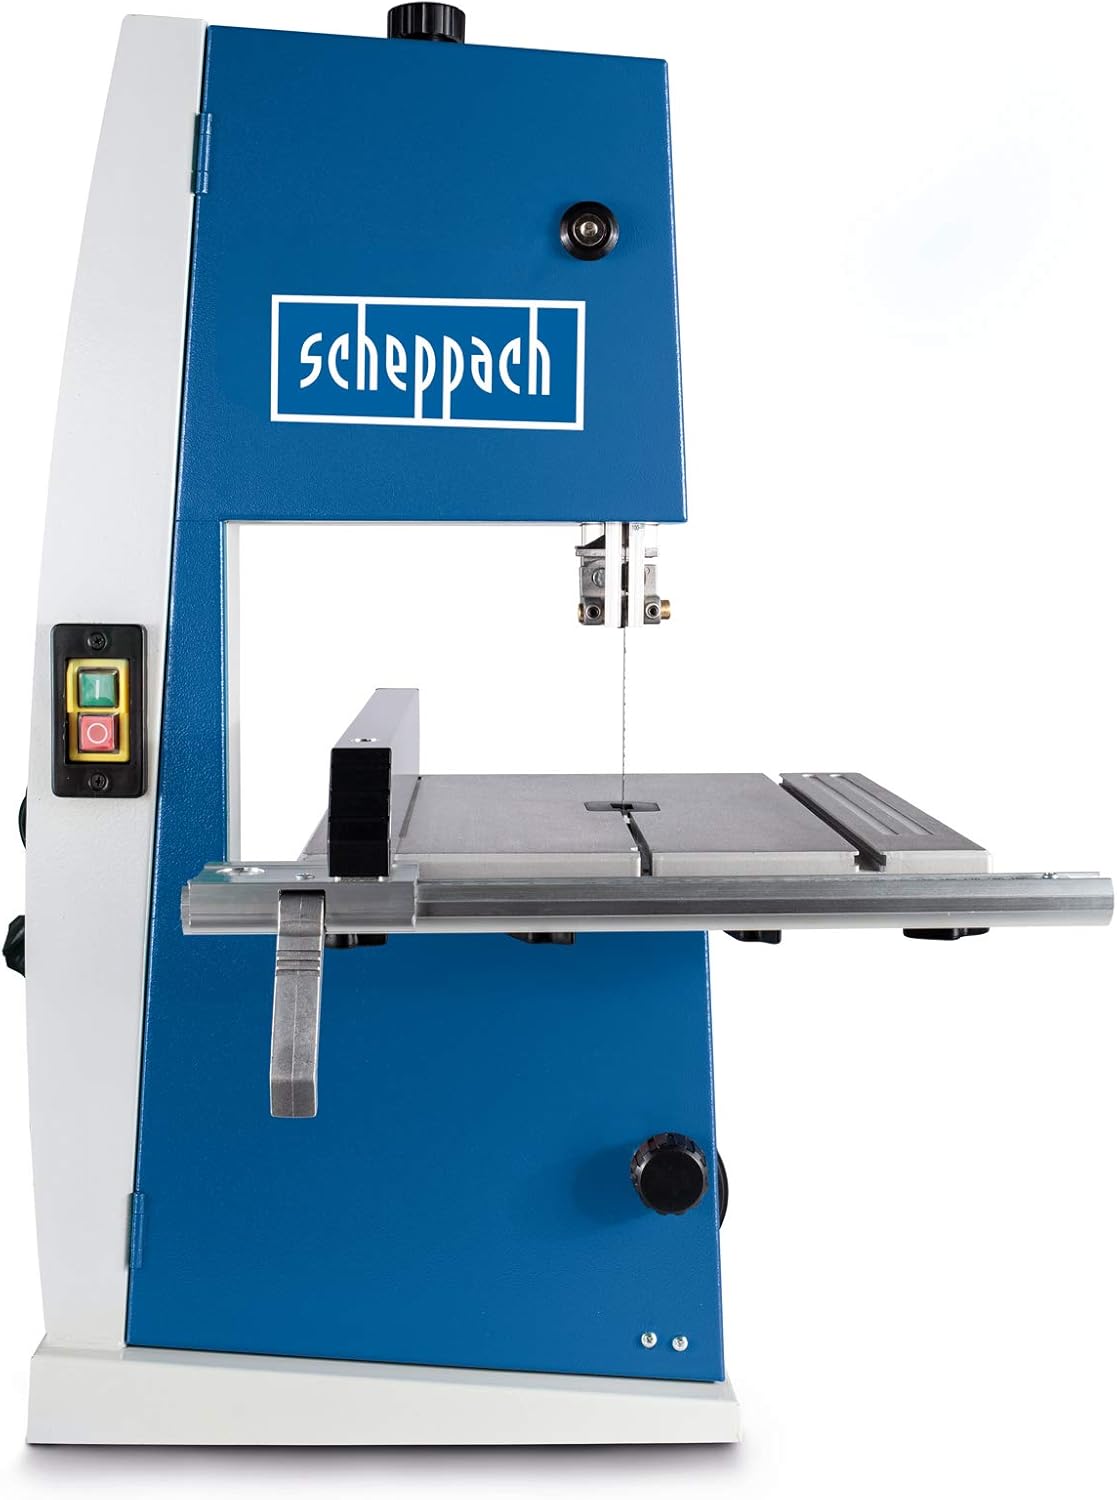
Figure 2.1: Front view of the Scheppach BASA1 Band Saw.
Key Features
- Precision Roller Guides: Equipped with 3 hardened roller guides above and below the table for accurate blade guidance.
- Adjustable Upper Blade Guide: Height-adjustable via a rack and pinion system.
- Balanced Flywheels: Rubber-coated and balanced flywheels ensure smooth blade operation.
- Tilting Aluminum Table: The work table is made of aluminum and can be tilted from 0° to +45° for angled cuts.
- Precision Parallel Guide: Features a magnifying glass for precise adjustments, usable on both the left and right sides of the blade.
- Dust Extraction Port: Allows for connection to a dust extraction system for a cleaner work environment.

Figure 2.2: Illustration comparing the stable aluminum die-cast table of the BASA1 (left) with a conventional sheet metal table (right).

Figure 2.3: View of the balanced and ground band wheels with rubber coating, ensuring smooth running and precise blade guidance.
3. Setup
Unpacking and Assembly
- Carefully remove all components from the packaging.
- Inspect for any shipping damage. Report any damage immediately.
- Mount the work table to the machine body using the provided screws. Ensure it is securely fastened.
- Install the parallel guide and ensure it slides smoothly and locks firmly.
Initial Adjustments
Before first use, it is critical to perform several adjustments to ensure safe and accurate operation. Refer to the detailed instructions in the manufacturer's manual for precise steps.
- Blade Tension: Adjust the blade tension according to the blade type and material. Incorrect tension can lead to blade breakage or inaccurate cuts.
- Blade Tracking: Ensure the blade runs centrally on the rubber-coated flywheels. Adjust the tracking mechanism if necessary.
- Blade Guides: Set the precision roller guides and thrust bearing to be just clear of the blade (approximately 0.5mm clearance) to support the blade without causing friction.
- Table Alignment: Verify that the work table is perpendicular (90°) to the blade when set for straight cuts. Adjust if needed.
- Parallel Guide Alignment: Align the parallel guide to be truly parallel with the blade. The integrated magnifying glass assists with precise scale readings.
Power Connection
Connect the band saw to a suitable 240V power outlet. Ensure the power supply matches the machine's requirements as specified on the rating plate.
4. Operation
Starting and Stopping
- To start the machine, press the green 'ON' button.
- To stop the machine, press the red 'OFF' button.
- Always allow the blade to reach full speed before beginning a cut.
Cutting Techniques
The BASA1 is capable of various cuts in wood, including rip cuts, cross-cuts, curve cuts, and angle cuts.

Figure 4.1: Examples of cutting applications: Rip cut (top left), Angle cut (top right), Curve cut (bottom left).

Figure 4.2: A user performing a cut on the Scheppach BASA1 band saw, demonstrating proper hand placement and material feeding.
- Straight Cuts (Rip and Cross-cuts): Use the parallel guide for accurate straight cuts. Feed the workpiece slowly and steadily into the blade.
- Curve Cuts: For intricate curve cuts, use a narrower blade. Guide the workpiece smoothly along the desired curve, avoiding sudden turns.
- Angle Cuts: The work table can be tilted up to 45° for angled cuts. Loosen the table locking knob, adjust to the desired angle using the scale, and re-tighten securely.

Figure 4.3: The continuously swiveling saw table allows for quick and easy angle cuts from 0° to 45°.
Workpiece Support
Always ensure adequate support for the workpiece, especially for larger or heavier pieces, to prevent tipping or loss of control. For thin materials, ensure they do not slip under the parallel guide; use an auxiliary block if necessary.
5. Maintenance
Regular maintenance ensures the longevity and safe operation of your band saw. Always disconnect the power supply before performing any maintenance.
Cleaning
- After each use, clean the machine of sawdust and debris using a brush or vacuum cleaner.
- Pay special attention to the blade guides, table surface, and dust extraction port.

Figure 5.1: The dust extraction port allows for nearly dust-free operation during sawing.
Blade Replacement
Worn or damaged blades should be replaced promptly. Refer to your full manual for detailed instructions on how to safely replace the blade and re-tension it.
Lubrication
Periodically check moving parts for smooth operation. Lubricate as recommended in the full manufacturer's manual.
6. Troubleshooting
This section addresses common issues you might encounter with your SCHEPPACH BASA1 band saw. For more complex problems, consult a qualified technician.
| Problem | Possible Cause | Solution |
|---|---|---|
| Blade wanders or cuts inaccurately | Incorrect blade tension; Worn blade; Improper blade guide adjustment; Parallel guide not aligned. | Adjust blade tension; Replace blade; Re-adjust blade guides and thrust bearing; Re-align parallel guide. |
| Motor stops or stalls during cutting | Overloading the motor (feeding too fast or cutting too thick material); Dull blade; Insufficient power supply. | Reduce feed rate; Use a sharp blade; Ensure proper power supply; Avoid cutting material beyond machine capacity. |
| Excessive vibration or noise | Loose components; Unbalanced blade; Worn bearings; Incorrect blade tracking. | Check and tighten all fasteners; Replace blade; Inspect and replace bearings if necessary; Adjust blade tracking. |
| Dust accumulation is high | Dust extraction system not connected or inefficient; Blocked dust port. | Connect to a suitable dust extractor; Clear any blockages in the dust port. |
7. Specifications
Technical data for the SCHEPPACH BASA1 Electric Wood Band Saw.

Figure 7.1: Key dimensions including cut height (max 100mm), throat width (195mm), blade length (1490mm), and blade width (3.5-12mm).
| Feature | Specification |
|---|---|
| Model Number | BASA1.0-240V |
| Power Input (P1) | 300 W |
| Voltage | 240 V |
| Frequency | 50 Hz |
| Blade Speed | 880 rpm (or 880 m/min as per image) |
| Max. Cutting Height | 100 mm |
| Throat Depth (Col de cygne) | 195 mm |
| Table Dimensions (L x W) | 320 mm x 310 mm |
| Table Tilt | 0° to +45° |
| Blade Length | 1490 mm |
| Blade Width | 3.5 - 12 mm |
| Machine Dimensions (L x W x H) | 445 mm x 500 mm x 700 mm |
| Net Weight | 17 kg |
| Certification | CE |
8. Warranty and Support
Manufacturer's Warranty
The SCHEPPACH BASA1 Band Saw comes with a five-year manufacturer's warranty. Please retain your proof of purchase for warranty claims. The warranty covers defects in materials and workmanship under normal use.
Customer Support
For technical assistance, spare parts, or warranty service, please contact your authorized Scheppach dealer or visit the official Scheppach website for contact information. When contacting support, please have your model number (BASA1) and serial number (if applicable) ready.


