1. Introduction
This manual provides detailed instructions for the installation, operation, and maintenance of your Nordlux Kiom Edge 100 Wall and Ceiling Light. Designed with a modern aesthetic, this fixture offers superior quality finishes and facilitates easy bulb replacement. Please read these instructions carefully before installation and retain them for future reference.

Image 1: Close-up view of the Nordlux Kiom Edge 100 light fixture, highlighting its angular design and material composition.
2. Safety Instructions
To ensure safe installation and operation, please observe the following safety precautions:
- Disconnect Power: Always switch off the main power supply at the circuit breaker before attempting any installation, maintenance, or bulb replacement.
- Qualified Installation: If you are unsure about electrical installations, consult a qualified electrician.
- Voltage Compatibility: Ensure the voltage supply (230 Volts) matches the requirements of the fixture.
- Bulb Type and Wattage: Use only GU10 LED bulbs and do not exceed the maximum wattage of 5 Watts.
- Intended Use: This fixture is designed for indoor use only. While rated IP44 (protected against solid objects over 1mm and splashing water from any direction), it is not intended for outdoor exposure to direct weather conditions.
- Handling: Handle the fixture with care to avoid damage.
3. Package Contents
Please check that all components are present and undamaged:
- One (1) Nordlux Kiom Edge 100 Light Fixture (Model 77441001)
- Mounting Hardware (screws, wall plugs)
- Instruction Manual
Note: The GU10 bulb is not included and must be purchased separately.
4. Product Specifications
| Feature | Specification |
|---|---|
| Brand | Nordlux |
| Model Number | 77441001 |
| Dimensions (L x W x H) | 10 x 10 x 20 cm |
| Weight | 460 g |
| Color | White (Body) |
| Material | Aluminum, PVC |
| Style | Modern |
| IP Rating | IP44 |
| Number of Bulbs | 1 |
| Max Wattage | 5 Watts |
| Voltage | 230 Volts |
| Specific Uses | For indoor use only |
| Special Feature | Bulb not included |
| Bulb Type | LED |
| Cap Type | GU10 |
| Installation Type | Wall Mount |
5. Installation Instructions
Follow these steps for safe and proper installation:
- Prepare for Installation: Ensure the main power supply to the installation area is switched off at the circuit breaker. Gather necessary tools (drill, screwdriver, wire strippers, pencil, measuring tape).
- Choose Mounting Location: Select a suitable wall or ceiling location for the fixture, ensuring it is a dry indoor area.
- Mark Drill Holes: Hold the mounting bracket (if separate) or the fixture itself against the desired surface and mark the positions for drilling.
- Drill Holes: Drill holes at the marked positions. Insert the provided wall plugs into the drilled holes.
- Connect Wiring: Carefully connect the electrical wires from your mains supply to the terminal block inside the fixture. Ensure correct polarity (Live to Live, Neutral to Neutral, and Earth if applicable). Secure all connections tightly.
- Mount the Fixture: Secure the fixture to the wall or ceiling using the provided screws. Ensure it is firmly attached and stable.
- Install GU10 Bulb: Insert a GU10 LED bulb (max 5W, not included) into the lamp holder by pushing it in and twisting clockwise until secure.
- Restore Power: Once installation is complete and all connections are secure, restore power at the circuit breaker.
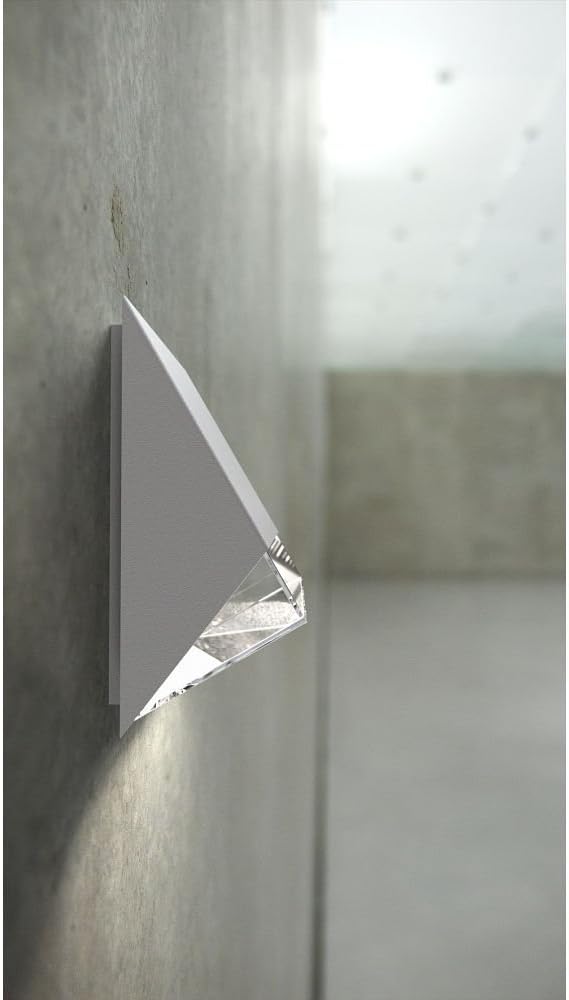
Image 2: The Nordlux Kiom Edge 100 light fixture mounted on a wall, demonstrating its illumination effect.
6. Operating Instructions
Once installed and powered, the Nordlux Kiom Edge 100 operates via your standard wall switch. Ensure the correct GU10 bulb is installed and functional.

Image 3: Multiple Nordlux Kiom Edge 100 fixtures installed on a building exterior, showcasing their application.
7. Maintenance
Regular maintenance will help prolong the life and appearance of your light fixture.
- Cleaning: Clean the fixture with a soft, dry cloth. Do not use abrasive cleaners, solvents, or harsh chemicals, as these can damage the finish.
- Bulb Replacement: To replace the GU10 bulb, first ensure the power supply to the fixture is switched off. Carefully remove the old bulb by twisting it counter-clockwise and pulling it out. Insert the new GU10 bulb by aligning the pins, pushing it in, and twisting clockwise until secure.
8. Troubleshooting
If you encounter issues with your light fixture, refer to the following common problems and solutions:
- Light does not turn on:
- Check if the main power supply is switched on.
- Ensure the GU10 bulb is correctly installed and not faulty. Try replacing it with a known working bulb.
- Verify that all electrical connections are secure and correctly wired.
- Check the circuit breaker for any tripped circuits.
- Light flickers:
- Ensure the bulb is fully seated in the socket.
- Check for loose wiring connections.
- The bulb may be faulty or incompatible with the fixture (e.g., if using a dimmer not designed for LED).
If these steps do not resolve the issue, please contact customer support or a qualified electrician.
9. Warranty and Support
For detailed warranty information, terms, and conditions, please refer to the official Nordlux website or the retailer from whom you purchased the product. Keep your proof of purchase for any warranty claims. For technical support or further assistance, please contact Nordlux customer service or your local distributor.


