
Milescraft 13110003
Contents
Milescraft 1311 JointPro Doweling Jig Instruction Manual
Model: 13110003
Brand: Milescraft
Introduction
The Milescraft 1311 JointPro is a professional-grade, self-clamping all-steel doweling jig designed to quickly and accurately create strong doweled joints. This manual provides essential information for the proper setup, operation, and maintenance of your JointPro to ensure optimal performance and longevity.
Key Features:
- Clamp both boards simultaneously for precise hole alignment.
- Drill up to six matching holes per setup for stronger joints.
- Accommodates 1/4", 5/16", and 3/8" dowels using hardened steel bushing blocks.
- Includes detailed instructions for creating corner, edge, and surface joints.
- Self-clamping mechanism securely holds the work surface.
Package Contents
Verify that all components are present upon unboxing:
- JointPro Main Body
- JointPro Sub Body
- 4 Guide Bushings for 1/4 in., 5/16 in., and 3/8 in. Dowels

Image: The Milescraft 1311 JointPro Doweling Jig, showing its main body and sub-body components.
Setup
Before beginning any project, ensure your workspace is clean and well-lit. Familiarize yourself with the components of the JointPro.
Attaching the Jig to Workpiece:
- Identify the two pieces of wood you intend to join. Ensure their edges are clean and straight.
- Position the JointPro jig over the edge of the first workpiece. The self-clamping mechanism allows for simultaneous clamping of both boards.
- Adjust the clamping screws to securely hold the workpiece in place. The jig should be firm and not move during drilling.
- Select the appropriate hardened steel bushing block (1/4", 5/16", or 3/8") based on your dowel size and insert it into the jig's guide holes.
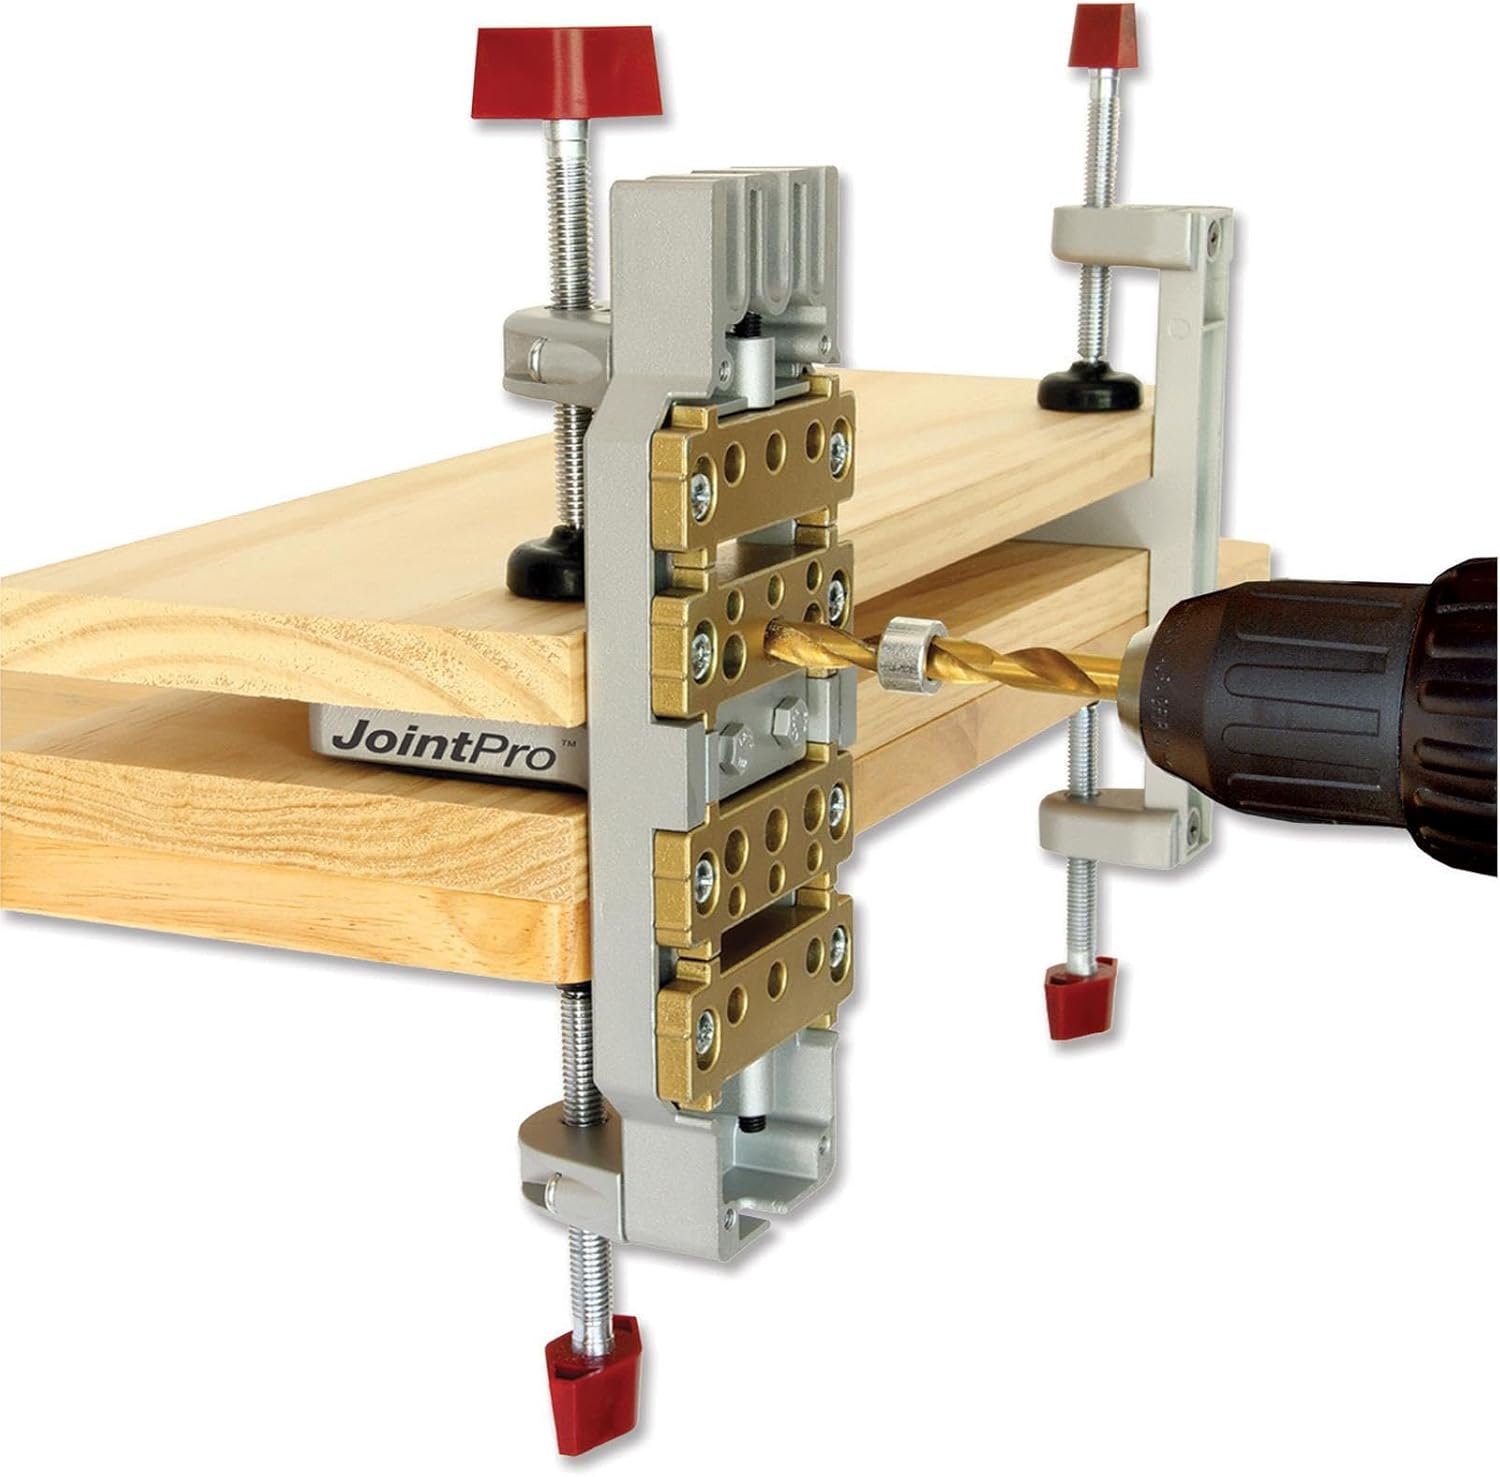
Image: The JointPro jig clamped onto two pieces of wood, ready for drilling dowel holes. A drill bit is shown entering one of the guide holes.
Operating Instructions
Creating Doweled Joints:
- Once the jig is securely clamped and the correct bushing block is inserted, use a drill with a bit matching the dowel size.
- Drill through the bushing guides. The jig allows for drilling up to six matching holes per setup, ensuring strong and accurate joints.
- After drilling, unclamp the jig and remove it from the workpieces.
- Insert dowels into the drilled holes on one workpiece. Apply wood glue to the dowels and the mating surfaces.
- Align the second workpiece with the dowels and press the pieces together firmly. Use clamps to hold the joint until the glue dries.
Types of Joints:
The Milescraft JointPro is versatile and can be used to create various types of doweled joints, including:
- Corner Joints: For joining two pieces at a 90-degree angle.
- Edge Joints: For joining two pieces along their edges to create wider panels.
- Surface Joints: For joining a workpiece to the face of another.
Maintenance
Proper maintenance will extend the life of your Milescraft JointPro.
- Cleaning: After each use, wipe down the jig with a dry cloth to remove sawdust and debris. For stubborn residue, a slightly damp cloth can be used, followed by immediate drying.
- Lubrication: Periodically apply a light machine oil to the threaded rods and moving parts to ensure smooth operation and prevent rust.
- Storage: Store the jig in a dry environment to prevent corrosion. Keep it away from excessive moisture and extreme temperatures.
- Inspection: Regularly inspect the hardened steel bushing blocks for wear. Replace them if they show signs of damage or excessive wear to maintain drilling accuracy.
Troubleshooting
If you encounter issues while using your JointPro, consider the following common problems and solutions:
Holes Not Aligning:
- Check Clamping: Ensure the jig is clamped securely to both workpieces. Any movement during drilling can lead to misalignment.
- Workpiece Stability: Verify that the workpieces themselves are stable and not shifting.
- Bushing Block Insertion: Confirm that the bushing block is fully seated and correctly oriented within the jig.
- Dowel Size Consistency: Ensure the dowels and drill bits are precisely the stated size. Inconsistent dowel diameters can affect fit.
Difficulty Drilling:
- Dull Drill Bit: Use sharp, appropriate drill bits for woodworking.
- Clear Debris: Ensure the bushing holes are clear of sawdust and debris before drilling.
Specifications
| Attribute | Value |
|---|---|
| Model Number | 13110003 |
| Brand | Milescraft |
| Material | Metal |
| Color | Silver |
| Item Dimensions (L x W x H) | 12.4 x 4.63 x 4.4 inches |
| Item Weight | 3.78 pounds |
| Dowel Sizes Supported | 1/4", 5/16", 3/8" |
| Included Components | JointPro Main Body, JointPro Sub body |
Warranty and Support
For information regarding product warranty, technical support, or replacement parts, please visit the official Milescraft website or contact their customer service department. Keep your purchase receipt as proof of purchase.
Official Milescraft Website: www.milescraft.com
For additional resources and product information, you may also visit the Milescraft Store on Amazon.
Ask a question about this manual
Ask about setup, troubleshooting, compatibility, parts, safety, or missing instructions. Manuals+ will review the question and use this page’s manual context to help answer it.