1. Introduction
Thank you for choosing the Channellock 2.5 Gallon Wet/Dry Vacuum. This manual provides essential information for the safe assembly, operation, and maintenance of your vacuum cleaner. Please read it thoroughly before first use and keep it for future reference.
Important Safety Information
- Always disconnect the power cord from the electrical outlet before performing any maintenance or cleaning.
- Do not vacuum flammable or combustible liquids, hot ashes, or sharp objects.
- Ensure all filters are correctly installed before operation.
- This appliance is not intended for use by persons with reduced physical, sensory, or mental capabilities unless supervised.
- Keep children and pets away from the vacuum during operation.
2. Package Contents
Verify that all items listed below are present in your package:
- Channellock 2.5 Gallon Wet/Dry Vacuum Unit
- Hose
- Reusable Cloth Filter
- Reusable Foam Sleeve
- 2-in-1 Utility Nozzle
- Crevice Tool
- Wall Mount Bracket (if included as a separate accessory)

Figure 2.1: The Channellock 2.5 Gallon Wet/Dry Vacuum shown with its hose, 2-in-1 utility nozzle, and crevice tool attached or stored.
3. Assembly
3.1 Attaching the Hose
- Locate the hose and the inlet port on the vacuum tank.
- Insert the larger end of the hose firmly into the inlet port until it clicks into place.
- For blower function, insert the hose into the exhaust port located on the motor head.
3.2 Installing Accessories
- Attach the desired nozzle (2-in-1 utility nozzle or crevice tool) to the free end of the hose.
- The vacuum features on-board accessory storage for convenience. Secure unused accessories in their designated slots.

Figure 3.1: The Channellock 2.5 Gallon Wet/Dry Vacuum with the hose connected to the suction inlet.
3.3 Wall Mount Installation (Optional)
The vacuum is designed with wall mount capability for convenient storage. If you wish to wall mount your vacuum:
- Select a suitable location on a sturdy wall, ensuring it can support the weight of the vacuum.
- Securely attach the wall mount bracket (if included) to the wall using appropriate fasteners (not included).
- Carefully hang the vacuum onto the installed bracket.
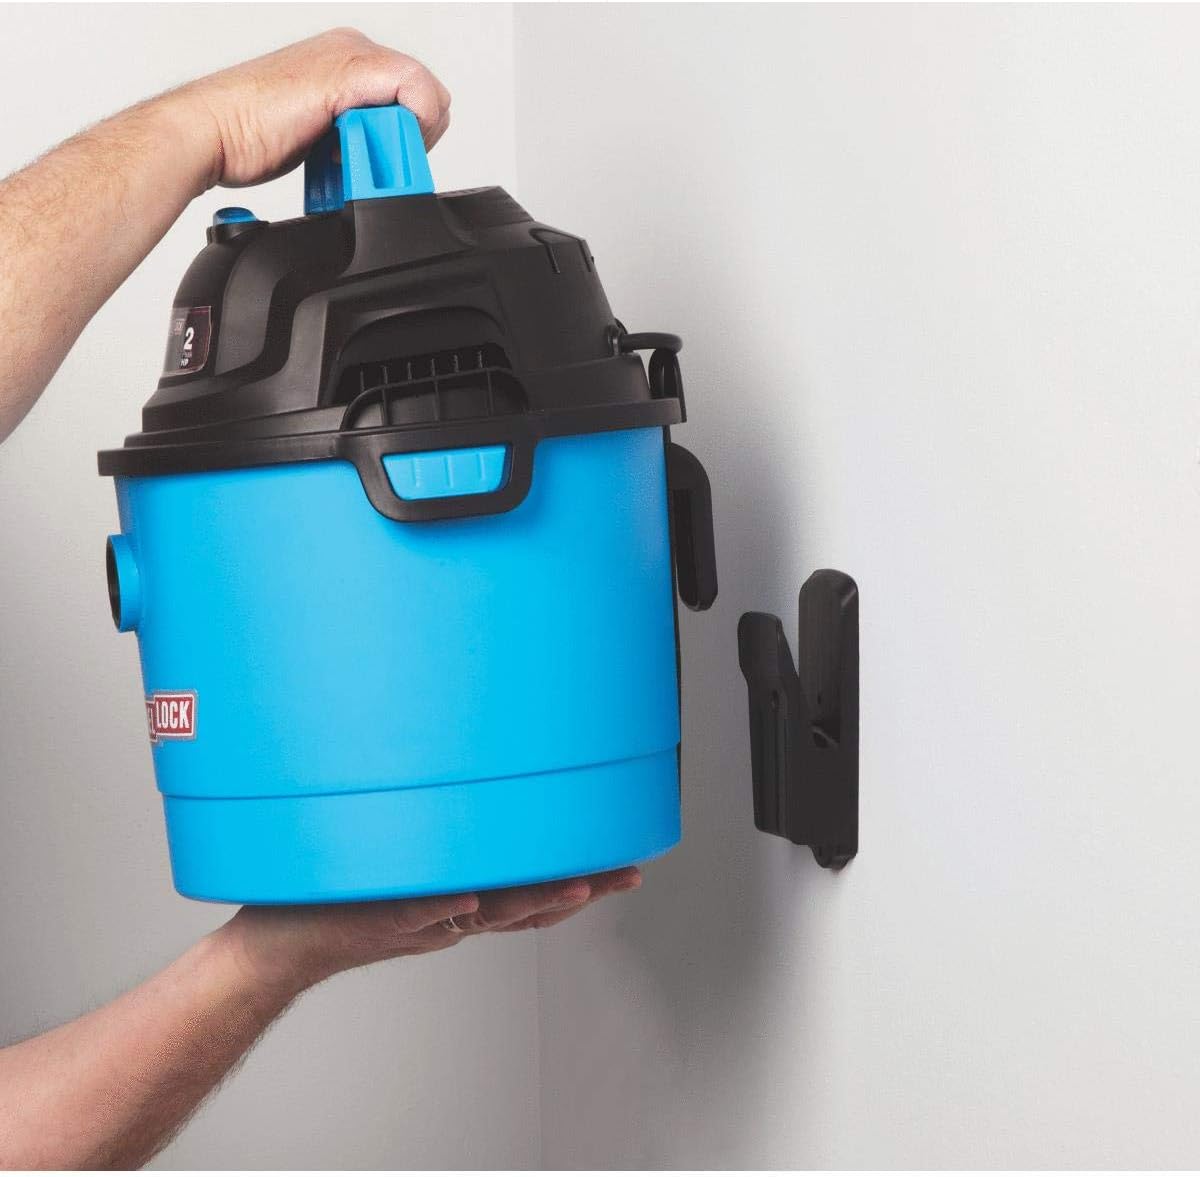
Figure 3.2: A person demonstrating the wall mounting of the Channellock 2.5 Gallon Wet/Dry Vacuum.
4. Initial Setup and Filter Installation
4.1 For Dry Vacuuming
- Ensure the reusable cloth filter is securely installed over the filter cage.
- Place the reusable foam sleeve over the cloth filter for additional filtration.
- Secure the motor head onto the tank by latching the side clips.
4.2 For Wet Vacuuming
- Remove the reusable cloth filter and foam sleeve. These filters are not suitable for wet pickup and can be damaged.
- Ensure the float mechanism (auto shut-off) is clear and can move freely. This mechanism prevents overflow during wet pickup.
- Secure the motor head onto the tank by latching the side clips.
5. Operating Instructions
5.1 Powering On/Off
- Plug the power cord into a suitable electrical outlet (120V).
- Press the large dust-sealed switch located on the top handle to turn the vacuum ON.
- Press the switch again to turn the vacuum OFF.
5.2 Dry Vacuuming
- Ensure the cloth filter and foam sleeve are installed.
- Use the appropriate nozzle for the task.
- Guide the nozzle over the dry debris to be collected.
5.3 Wet Vacuuming
- Ensure the cloth filter and foam sleeve are removed.
- Use the appropriate nozzle for liquid pickup.
- The vacuum will automatically shut off when the liquid level reaches its maximum capacity. Turn off the vacuum and empty the tank immediately.
5.4 Blower Function
- Disconnect the hose from the inlet port.
- Insert the hose firmly into the exhaust port on the motor head.
- Turn on the vacuum to use it as a blower for clearing debris from surfaces.
6. Maintenance
Regular maintenance ensures optimal performance and extends the life of your vacuum.
6.1 Emptying the Tank
- Disconnect the power cord.
- Unlatch the side clips and remove the motor head.
- Carefully empty the contents of the tank into a suitable receptacle.
- Clean the inside of the tank with water and mild detergent if necessary, then dry thoroughly.
6.2 Filter Cleaning and Replacement
- Reusable Cloth Filter: Remove and shake off excess dust. For thorough cleaning, rinse with water and allow to air dry completely before reinstallation.
- Reusable Foam Sleeve: Rinse with water and allow to air dry completely before reinstallation.
- Inspect filters regularly for damage. Replace if torn or excessively worn.
6.3 Storage
- Ensure the vacuum is clean and dry before storing.
- Utilize the on-board accessory and hose storage to keep all components organized.
- Store in a dry, protected area. The wall mount capability offers a space-saving storage solution.
7. Troubleshooting
Refer to this section for common issues and their solutions.
| Problem | Possible Cause | Solution |
|---|---|---|
| Vacuum does not turn on. | No power supply. Faulty switch. | Check power cord connection and outlet. Contact customer support if switch is faulty. |
| Loss of suction. | Clogged hose or nozzle. Full tank. Dirty filter. Motor head not sealed properly. | Clear obstruction. Empty tank. Clean or replace filter. Ensure side clips are latched securely. |
| Water overflow during wet pickup. | Float mechanism obstructed. Tank is full. | Check and clear float mechanism. Empty tank immediately. |
8. Specifications
| Feature | Detail |
|---|---|
| Model | VOM205P.CL |
| Capacity | 2.5 Gallons |
| Power | 120 Watts, 120 Volts |
| Motor Horsepower | 2 Peak HP |
| Filter Type | Reusable Cloth Filter, Reusable Foam Sleeve |
| Special Features | Wet/Dry Functionality, Blower Function, Auto Shut-off, Wall Mount Capability, On-board Accessory Storage |
| Included Components | Hose, Reusable Cloth Filter, Reusable Foam Sleeve, 2-in-1 Utility Nozzle, Crevice Tool |
| Item Weight | Approximately 0.01 ounces (Note: This value seems incorrect from source data; please refer to product packaging for accurate weight.) |
| UPC | 009326329406 |
9. Warranty and Customer Support
For warranty information or technical assistance, please contact Channellock customer support. Keep your purchase receipt as proof of purchase.
Visit the official Channellock website for the most current support information: www.channellock.com


