
1. Introduction
This manual provides detailed instructions for the Iconbit DVR FHD QX1 Dashcam. This device is engineered for recording vehicle journeys in Full HD quality, offering reliable video and photo capture capabilities for road surveillance and general recording. Please read this manual thoroughly before operating the device to ensure proper use and optimal performance.
2. Package Contents
The Iconbit DVR FHD QX1 package typically includes the following items:
- Iconbit DVR FHD QX1 Dashcam
- Car charger/power cable
- Mounting bracket for windshield
- USB cable (for data transfer/webcam function)
3. Product Features
The Iconbit DVR FHD QX1 Dashcam is equipped with advanced features for reliable in-car recording:
- Full HD Video Recording: Captures video at 1080p resolution and 30 frames per second (H.264 format).
- Wide-Angle Lens: Features a professional 120-degree wide-angle lens for comprehensive road coverage.
- Automatic Recording: Initiates recording automatically when the vehicle's engine starts.
- Integrated LCD Display: A 2.7-inch LCD screen for live view and playback.
- HDMI Output: Mini HDMI port for high-definition video playback on external displays (1080i/720p).
- MicroSD Card Slot: Supports MicroSD cards up to 32 GB (card not included).
- Webcam Function: Can be used as a webcam when connected to a computer via USB.
- High-Resolution Photos: Captures still images in JPEG format at 2592x1944 resolution.
- Loop Recording: Adjustable cyclic recording length to ensure continuous recording without manual deletion.
- Built-in Microphone and Speaker: For audio recording and playback.
- USB 2.0: For efficient data transfer to a PC.
- Night Mode: Manual or automatic activation for improved low-light recording.
4. Setup
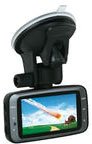
This image shows the front of the Iconbit DVR FHD QX1 dashcam, highlighting its compact design and the integrated 2.7-inch LCD screen.
4.1 Mounting the Dashcam
- Clean the area on your vehicle's windshield where you intend to mount the dashcam.
- Attach the suction cup mounting bracket firmly to the cleaned windshield surface.
- Secure the DVR FHD QX1 dashcam onto the mounting bracket, ensuring it is stable and positioned to capture the road ahead clearly.
4.2 Inserting the MicroSD Card
- Ensure the dashcam is powered off before inserting the memory card.
- Locate the MicroSD card slot on the device.
- Insert a compatible MicroSD card (up to 32 GB, Class 10 recommended, not included) into the slot until it clicks into place.
- To remove, gently press the card inward until it springs out.
4.3 Power Connection
- Connect the provided car charger cable to the dashcam's power input port.
- Plug the other end of the car charger into your vehicle's 12V cigarette lighter socket.
- The dashcam will typically power on automatically when the vehicle's engine starts and power is supplied.
5. Operating Instructions
5.1 Automatic Recording
Once powered on and connected to the vehicle's power supply, the dashcam will automatically begin recording video. Recording will cease when the vehicle's engine is turned off and power is disconnected.
5.2 Loop Recording
The DVR FHD QX1 supports loop recording. This feature ensures continuous recording by overwriting the oldest files when the MicroSD card reaches its capacity. The duration of these recording segments can be adjusted in the device's settings menu.
5.3 Video Recording
The dashcam records video in MOV (H.264) format at a resolution of up to 1080P at 30 frames per second. The integrated 2.7-inch LCD display provides a real-time view of the recording area.
5.4 Photo Mode
To capture still images, switch the device to photo mode. Photos are saved in JPEG format with a resolution of 2592x1944 pixels.
5.5 Night Mode
The dashcam includes a night mode feature to enhance video quality in low-light conditions. This mode can be activated manually through the menu or set to automatic activation.
5.6 Webcam Function
Connect the DVR FHD QX1 dashcam to your computer using the provided USB cable. The device can then be selected and used as a webcam for video conferencing or other applications.
5.7 Playback
Recorded videos and photos can be reviewed directly on the dashcam's 2.7-inch LCD display. For a larger view, connect the device to an external monitor or TV using a Mini HDMI cable (not included) to utilize the HDMI output (1080i/720p).
6. Maintenance
- Lens Cleaning: Regularly clean the dashcam's lens with a soft, dry, lint-free cloth. Avoid using abrasive cleaners or solvents that could damage the lens.
- Temperature Control: Protect the device from extreme temperatures, both hot and cold, and prolonged direct sunlight exposure to prevent damage to internal components and the battery.
- MicroSD Card Management: To maintain optimal recording performance and prevent data corruption, it is recommended to format the MicroSD card at least once a month. Always back up any important files before formatting.
- Firmware Updates: Check the manufacturer's website periodically for any available firmware updates to ensure your device has the latest features and bug fixes.
7. Troubleshooting
If you encounter issues with your Iconbit DVR FHD QX1 Dashcam, please refer to the following troubleshooting guide:
- Device Not Starting or Shuts Off Intermittently:
- Ensure the power connection is secure and stable. Check that the car charger is fully inserted into both the dashcam and the vehicle's 12V socket.
- Verify that the vehicle's 12V socket is functioning correctly. Try plugging in another device to test it.
- A faulty or incompatible MicroSD card can cause instability. Try removing the card or replacing it with a known good, high-speed MicroSD card (Class 10 or higher).
- The internal battery may be low. Ensure the device is connected to power for a sufficient period to charge.
- Poor Video Quality:
- Clean the dashcam's lens thoroughly with a soft cloth.
- Check the video resolution settings in the device menu to ensure it is set to 1080p.
- Ensure night mode is appropriately activated for low-light conditions.
- Verify the MicroSD card is high-speed and not corrupted.
- Memory Card Full Message:
- Ensure loop recording is enabled in the settings menu.
- Regularly format the MicroSD card to clear old files. Remember to back up any important recordings before formatting.
- Date/Time Incorrect:
- Access the system settings menu on the dashcam and manually adjust the date and time.
8. Specifications
| Image Sensor | High-resolution CMOS |
| Display | 2.7" LTPS TFT LCD |
| Video Output | Mini HDMI 1080i/720p, Composite NTSC/PAL |
| Video Format | MOV (H.264) |
| Photo Format | JPEG, 2592x1944 |
| Viewing Angle (Diagonal) | 120° |
| Night Mode | Yes, manual or automatic |
| Battery | 3.7V 300 mAh Lithium-ion-polymer |
| Internal Memory | 32 MB |
| External Memory | Supports Micro SD card up to 32 GB (not included) |
| USB Interface | USB 2.0 |
| Audio | Built-in Microphone and Speaker |
| Product Dimensions | 21.4 x 15.9 x 8.1 cm; 0.55 g |
| Mounting Type | Windshield mount |
| Special Features | Loop recording, Webcam function |
9. Warranty and Support
For detailed warranty information, technical assistance, or customer support, please refer to the documentation included with your original purchase. It is advisable to retain your proof of purchase for any warranty claims or service requests. You may also visit the official Iconbit website for further support resources.