1. Product Overview
The Yato YT-36012 Pop Rivet Gun is a hand tool designed for securely fastening materials together using pop rivets. It features a durable construction with an aluminium die-cast housing and forged steel handle, ensuring reliable performance for various applications. This manual provides essential information for the safe and effective use of your rivet gun.

Image 1.1: Yato YT-36012 Pop Rivet Gun with its original packaging.
Key Features:
- Durable Construction: Aluminium die-cast housing and forged steel handle for longevity.
- Secure Grip: Features a 3-jaw design made from heat-treated CrV steel for strong rivet gripping.
- Versatile: Compatible with various rivet sizes through interchangeable nosepieces.
2. Safety Instructions
Always follow these safety guidelines to prevent injury and ensure proper tool function:
- Wear Eye Protection: Always wear safety glasses or goggles to protect against flying debris.
- Wear Hand Protection: Use work gloves to protect your hands.
- Inspect Tool: Before each use, check the rivet gun for any damage or loose parts. Do not use a damaged tool.
- Use Correct Rivet Size: Ensure the rivet diameter matches the selected nosepiece and the material thickness.
- Maintain a Firm Grip: Hold the tool firmly during operation to prevent slippage.
- Keep Work Area Clear: Ensure your work area is clean and well-lit.
- Store Safely: Store the rivet gun in a dry, secure place out of reach of children.
3. Setup
3.1. Selecting the Correct Nosepiece
The Yato YT-36012 comes with multiple interchangeable nosepieces to accommodate different rivet diameters. Select the nosepiece that matches the diameter of the rivet you intend to use.
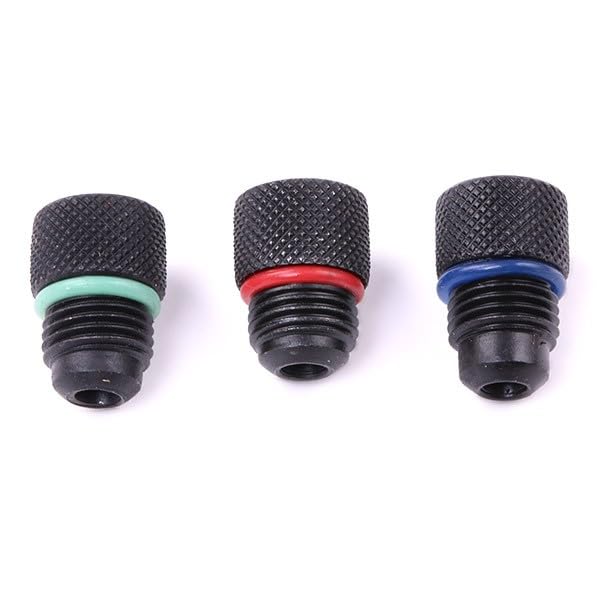
Image 3.1: Various nosepiece sizes for the rivet gun.
3.2. Attaching and Adjusting the Nosepiece
- Identify Nosepiece Rings: The rivet gun head features three knurled rings. The smallest ring is the removable nosepiece. The second ring is the clinch adjuster, and the third ring locks the clinch adjuster.
- Remove Current Nosepiece: Unscrew the currently installed nosepiece by hand.
- Install New Nosepiece: Screw the selected nosepiece firmly into the head of the rivet gun.
- Adjust Clinch (Rivet Grip):
- Loosen the third (locking) ring completely.
- Adjust the second (clinch adjuster) ring by turning it until the tool's jaws feel tight when gripping the rivet shank. This adjustment ensures the tool properly grips and pulls the rivet.
- Once the desired grip is achieved, tighten the third (locking) ring firmly to secure the clinch adjuster in place.
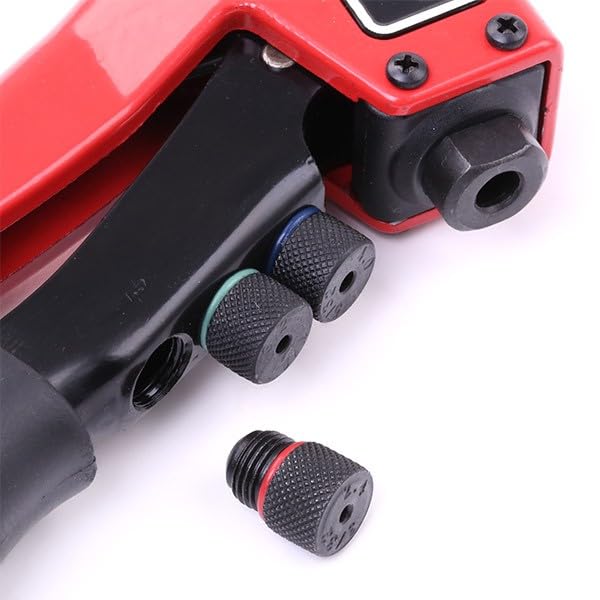
Image 3.2: Close-up view of the rivet gun head, showing the nosepiece and adjustment rings.
4. Operating Instructions
Follow these steps to effectively use your Yato YT-36012 Pop Rivet Gun:
- Prepare Materials: Drill a hole through the materials to be joined. The hole diameter should match the rivet diameter.
- Insert Rivet: Place the rivet's body through the prepared hole.
- Load Rivet Gun: Insert the rivet's mandrel (the pin) into the nosepiece of the rivet gun until it is fully seated.
- Position Tool: Place the nosepiece firmly against the surface of the material, ensuring the rivet head is flush.
- Actuate Tool: Squeeze the handles of the rivet gun together with firm, steady pressure. You will feel resistance as the tool pulls the mandrel, causing the rivet body to expand and form a blind head on the backside of the materials. Continue squeezing until the mandrel snaps off.
- Eject Mandrel: After the mandrel snaps, release the handles. The broken mandrel will typically fall out of the back of the tool. If it remains, open the handles fully and shake the tool to eject it.
- Inspect Rivet: Verify that the rivet is securely set and the materials are firmly joined.

Image 4.1: The Yato YT-36012 Pop Rivet Gun with handles open, ready for operation.
5. Maintenance
Proper maintenance ensures the longevity and reliable performance of your rivet gun.
- Cleaning: After each use, wipe down the tool with a clean, dry cloth to remove any dust or debris.
- Lubrication: Periodically apply a small amount of light machine oil to the pivot points and jaw mechanism to ensure smooth operation.
- Inspect Jaws: Regularly check the 3-jaw mechanism for wear or damage. Worn jaws can lead to poor rivet setting. Replace if necessary.
- Storage: Store the rivet gun in a dry environment to prevent rust. Keep the handles closed and secured with the latch (if present) to protect the jaws.
6. Troubleshooting
Refer to this section for common issues and their solutions.
| Problem | Possible Cause | Solution |
|---|---|---|
| Rivet mandrel does not snap off. | Incorrect nosepiece size; Worn jaws; Insufficient force applied. | Ensure nosepiece matches rivet diameter. Check and adjust clinch. Apply more force to handles. Inspect and replace jaws if worn. |
| Rivet does not set properly (loose). | Incorrect rivet length for material thickness; Worn jaws; Improper clinch adjustment. | Use correct rivet length. Inspect and replace jaws. Re-adjust clinch as per Section 3.2. |
| Mandrel gets stuck in the tool. | Debris in jaw mechanism; Worn jaws. | Clean the jaw mechanism. Lubricate moving parts. Inspect and replace jaws if worn. |
7. Specifications
Detailed technical specifications for the Yato YT-36012 Pop Rivet Gun.
| Feature | Specification |
|---|---|
| Model Number | YT-36012 |
| Brand | Yato |
| Head Material | Alloy Steel |
| Handle Material | Alloy Steel |
| Colour | Red |
| Item Weight | 0.5 Kilograms (504 g) |
| Grip Type | Forged Steel |
| Head Style | Forged 3-jaw |
| Product Dimensions (LxWxH) | 20 x 8 x 3 cm |
| Power Source | Hand Powered |
| Included Components | 1 YT-36012 pop rivet gun |
| Country of Origin | China |
8. Warranty and Support
For information regarding warranty coverage, technical support, or spare parts for your Yato YT-36012 Pop Rivet Gun, please contact Yato customer service or refer to the official Yato website. Keep your purchase receipt as proof of purchase.


