1. Product Overview
This manual provides instructions for the Exmark 1-412011 Sheave with Shaft, a genuine replacement part designed for specific Exmark lawn mower models. The sheave is a critical component in the mower's drive system, facilitating power transmission through belts.
1.1 Intended Use
The Exmark 1-412011 Sheave with Shaft is intended for use as a direct replacement part in Exmark Metro HP and Turf Tracer HP lawn mowers. It is designed to restore proper function and performance to the mower's deck or drive system where this specific part is required.
2. Safety Information
WARNING: Always prioritize safety when performing maintenance or repairs on power equipment.
- Read and understand the original equipment owner's manual before attempting any installation or repair.
- Disconnect the spark plug wire(s) or remove the battery to prevent accidental starting of the engine.
- Wear appropriate personal protective equipment (PPE), including safety glasses and gloves.
- Ensure the equipment is stable and supported before working underneath or on moving parts.
- Use only genuine Exmark replacement parts to ensure proper fit, function, and safety.
- If you are unsure about any step, consult a qualified service technician.
3. Package Contents
The package contains the following item:
- 1 x Exmark 1-412011 Sheave with Shaft
4. Installation Instructions
The installation of the sheave with shaft typically involves removing the old, worn, or damaged component and installing the new one. Due to variations in mower models and configurations, it is crucial to refer to the specific service manual for your Exmark Metro HP or Turf Tracer HP mower for detailed, step-by-step instructions.
General steps may include:
- Preparation: Park the mower on a level surface, engage the parking brake, and disconnect the spark plug wire(s) or battery. Allow the engine and any hot components to cool.
- Access: Depending on the location of the sheave, you may need to remove the mower deck, belt covers, or other components to gain access.
- Belt Removal: Carefully relieve tension on the belt(s) connected to the sheave and remove them. Note the routing of the belts for reinstallation.
- Sheave Removal: Loosen and remove any fasteners securing the old sheave and shaft assembly. Carefully extract the old component.
- New Sheave Installation: Position the new Exmark 1-412011 Sheave with Shaft in place, ensuring proper alignment. Secure it with the appropriate fasteners, tightening them to the torque specifications provided in your mower's service manual.
- Belt Reinstallation: Route the belt(s) correctly around the new sheave and other pulleys. Apply tension as specified in your manual.
- Reassembly & Test: Reinstall any covers or components removed during access. Reconnect the spark plug wire(s) or battery. Test the mower's function in a safe, open area, ensuring all parts operate smoothly and without unusual noise.
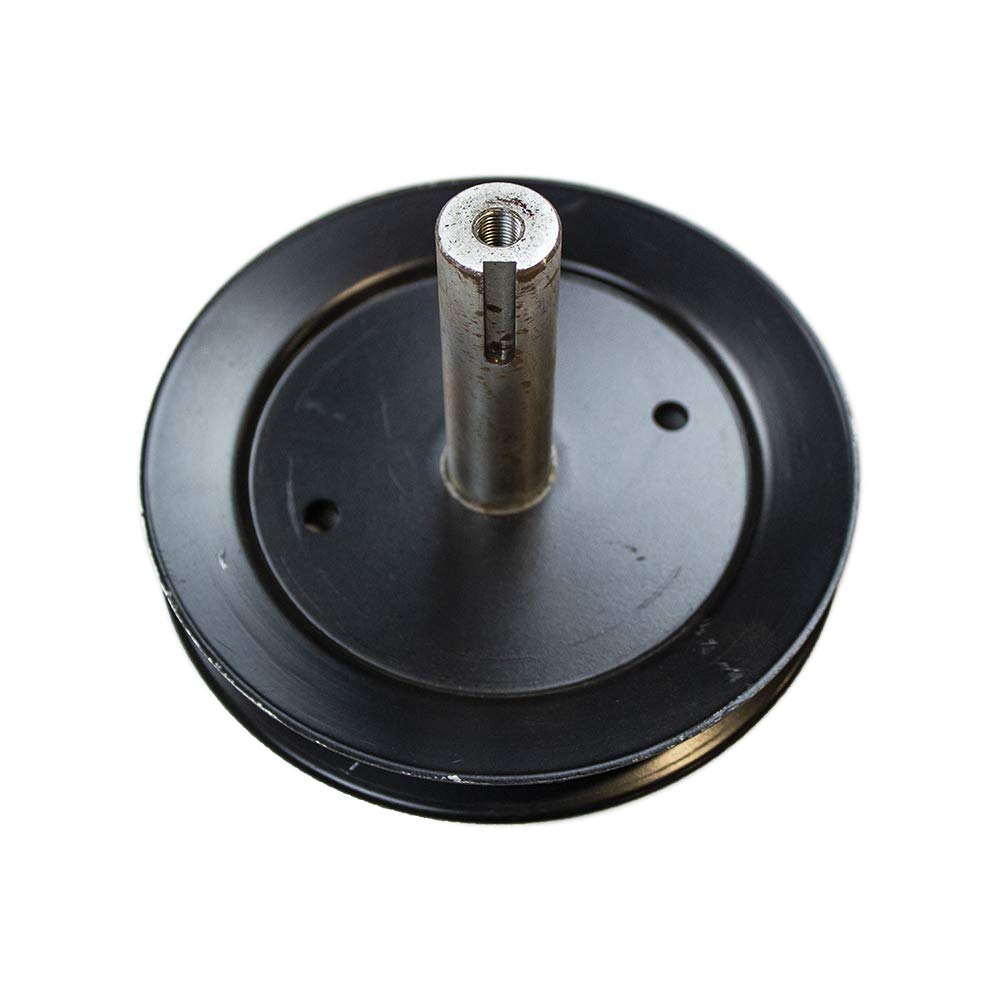
Figure 1: A close-up view of the Exmark 1-412011 sheave with shaft. The sheave is a black, circular component with a central shaft extending from it. The shaft has a keyway and a threaded end for secure attachment.
5. Operating Considerations
Once installed, the sheave with shaft operates as an integral part of your mower's drive system. Proper installation ensures smooth and efficient power transfer. No specific operating procedures are required for the sheave itself beyond ensuring it is correctly installed and maintained.
6. Maintenance
Regular inspection of the sheave with shaft is recommended as part of your mower's overall maintenance schedule. Look for the following:
- Wear: Check for excessive wear on the sheave grooves where the belt rides. Worn grooves can lead to belt slippage and premature belt failure.
- Damage: Inspect for cracks, bends, or other physical damage to the sheave or shaft.
- Bearing Condition: If the sheave includes a bearing, check for smooth rotation and listen for any grinding or unusual noises. A seized or noisy bearing indicates a need for replacement.
- Fastener Tightness: Ensure all mounting bolts and fasteners are securely tightened to prevent movement or vibration.
Replace the sheave with shaft if any significant wear or damage is observed to maintain optimal mower performance and safety.
7. Troubleshooting
If you experience issues after installing or during the operation of your mower, consider the following:
- Belt Slippage: If the belt is slipping on the sheave, check for proper belt tension, wear in the sheave grooves, or incorrect belt type.
- Unusual Noise: Grinding, squealing, or rattling noises from the sheave area may indicate a worn bearing, loose fasteners, or interference with other components.
- Vibration: Excessive vibration could be caused by an unbalanced or damaged sheave, or improper installation.
Always refer to your mower's service manual for specific troubleshooting guides. If the problem persists, contact an authorized Exmark service center.
8. Specifications
| Feature | Specification |
|---|---|
| Part Number | 1-412011 |
| Brand | Exmark |
| Compatible Models | Metro HP, Turf Tracer HP |
| Product Dimensions | 7 x 7 x 7 inches |
| Item Weight | 2.32 pounds |
| Manufacturer | Exmark |
9. Genuine Exmark Parts Overview
This video provides a general overview of genuine Exmark replacement parts, emphasizing their quality and importance for maintaining your equipment.
Video 1: An official video from Exmark Manufacturing highlighting the importance and availability of genuine Exmark lawn and garden replacement parts, including fuel additives, oils, lubricants, blades, belts, filters, and other accessories.
10. Warranty and Support
For information regarding the warranty of your Exmark 1-412011 Sheave with Shaft, please refer to the warranty documentation provided with your original Exmark equipment or visit the official Exmark website. For technical support, replacement part inquiries, or service, please contact an authorized Exmark dealer or Exmark customer service directly.
You can find more information and locate authorized dealers on the official Exmark website: www.exmark.com


