
1. Introduction
Thank you for choosing the Carepeutic Bed Lounger with Heated Comfort Massager. This innovative product is designed to transform your bed or couch into a personal wellness sanctuary, offering total back support, deep vibration massage, and soothing heat therapy. This manual provides essential information for the safe and effective use, setup, operation, and maintenance of your new bed lounger.
2. Important Safety Information
Please read all instructions carefully before using the Carepeutic Bed Lounger. Failure to follow these instructions may result in injury or damage to the product.
- For safe use, do not exceed the maximum weight capacity of 250 lbs.
- Use on a hard, flat surface to ensure stability.
- Use the heated massage function with caution and avoid using it on soft or uneven surfaces.
- Keep the product away from water or damp environments.
- Do not attempt to disassemble or repair the unit yourself. Contact customer service for assistance.
3. Package Contents
Verify that all items are present in your package:
- 1 x Main Bed Lounger Unit
- 2 x Detachable Armrests
- 1 x Detachable Neck Rest
- 1 x AC Power Adapter
- 1 x Deluxe Carrying Bag
4. Setup and Assembly
4.1 Attaching the Armrests
The two armrests attach to the main lounger unit using built-in zippers and Velcro straps. Align the zipper on the armrest with the zipper on the side of the main lounger and zip it up. Secure the Velcro straps for added stability.

Figure 1: The image shows the zippered connection for the armrests, demonstrating how they can be easily attached or detached for cleaning or customized use.
4.2 Attaching the Neck Rest
The detachable neck rest can be secured to the top of the main lounger using the integrated loops and toggles. Insert the toggles into the loops to hold the neck rest in place. This provides additional head and neck support, or can be used as a lumbar pillow.

Figure 2: This image details the control panel and integrated features, including the attached neck rest. It shows the switches for the LED reading light, heat, and vibration massage functions, along with the side pocket and cup holder.
4.3 Positioning the Lounger
Place the assembled bed lounger on a flat, stable surface such as your bed or the floor. Ensure there is enough space around the unit for comfortable use.

Figure 3: The bed lounger is shown comfortably positioned on a bed, demonstrating its use for relaxation. A cup is placed in the cup holder and a book in the side pocket, illustrating convenient storage.
5. Operating Instructions
5.1 Power Connection
Connect the AC power adapter to the designated port on the lounger and then plug it into a standard electrical outlet.
5.2 Vibration Massage
Locate the 'Vibration Massage' button on the side control panel (refer to Figure 2). Press the button to activate the powerful vibration massage. Press again to cycle through intensity levels or turn off the function.
5.3 Soothing Heat Therapy
Locate the 'Soothing Heat' button on the side control panel (refer to Figure 2). Press the button to activate the heat therapy. The heat will gently warm the backrest area, enhancing circulation and relaxation. Press again to turn off the function.
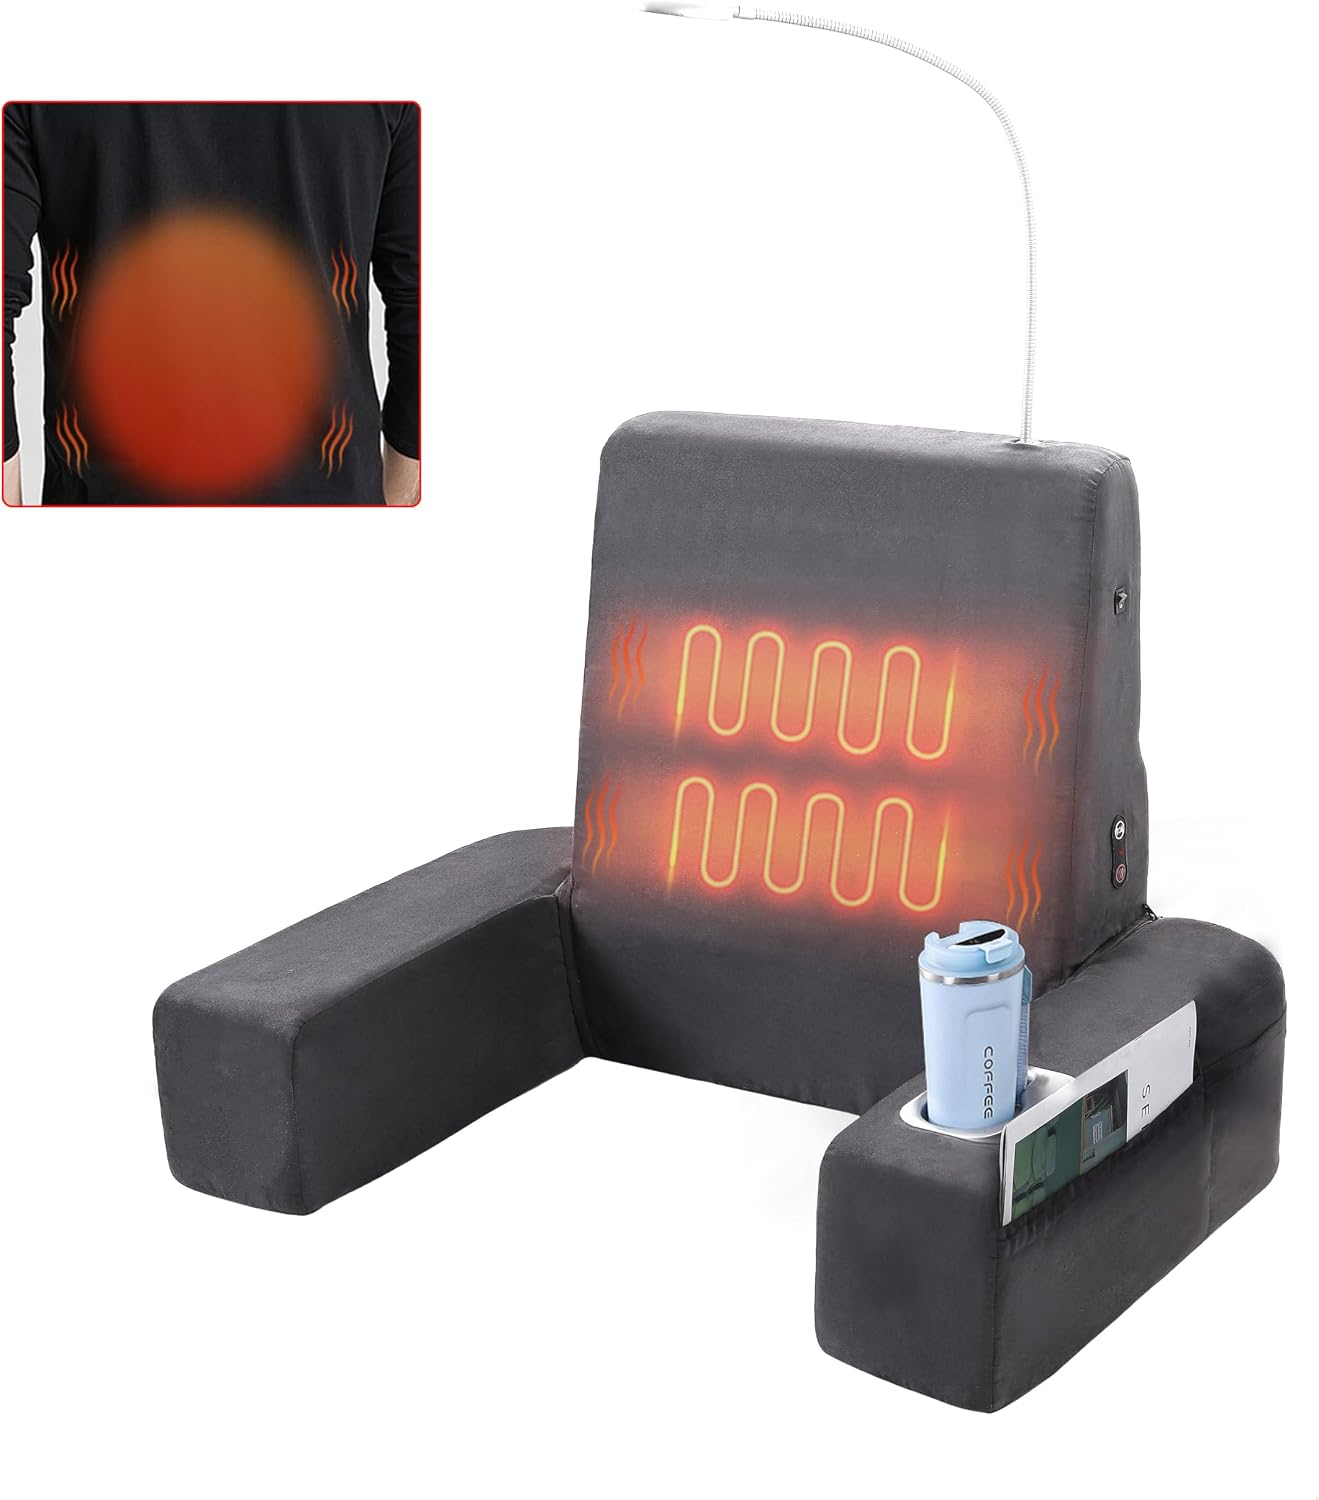
Figure 4: This visual demonstrates the heated comfort massager feature, with orange wavy lines indicating the areas on the backrest that provide soothing heat therapy.
5.4 Adjustable LED Reading Light
The flexible LED reading light is located at the top of the lounger. Use the 'LED Reading Light Switch' (refer to Figure 2) to turn it on or off. Adjust the flexible arm to direct the light as needed for reading or ambient lighting.
5.5 Automatic Timer
For safety and energy efficiency, the heated massage function is equipped with a 15-minute auto shut-off timer.
6. Thoughtful Design Features
6.1 Side Pockets and Cup Holder
The armrests feature spacious side pockets and a built-in cup holder to keep your essentials like remote controls, phones, or beverages conveniently within reach.
Figure 5: This image details the control panel and integrated features, including the side pocket and cup holder for convenient storage.
6.2 Portability
The lounger includes a built-in carrying handle at the top and comes with a deluxe travel bag, making it easy to transport and store.

Figure 6: This image displays the complete Carepeutic Bed Lounger, highlighting its ergonomic design and the integrated carrying handle at the top.
7. Maintenance and Cleaning
7.1 Cleaning the Covers
The covers of the Carepeutic Bed Lounger, including the armrests and neck rest, are removable and machine washable. Unzip the covers to remove them from the foam inserts. Wash on a gentle cycle with cold water and mild detergent. Air dry or tumble dry on low heat. Do not bleach or iron.
Video 1: This official seller video demonstrates the various ways to use the reading pillow, including attaching and detaching components, and highlights its comfort and versatility for leisure time. It also shows the covers being removed for washing.
8. Troubleshooting
- No Power: Ensure the AC adapter is securely plugged into both the lounger and a working electrical outlet.
- Massage/Heat Not Working: Check power connection. Ensure the respective function buttons are pressed correctly. The heat function has a 15-minute auto shut-off.
- LED Light Not Working: Verify the power connection and ensure the LED light switch is in the 'on' position.
9. Specifications
| Feature | Detail |
|---|---|
| Product Dimensions | 24"D x 21"W x 26"H |
| Item Model Number | KH265V |
| Brand | Carepeutic |
| Color | Grey |
| Weight | 9 Pounds |

Figure 7: A clear diagram illustrating the key dimensions of the bed lounger, including its height, depth, and width, for reference.
10. Warranty and Support
For warranty information or customer support, please refer to the product packaging or contact Carepeutic customer service directly. Keep your purchase receipt for any warranty claims.

