
Janome JN508DX
Janome JN508DX Electric Sewing Machine User Manual
Model: JN508DX
Introduction
This user manual provides comprehensive instructions for the safe and efficient operation, maintenance, and troubleshooting of your Janome JN508DX electric sewing machine. Designed for ease of use, this model features a foot controller for hands-free operation, allowing for precise control and intricate work. Please read this manual thoroughly before using the machine to ensure optimal performance and longevity.
Safety Information
- Always unplug the sewing machine from the electrical outlet when cleaning, making adjustments, or when the machine is not in use.
- Keep fingers away from all moving parts, especially the needle and handwheel.
- Use only the accessories recommended by the manufacturer.
- Never operate the machine if the air openings are blocked. Keep air openings free from lint, dust, and loose cloth.
- Do not operate where aerosol (spray) products are being used or where oxygen is being administered.
- This appliance is not intended for use by persons (including children) with reduced physical, sensory or mental capabilities, or lack of experience and knowledge, unless they have been given supervision or instruction concerning use of the appliance by a person responsible for their safety.
Parts Identification
Familiarize yourself with the main components of your Janome JN508DX sewing machine.
Overall View

The Janome JN508DX electric sewing machine, showcasing its compact and user-friendly design. This image provides a general overview of the machine's main body and controls.
Foot Controller

The foot controller allows for hands-free operation, providing precise speed control while keeping both hands free to guide the fabric. This is a key feature for detailed sewing tasks.
Stitch Selection Dial

A close-up of the stitch selection dial, showing various stitch patterns available. Simply turn the dial to choose your desired stitch for different sewing needs.
Needle Threader

Detail of the built-in needle threader, designed to simplify the threading process and save time. This feature is particularly helpful for those with vision difficulties.
Horizontal Full Rotary Hook & Bobbin

The horizontal full rotary hook system allows for easy bobbin insertion and removal, visible through the clear cover. This design ensures smooth and quiet operation.
Free Arm

The removable accessory box converts the flatbed into a free arm, ideal for sewing cuffs, sleeves, and other small, circular items.
Portable Handle
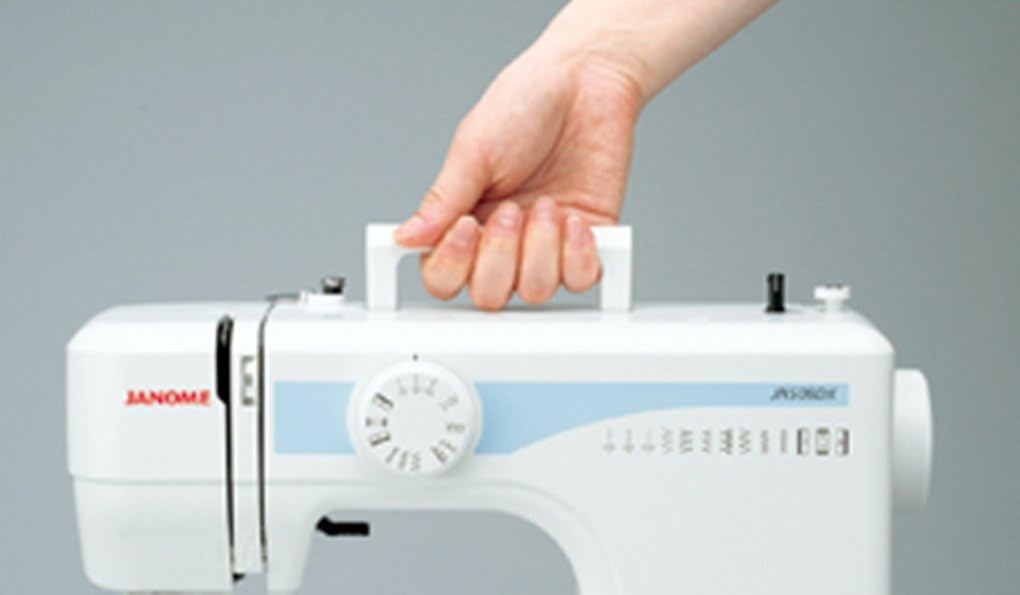
The integrated handle makes the machine easy to carry and transport, enhancing its portability for classes or different workspaces.
Setup
- Unpacking: Carefully remove the machine from its packaging. Retain all packing materials for future storage or transport.
- Placement: Place the machine on a stable, flat surface. Ensure there is adequate space around the machine for fabric handling.
- Power Connection: Connect the power cord to the machine and then to a suitable electrical outlet. Connect the foot controller to its designated port on the machine.
- Winding the Bobbin:
- Place an empty bobbin onto the bobbin winder spindle.
- Follow the threading path for bobbin winding as indicated on the machine.
- Start the machine using the foot controller until the bobbin is sufficiently wound.
- Inserting the Bobbin: Open the bobbin cover. Insert the wound bobbin into the bobbin case, ensuring the thread unwinds in the correct direction (usually counter-clockwise). Pull the thread through the tension spring and close the cover.
- Threading the Upper Thread:
- Raise the presser foot lever.
- Place a spool of thread on the spool pin.
- Follow the numbered threading path on the machine, guiding the thread through all tension discs and guides.
- Use the built-in needle threader (refer to "Needle Threader" in Parts Identification) to thread the needle from front to back.
- Bringing Up the Bobbin Thread: Hold the upper thread lightly. Turn the handwheel towards you to lower the needle into the needle plate and then raise it. The upper thread will catch the bobbin thread, forming a loop. Pull both threads under the presser foot and towards the back of the machine.
Operating Instructions
Basic Sewing
- Select Stitch Pattern: Turn the stitch selection dial to choose your desired stitch (e.g., straight stitch, zigzag). Refer to the stitch pattern guide on the machine or in the specifications section.
- Adjust Stitch Length and Width: Use the corresponding dials or levers to set the stitch length and width as needed for your fabric and project.
- Place Fabric: Place the fabric under the presser foot, aligning the edge with the seam guide on the needle plate.
- Lower Presser Foot: Lower the presser foot lever.
- Start Sewing: Gently press the foot controller to start sewing. The harder you press, the faster the machine will sew.
- Reverse Stitching: To reinforce stitches at the beginning and end of a seam, press and hold the reverse lever/button. Release to sew forward again.
- Finishing a Seam: When you reach the end of your seam, sew a few reverse stitches, then raise the needle to its highest position. Raise the presser foot and pull the fabric away from the machine. Cut the threads using the thread cutter on the machine or scissors.

Available stitch patterns on the Janome JN508DX.
Sewing Thick Fabrics
The Janome JN508DX is capable of sewing through multiple layers of thick fabric, such as denim. Ensure you use the correct needle size (e.g., a denim needle) and adjust the stitch length accordingly for best results.

Example of sewing through thick fabric, demonstrating the machine's capability.
Using the Free Arm
To use the free arm, simply slide off the accessory box. This exposes the narrow arm, which is perfect for sewing small, tubular items like sleeves, pant hems, and cuffs.
The free arm configuration, ideal for sewing cylindrical items.
Maintenance
Regular maintenance ensures the smooth operation and extends the life of your sewing machine.
- Cleaning: Regularly clean lint and dust from the bobbin area and feed dogs using a small brush or vacuum cleaner. Unplug the machine before cleaning.
- Oiling: Refer to your full instruction manual for specific oiling points and frequency. Use only high-quality sewing machine oil.
- Needle Replacement: Replace the needle frequently (after every 8-10 hours of sewing or when it becomes dull/bent) to prevent skipped stitches and fabric damage.
- Storage: When not in use, cover the machine with the provided dust cover to protect it from dust and debris. Store in a dry, cool place.

The accessory box also functions as a dust cover for the machine.
Troubleshooting
| Problem | Possible Cause | Solution |
|---|---|---|
| Skipped Stitches | Incorrect needle, bent needle, improper threading, wrong needle size for fabric. | Replace needle, re-thread machine, ensure correct needle type/size for fabric. |
| Thread Breaking | Improper threading, incorrect tension, dull/bent needle, poor quality thread. | Re-thread machine, adjust tension, replace needle, use good quality thread. |
| Fabric Not Feeding | Presser foot not lowered, feed dogs clogged with lint, stitch length set to zero. | Lower presser foot, clean feed dogs, adjust stitch length. |
| Machine Not Starting | Not plugged in, power switch off, foot controller not connected. | Check power connections, ensure switch is on, verify foot controller connection. |
For more complex issues, please refer to the full instruction manual or contact Janome customer support.
Specifications
- Model: JN508DX
- Type: Electric Sewing Machine
- Control: Foot Controller
- Dimensions: 5.91 x 15.16 x 11.1 inches (Product Dimensions)
- Weight: 13.36 pounds (Item Weight)
- Stitch Patterns: Multiple built-in stitch patterns (e.g., straight, zigzag, buttonhole)
- Bobbin System: Horizontal Full Rotary Hook
- Features: Built-in needle threader, free arm, thick fabric sewing capability, portable handle.
Warranty and Support
For warranty information, please refer to the warranty card included with your purchase or visit the official Janome website. Keep your proof of purchase for warranty claims.
If you require technical assistance or have questions not covered in this manual, please contact Janome customer support through their official channels. You can often find contact information on the Janome website or in the full product manual.
Janome Official Website: www.janome.com
Ask a question about this manual
Ask about setup, troubleshooting, compatibility, parts, safety, or missing instructions. Manuals+ will review the question and use this page’s manual context to help answer it.