1. Introduction
This manual provides instructions for the installation, operation, and maintenance of your DIGITUS 10-inch, 6U wall-mountable network cabinet, model DN-10-05U-1. This cabinet is designed for housing IT and telecommunication equipment in compact spaces, offering a robust and organized solution for network infrastructure.
2. Safety Information
- General Safety: Always follow local electrical and building codes during installation. Ensure the cabinet is installed by qualified personnel.
- Weight Capacity: Do not exceed the maximum loading capacity of 30 kg (66.1 lbs). Overloading can lead to structural failure and injury.
- Wall Mounting: Ensure the mounting surface is structurally sound and capable of supporting the cabinet's weight plus the weight of all installed equipment. Use appropriate fasteners for your wall type.
- Electrical Safety: When installing electrical components, ensure all power is disconnected. Use proper grounding techniques.
- Ventilation: While the cabinet offers passive ventilation, ensure adequate airflow around the cabinet to prevent overheating of internal components.
3. Package Contents
Carefully unpack the box and verify that all components are present and undamaged. If any items are missing or damaged, contact your supplier immediately.

Image: The Digitus network cabinet as it appears in its packaging, showing the cardboard box and protective foam inserts.
- 1x DIGITUS 10-inch, 6U Wall Mount Network Cabinet (DN-10-05U-1)
- Mounting hardware (screws, wall plugs, etc.)
- Keys for the front door lock
- User Manual (this document)
4. Setup and Installation
The cabinet is designed for wall mounting. Assembly is required for securing the cabinet to the wall and installing internal equipment.
4.1 Wall Mounting
- Select Location: Choose a suitable wall location that can support the cabinet's weight and provides easy access for cabling and maintenance. Ensure sufficient clearance for the door to open.
- Mark Drilling Points: Hold the cabinet against the wall at the desired height and mark the positions for the mounting holes. Use a level to ensure proper alignment.
- Drill Holes: Drill holes at the marked positions using an appropriate drill bit for your wall type. Insert wall plugs if necessary.
- Secure Cabinet: Attach the cabinet to the wall using the provided mounting screws. Ensure all screws are tightened securely.
4.2 Equipment Installation
The cabinet features 10-inch rack units for mounting compatible equipment. The usable depth is 250mm.

Image: An open Digitus network cabinet showcasing a patch panel, network switch, and power strip installed, with blue network cables neatly routed.
- Install Rack Rails: The cabinet comes with pre-installed rack rails. Ensure they are securely fastened.
- Mount Equipment: Attach your 10-inch compatible network devices (e.g., patch panels, switches, power distribution units) to the rack rails using appropriate rack screws.
- Cable Management: Utilize the cable entry openings on the top and base for routing cables. The cabinet also includes features for internal cable organization.
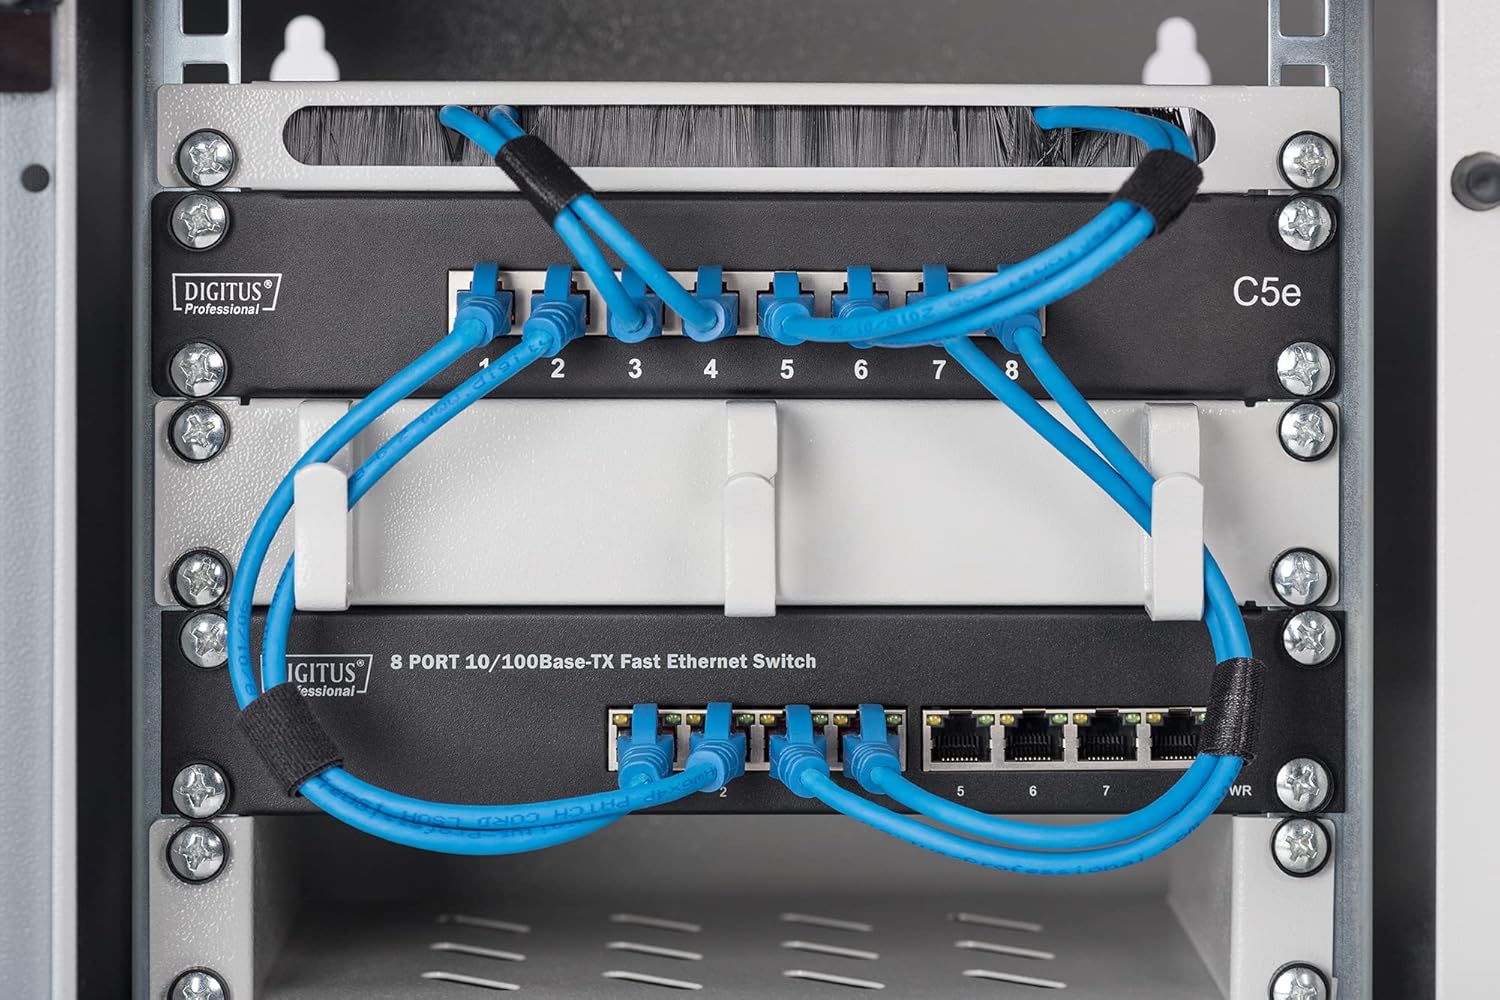
Image: A detailed view inside the network cabinet, showing a Digitus patch panel and an 8-port network switch with blue Ethernet cables connected.

Image: A close-up of the cable brush strip at the top of the cabinet, demonstrating how cables can be neatly routed through it.

Image: A close-up showing white cable management hooks within the cabinet, used to organize and secure network cables.
5. Operation
Once the network cabinet is installed and equipment is mounted, its operation primarily involves maintaining an organized and secure environment for your network devices.
- Access: Use the provided keys to lock and unlock the front door, securing your equipment from unauthorized access.
- Cable Routing: Ensure all cables are routed neatly to prevent strain, interference, and to maintain proper airflow.
- Monitoring: Periodically check the temperature inside the cabinet, especially if active equipment is installed, to ensure it remains within safe operating limits.

Image: A close-up of an 8-port PoE Ethernet switch installed in the cabinet, with network cables connected to its ports.
6. Maintenance
Regular maintenance helps ensure the longevity and optimal performance of your network cabinet and the equipment within it.
- Cleaning: Periodically clean the exterior of the cabinet with a soft, damp cloth. Avoid abrasive cleaners. For the interior, ensure all power is off before gently dusting to prevent dust buildup on equipment.
- Inspection: Regularly inspect all mounting screws and equipment fasteners to ensure they remain tight. Check cables for any signs of wear or damage.
- Door and Lock: Ensure the door hinges operate smoothly and the lock mechanism functions correctly. Lubricate if necessary.
7. Troubleshooting
This section addresses common issues you might encounter with your network cabinet.
- Overheating Equipment:
- Ensure proper cable management to avoid blocking airflow.
- Verify that the cabinet's ventilation openings are not obstructed.
- Consider reducing the number of heat-generating devices if space is limited.
- Loose Equipment:
- Tighten all rack screws securing equipment to the rails.
- Check wall mounting screws for tightness.
- Door Not Closing/Locking:
- Inspect hinges for damage or misalignment.
- Check the lock mechanism for obstructions or damage.
8. Specifications
| Model Number | DN-10-05U-1 |
| Brand | Digitus |
| Rack Units | 6U |
| Dimensions (HxWxD) | 330 x 312 x 300 mm (14.17"H x 14.57"W x 16.14"D) |
| Usable Depth | 250 mm |
| Loading Capacity | 30 kg (66.1 lbs) |
| Material | Metal |
| Color | Grey |
| Mounting Type | Wall Mount |
| Assembly Required | Yes |
9. Warranty and Support
The DIGITUS Network Cabinet is covered by a manufacturer's warranty. Please refer to your purchase documentation for specific warranty terms and conditions. Spare parts availability is typically 1 year from the date of purchase.
For technical support, warranty claims, or inquiries regarding spare parts, please contact your local Digitus distributor or visit the official Digitus website for contact information.


