
1. Introduction
This document serves as an instruction manual for the Robinair 15548 Replacement Pump Module, specifically designed for use with Robinair 15600 Cooltech Vacuum Pumps. This module is a genuine Robinair component, ensuring original equipment (OE) form, fit, and function for seamless integration and reliable performance.
The 15548 module is a complete assembly that includes a drain valve, sight glass, necessary fittings, and a switch. Please note that the motor component is not included with this replacement module.
2. Important Safety Information
Always observe the following safety precautions when handling, installing, or operating the pump module or the complete vacuum pump system:
- Electrical Safety: Ensure the vacuum pump is completely disconnected from the power source before performing any installation, maintenance, or repair.
- Eye Protection: Always wear appropriate eye protection to guard against splashes of vacuum pump oil or refrigerants.
- Skin Protection: Wear protective gloves to prevent skin contact with vacuum pump oil or refrigerants.
- Ventilation: Operate the vacuum pump in a well-ventilated area to prevent the accumulation of refrigerant vapors.
- Oil Handling: Handle vacuum pump oil with care. Refer to the oil manufacturer's safety data sheet (SDS) for specific handling and disposal instructions.
- System Pressure: Ensure the system being evacuated is depressurized before connecting or disconnecting the vacuum pump.
Failure to follow these safety guidelines may result in personal injury or equipment damage.
3. Package Contents
The Robinair 15548 Replacement Pump Module package typically includes the following components:
- Robinair 15548 Replacement Pump Module (main unit)
- Integrated Drain Valve
- Integrated Oil Sight Glass
- Various Fittings (pre-installed or included for connection)
- Integrated Switch
Note: Additional items such as pump oil, gloves, flare adapters, and Teflon tape may be included with a complete vacuum pump unit, but are not part of the 15548 replacement module itself.
4. Specifications
| Attribute | Detail |
|---|---|
| Manufacturer | Robinair |
| Model Number | 15548 |
| Compatible with | Robinair 15600 Cooltech Vacuum Pumps |
| Item Weight | 8.5 pounds |
| Product Dimensions | 10 x 14 x 8 inches |
| Manufacturer Part Number | 15548 |
| ASIN | B00C2GXEK8 |
| First Available Date | March 28, 2013 |
5. Setup and Installation
This section outlines the general steps for installing and preparing the replacement pump module. Always refer to the complete Robinair 15600 Cooltech Vacuum Pump manual for detailed, model-specific instructions.
5.1. Module Replacement
- Disconnect Power: Ensure the Robinair 15600 vacuum pump is completely disconnected from its power source.
- Drain Old Oil: If replacing an existing module, drain any remaining oil from the old pump module.
- Remove Old Module: Carefully detach the old pump module from the motor assembly, noting all connections and fasteners.
- Install New Module: Align the Robinair 15548 Replacement Pump Module with the motor assembly. Secure it using the appropriate fasteners, ensuring a tight and stable connection.
- Connect Components: Reconnect any external components or hoses that were detached during the removal process.
5.2. Initial Oil Fill
After installation, the pump module must be filled with appropriate vacuum pump oil. Use only high-quality vacuum pump oil recommended by Robinair.
- Locate Oil Fill Port: Identify the oil fill port, typically covered by a cap.
- Remove Cap: Unscrew and remove the oil fill cap.
- Fill with Oil: Slowly pour vacuum pump oil into the fill port until the oil level reaches the "MAX" mark on the sight glass. Do not overfill.
- Replace Cap: Securely replace the oil fill cap.
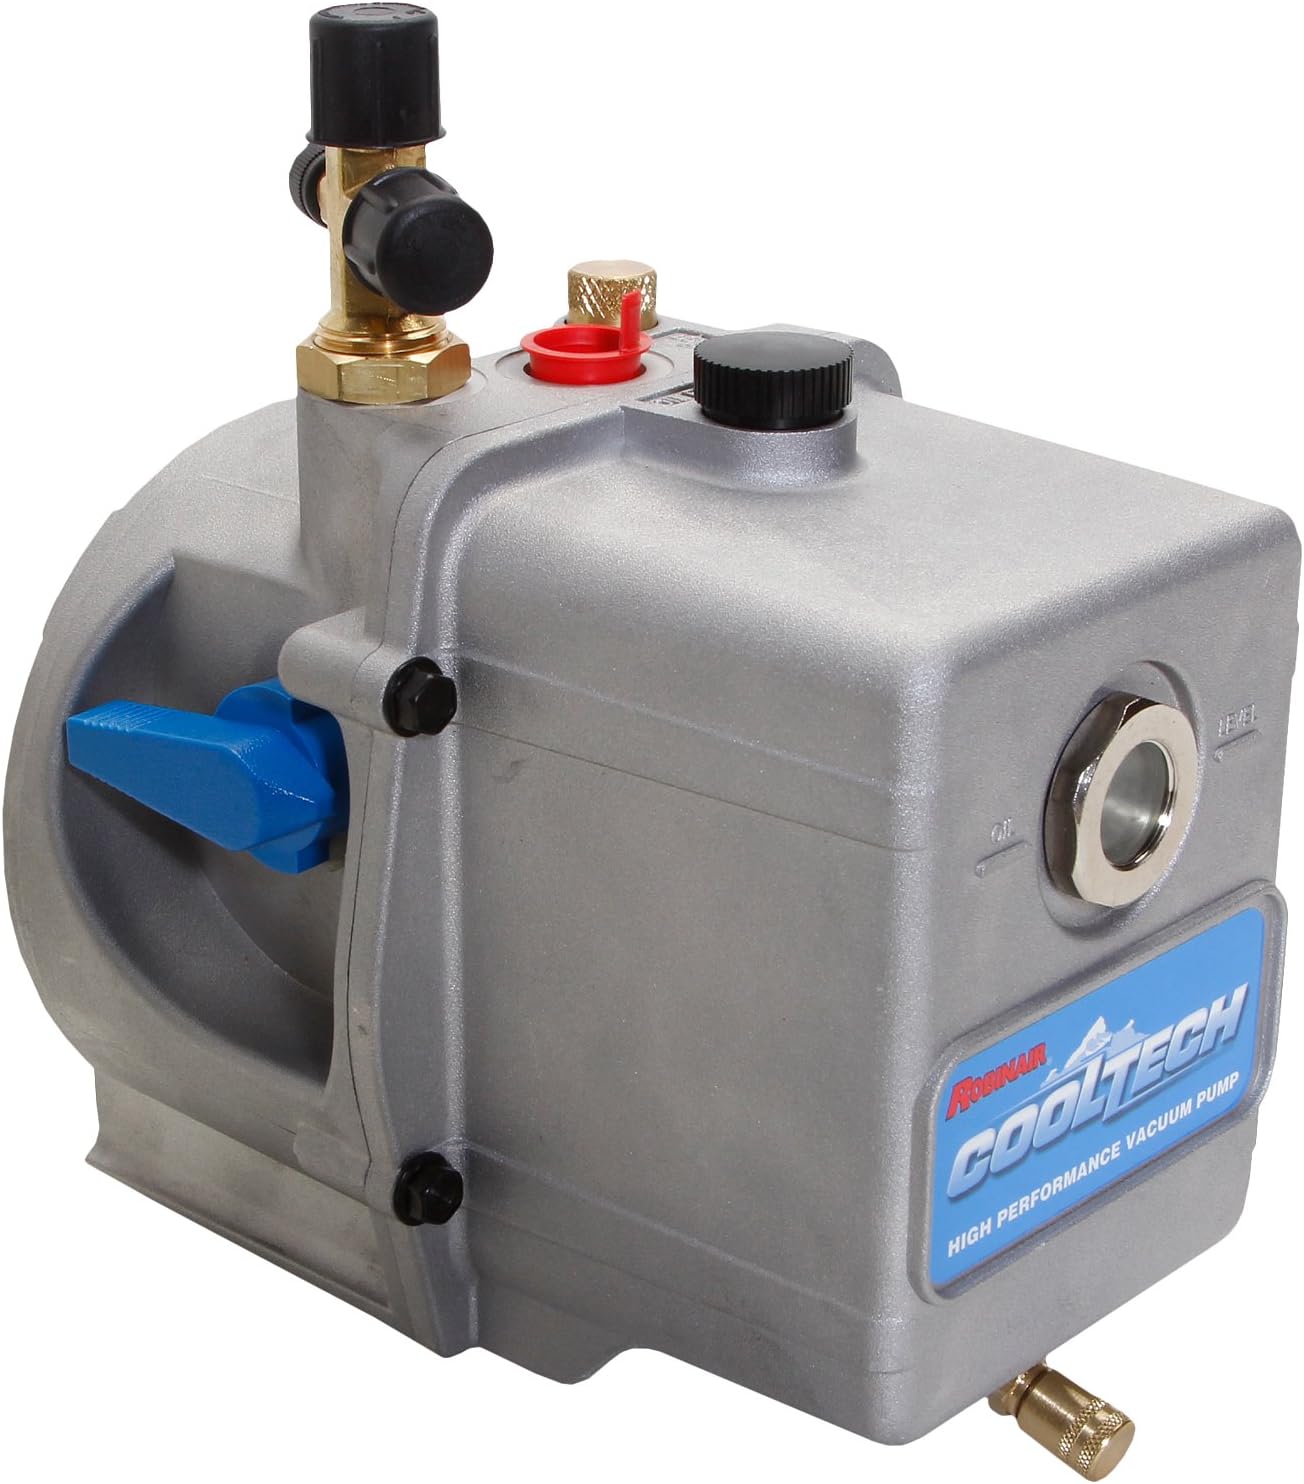
Figure 1: Robinair 15548 Replacement Pump Module. Note the oil sight glass and fill port.
6. Operating Instructions
This section provides general operating guidelines for a vacuum pump equipped with the Robinair 15548 module. Always consult the full vacuum pump manual for specific operational procedures.
6.1. Connecting to a System
- Prepare Connections: Ensure all hoses and fittings are clean and in good condition. Apply Teflon tape to threaded connections if necessary to ensure a tight seal.
- Connect Hoses: Attach appropriate vacuum hoses to the pump's inlet ports (e.g., 1/4 inch flare, 3/8 inch port) and to the system being evacuated.
- Secure Connections: Hand-tighten all connections, then use a wrench to ensure they are snug but do not overtighten.
6.2. Starting the Vacuum Pump
- Check Oil Level: Verify that the oil level is between the "MIN" and "MAX" marks on the sight glass.
- Power On: Connect the vacuum pump to a suitable power outlet. Flip the power switch to the "ON" position. The pump should start running smoothly.
- Monitor Operation: Listen for any unusual noises or vibrations. The pump should operate relatively quietly.
6.3. Evacuation Process
Allow the vacuum pump to run for the recommended duration to achieve the desired vacuum level. This duration depends on the system volume and the required vacuum depth.
- Monitor Vacuum: Use a vacuum gauge (not included) to monitor the system's vacuum level.
- Close Valves: Once the desired vacuum is achieved, close the manifold gauge valves or system valves before turning off the pump.
- Turn Off Pump: Flip the power switch to the "OFF" position.
- Disconnect Hoses: Carefully disconnect the hoses from the system and the pump.
General Vacuum Pump Operation (Example)
Video 1: This video demonstrates the features and basic operation of a VIVOHOME vacuum pump, including oil filling, port connections, noise levels, and various applications such as refrigeration and HVAC repair. While showcasing a different brand, the principles of operation and maintenance are broadly applicable to similar vacuum pump modules.
Video 2: This video highlights the features of an Orion Motor Tech vacuum pump, including its oil tank capacity, sparkless operation, angled oil drain, and high pumping efficiency. It also demonstrates connecting a vacuum gauge and mentions its low-noise design, offering insights into general vacuum pump usage and performance.
Video 3: This video provides an overview of the Orion Motor Tech 4CFM vacuum pump, detailing included accessories like working gloves, pump oil, Teflon tape, and an adapter. It demonstrates a vacuum test, showcasing its ultimate vacuum capability, and includes a noise level test, providing practical information on its performance and accessories.
7. Maintenance
Regular maintenance is crucial for the longevity and efficient operation of your Robinair 15600 Cooltech Vacuum Pump with the 15548 module.
7.1. Oil Changes
- Frequency: Change the vacuum pump oil after every 10 hours of operation or more frequently if the oil appears discolored or contaminated.
- Procedure:
- Ensure the pump is off and cool.
- Place a suitable container under the oil drain plug.
- Remove the oil drain plug and the oil fill cap to allow the oil to drain completely.
- Replace the drain plug securely.
- Refill with new, clean vacuum pump oil to the "MAX" level on the sight glass.
- Replace the oil fill cap.
7.2. Cleaning
- Regularly wipe down the exterior of the pump module to remove dust and debris.
- Keep the cooling fins on the motor clear of obstructions to ensure proper heat dissipation.
8. Troubleshooting
This section addresses common issues that may arise during the operation of your vacuum pump. For complex problems, contact qualified service personnel.
8.1. Pump Not Starting
- Check Power: Ensure the pump is securely plugged into a functional power outlet.
- Power Switch: Verify the power switch is in the "ON" position.
- Circuit Breaker: Check if a circuit breaker has tripped.
- Motor Issues: If the motor hums but does not start, there might be an internal motor issue (not part of the 15548 module).
8.2. Not Achieving Desired Vacuum
- Oil Level/Condition: Check the oil level and ensure the oil is clean. Low or contaminated oil can severely impact vacuum performance.
- System Leaks: Inspect all connections, hoses, and the system itself for leaks. Even small leaks can prevent deep vacuum.
- Pump Inlet: Ensure the pump inlet is not obstructed.
- Pump Condition: If the module is old or heavily used, internal wear might reduce its ultimate vacuum capability.
8.3. Excessive Noise or Vibration
- Oil Level: Incorrect oil level can cause increased noise.
- Mounting: Ensure the pump is placed on a stable, level surface and that all mounting bolts are secure.
- Internal Issues: Persistent loud noises or strong vibrations may indicate internal mechanical problems requiring professional service.
9. Warranty and Support
The Robinair 15548 Replacement Pump Module is manufactured by Robinair, a brand under Bosch Automotive Service Solutions. For specific warranty terms, conditions, and duration, please refer to the warranty documentation included with your original Robinair 15600 Cooltech Vacuum Pump or contact Robinair customer support directly.
For technical assistance, spare parts, or service inquiries, please visit the official Robinair website or contact their authorized service centers. Always provide your product model number (15548) and serial number when seeking support.
Robinair Contact Information:
- Website: www.robinair.com (or refer to your product packaging for specific regional contact details)
- Customer Service: Refer to the website for phone numbers and email contacts.