
Introduction
Thank you for choosing the De'Longhi Dragon 4 Oil Radiator. This manual provides essential information for the safe and efficient use of your appliance. Please read these instructions carefully before operating the radiator and keep them for future reference.
Important Safety Instructions
When using electrical appliances, basic precautions should always be followed to reduce the risk of fire, electric shock, and injury to persons, including the following:
- Read all instructions before using this heater.
- This heater is hot when in use. To avoid burns, do not let bare skin touch hot surfaces. Use handles when moving this heater. Keep combustible materials, such as furniture, pillows, bedding, papers, clothes, and curtains at least 3 feet (0.9 m) from the front of the heater and keep them away from the sides and rear.
- Extreme caution is necessary when any heater is used by or near children or invalids and whenever the heater is left operating and unattended.
- Always unplug heater when not in use.
- Do not operate any heater with a damaged cord or plug or after the heater malfunctions, has been dropped or damaged in any manner. Return heater to authorized service facility for examination, electrical or mechanical adjustment, or repair.
- Do not use outdoors.
- This heater is not intended for use in bathrooms, laundry areas and similar indoor locations. Never locate heater where it may fall into a bathtub or other water container.
- Do not run cord under carpeting. Do not cover cord with throw rugs, runners, or similar coverings. Arrange cord away from traffic area and where it will not be tripped over.
- To disconnect heater, turn controls to off, then remove plug from outlet.
- Do not insert or allow foreign objects to enter any ventilation or exhaust opening as this may cause an electric shock or fire, or damage the heater.
- To prevent a possible fire, do not block air intakes or exhaust in any manner. Do not use on soft surfaces, like a bed, where openings may become blocked.
- A heater has hot and arcing or sparking parts inside. Do not use it in areas where gasoline, paint, or flammable liquids are used or stored.
- Use this heater only as described in this manual. Any other use not recommended by the manufacturer may cause fire, electric shock, or injury to persons.
- Always plug heaters directly into a wall outlet/receptacle. Never use with an extension cord or relocatable power tap (outlet/power strip).
Product Overview
The De'Longhi Dragon 4 Oil Radiator is designed to provide efficient and consistent heating. Familiarize yourself with its components before use.
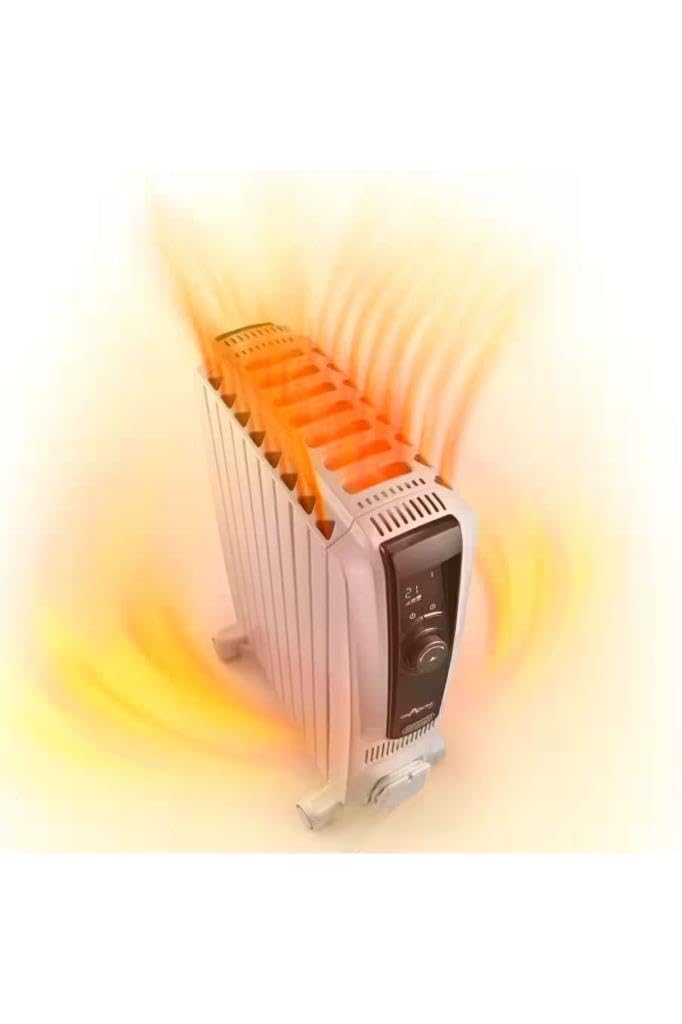
Figure 1: Full view of the De'Longhi Dragon 4 Oil Radiator, showing its fins, control panel, and wheels.
Main Components:
- Heating Fins: The oil-filled fins radiate heat into the room.
- Control Panel: Located on the front, it houses the digital display, power button, mode selection, and thermostat knob.
- Wheels: For easy portability of the unit.
- Power Cord Storage: A dedicated area to neatly store the power cord when not in use.

Figure 2: A hand adjusting the control knob on the digital panel, displaying temperature settings.
Control Panel Features:
- Digital Display: Shows current settings, temperature, and timer information.
- Power Button: Turns the radiator on or off.
- Mode/Heat Setting Button: Cycles through the 3 heating functions (power levels).
- Thermostat Knob: Adjusts the desired room temperature.
- Timer Button: Activates and sets the timer function.
- Eco-Save Mode Button: Engages the energy-saving mode.
Setup
- Unpacking: Carefully remove the radiator from its packaging. Retain the packaging for future storage or transport.
- Wheel Assembly: The radiator comes with pre-assembled wheels for easy movement. Ensure they are securely locked in place if they have a locking mechanism.
- Placement: Place the radiator on a stable, flat surface. Ensure there is at least 3 feet (0.9 meters) of clear space around the heater from walls, furniture, and other combustible materials. Do not place it directly under a power outlet.
- Power Connection: Ensure the power cord is fully unwound. Plug the radiator directly into a suitable 240V AC wall outlet. Do not use extension cords or power strips.
Operating Instructions
Turning On/Off:
- To turn on, press the Power Button on the control panel. The digital display will illuminate.
- To turn off, press the Power Button again. The display will turn off, and the radiator will cease heating.
Adjusting Heat Settings (Power Levels):
The radiator offers 3 heating functions (power levels) to suit your comfort needs.
- With the radiator on, press the Mode/Heat Setting Button repeatedly to cycle through the available power levels (e.g., Low, Medium, High).
- The selected power level will be indicated on the digital display.
Setting the Thermostat:
The integrated thermostat allows you to set a desired room temperature.
- Turn the Thermostat Knob clockwise to increase the desired temperature or counter-clockwise to decrease it.
- The digital display will show the set temperature. The radiator will automatically turn on and off to maintain this temperature.
Eco-Save Mode:
The Eco-Save mode optimizes energy consumption while maintaining a comfortable temperature.
- Press the Eco-Save Mode Button to activate this feature. An indicator will appear on the display.
- The radiator will automatically adjust its power output to achieve the most efficient heating.
Timer Function:
The timer allows you to program the radiator to turn on or off automatically after a set period.
- Press the Timer Button.
- Use the Thermostat Knob or dedicated timer adjustment buttons (if present, otherwise assume the knob adjusts it) to set the desired delay in hours.
- The display will show the remaining time.
Maintenance
Cleaning:
- Always unplug the radiator from the power outlet and allow it to cool completely before cleaning.
- Wipe the exterior surfaces with a soft, damp cloth. Do not use abrasive cleaners or solvents, as these may damage the finish.
- Ensure no water enters the control panel or other electrical components.
- Do not immerse the radiator in water.
Storage:
- If storing the radiator for an extended period, ensure it is clean and dry.
- Wrap the power cord neatly using the integrated cord storage.
- Store the radiator in a cool, dry place, preferably in its original packaging, to protect it from dust and damage.

Figure 3: Close-up view of the power cord neatly wrapped around the integrated storage area at the base of the radiator.
Troubleshooting
| Problem | Possible Cause | Solution |
|---|---|---|
| Radiator does not turn on. | No power supply. Power button not pressed. Thermostat set too low. | Check if the plug is securely in the outlet and the circuit breaker is not tripped. Press the Power Button. Increase the thermostat setting. |
| Radiator is on but not heating. | Thermostat set too low. Eco-Save mode active in a cold room. | Increase the thermostat setting. Deactivate Eco-Save mode or allow more time for heating. |
| Radiator emits an unusual smell. | New appliance smell. Dust accumulation. | This is normal for new heaters and will dissipate after initial use. Unplug and clean the radiator as per maintenance instructions. |
| Radiator makes clicking noises. | Expansion and contraction of metal parts due to heating/cooling. | This is normal and not a cause for concern. |
Specifications
| Feature | Detail |
|---|---|
| Brand | De'Longhi |
| Model Number | TRD40820ER |
| Power/Wattage | 2000 W |
| Voltage | 240 Volt |
| Heat Settings | 3 |
| Special Features | On/Off Timer, Manual Thermostat, Wheels, Digital Panel, Eco-Save Mode |
| Product Dimensions | 49.5 x 66.5 x 16 cm |
| Weight | 15.9 Kilogram |
| Indoor/Outdoor Use | Indoor |
Warranty and Support
For warranty information, please refer to the warranty card included with your product or visit the official De'Longhi website. For technical support, service, or to purchase replacement parts, please contact De'Longhi customer service through their official channels.
You can find more information and contact details on the official De'Longhi website: www.delonghi.com