
Important Safety Information
Read and understand all instructions before operating this equipment. Failure to follow these instructions may result in serious injury or property damage. Keep this manual for future reference.
- Always wear appropriate personal protective equipment, including safety glasses and gloves, when handling used oil.
- Ensure the unit is on a stable, level surface before use.
- Do not exceed the maximum working pressure of 10 PSI for air-operated fluid transfer. Refer to the gauge for pressure monitoring.
- Never use this unit for flammable liquids or corrosive chemicals. It is designed for waste oil and non-corrosive fluids only.
- Keep children and unauthorized personnel away from the work area.
- Dispose of used oil according to local environmental regulations.
- Inspect the unit for damage or leaks before each use. Do not operate if damaged.
Package Contents
Verify that all components are present before assembly.
- 20 Gallon Oil Drain Tank
- Adjustable Height Drain Pan Assembly
- Handle
- Wheels (4)
- Air Pressure Regulator with Gauge
- Drain Hose with Nozzle
- 1/4" NPT Air Coupler
- Assembly Hardware
Product Overview and Features
The ARKSEN 20 Gallon Portable Air Operated Waste Oil Drain Tank is designed for efficient collection and transfer of used automotive fluids. Its robust construction and adjustable features make it suitable for various workshop environments.

Figure 1: Complete unit with adjustable height and mobility features.

Figure 2: Wide drain pan for efficient fluid collection.
- Efficient Draining: Allows easy transfer of used oil from the built-in tank to a secondary container for recycling.
- Adjustable Height: The drain pan height can be adjusted from 45" to 72-1/2", accommodating vehicles on lifts.
- Storage Capacity: Features a 20-gallon tank for waste oil.
- Mobility: Equipped with 4 wheels for easy maneuverability around the workshop.
- Air Operated Transfer: Includes a regulator and gauge for controlled air pressure-assisted fluid transfer.
Assembly Instructions
Follow these steps to assemble your oil drain tank:
- Attach the wheels to the base of the tank using the provided hardware. Ensure all wheels are securely fastened.
- Insert the adjustable height pole into the opening on the top of the tank. Secure it with the locking mechanism.
- Mount the drain pan onto the top of the adjustable pole.
- Connect the air pressure regulator and gauge to the designated port on the tank. Ensure a tight seal.
- Attach the drain hose to the appropriate outlet on the tank.
- Attach the handle to the tank for easier transport.

Figure 3: Securely attach the wheels for mobility.

Figure 4: Air pressure regulator and gauge connection point.
Operation
Draining Oil from a Vehicle
- Position the oil drain tank directly under the vehicle's oil drain plug.
- Adjust the height of the drain pan using the knob on the pole (refer to Figure 1) to ensure proper alignment with the vehicle's drain point.
- Ensure the main valve (Figure 5) is closed before draining.
- Remove the vehicle's oil drain plug and allow the used oil to flow into the drain pan. The pan's mesh filter will catch larger debris.
- Once draining is complete, replace the vehicle's drain plug.
- Open the main valve (Figure 5) to allow the oil from the pan to flow into the main tank. Close the valve once the pan is empty.
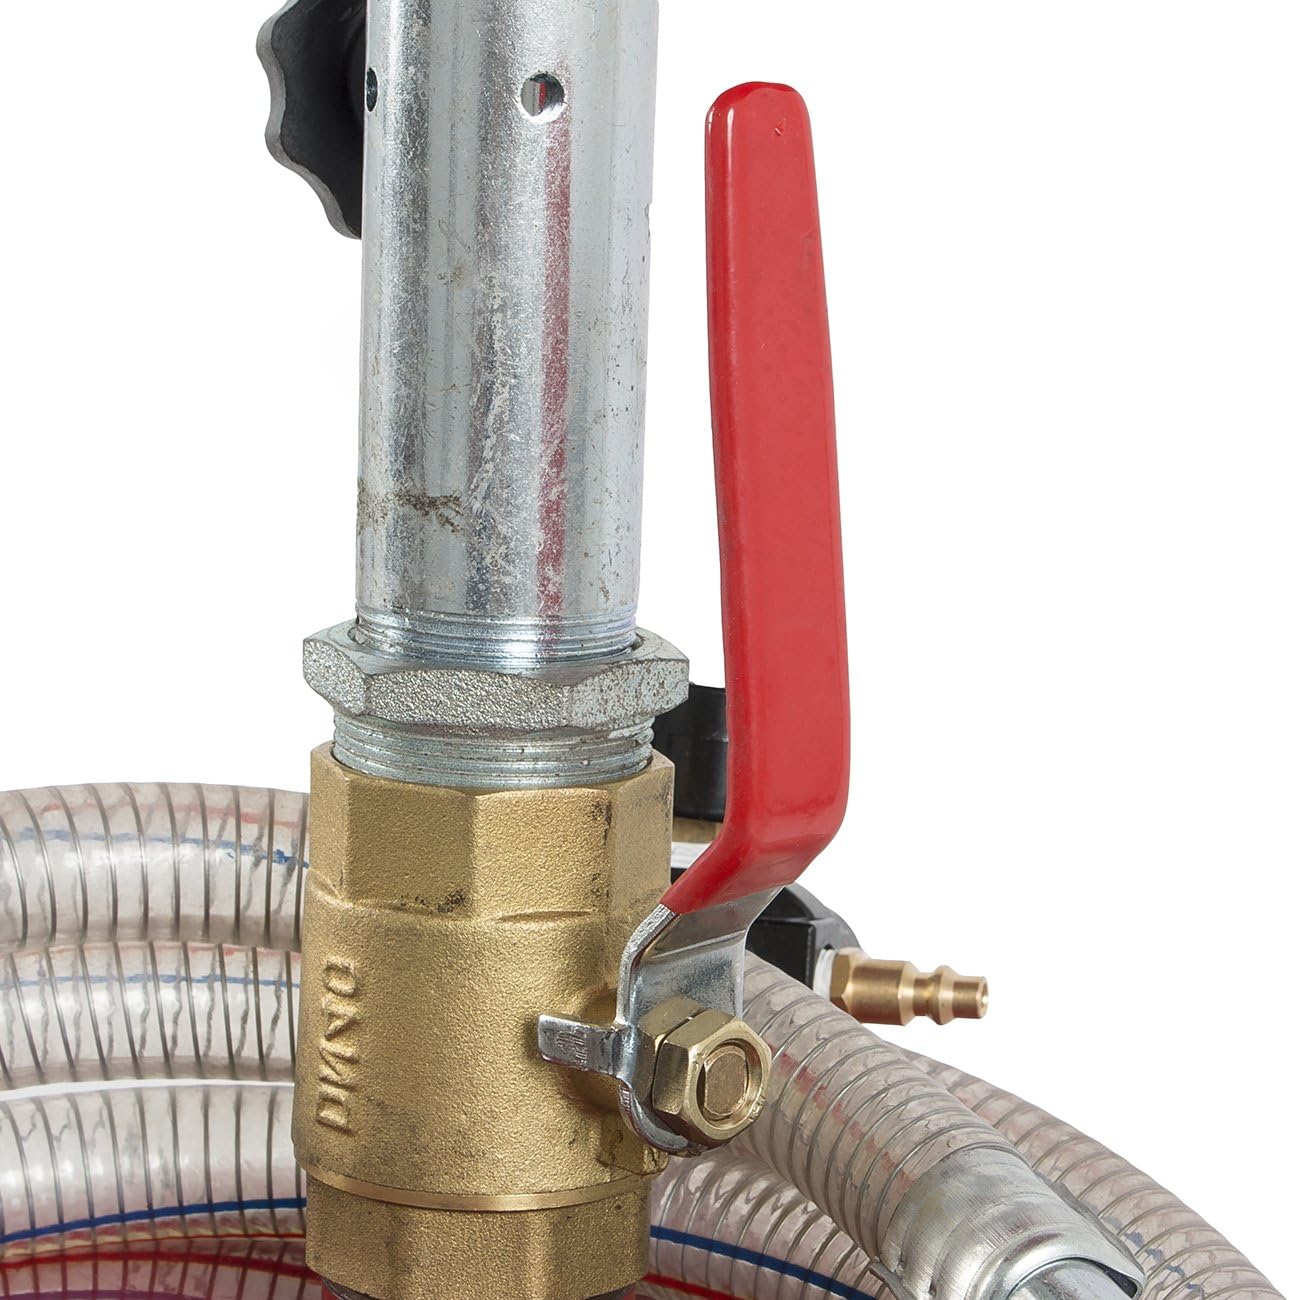
Figure 5: Main valve for controlling oil flow into the tank.

Figure 6: Air pressure gauge for monitoring internal tank pressure.
Transferring Oil from the Tank (Air Operated)
To transfer collected waste oil from the tank to a secondary container for disposal:
- Ensure the main valve (Figure 5) is closed.
- Connect an air compressor to the 1/4" NPT air coupler on the regulator (Figure 6).
- Slowly introduce air pressure, monitoring the gauge. Do not exceed 10 PSI.
- Direct the drain hose into your secondary waste oil container.
- Open the valve on the drain hose to begin transferring the oil.
- Once the tank is empty, close the drain hose valve and disconnect the air supply.
- Depressurize the tank by carefully opening the air regulator valve.
Maintenance
Regular maintenance ensures the longevity and safe operation of your oil drain tank.
- Cleaning: Periodically clean the drain pan and exterior of the tank to remove oil residue.
- Inspection: Before each use, inspect all hoses, connections, and valves for signs of wear, cracks, or leaks. Replace any damaged components immediately.
- Pressure Gauge: Ensure the pressure gauge is functioning correctly and provides accurate readings.
- Storage: Store the unit in a clean, dry area away from direct sunlight and extreme temperatures.
Troubleshooting
| Problem | Possible Cause | Solution |
|---|---|---|
| Oil not draining from pan into tank. | Main valve is closed or clogged. | Open the main valve. Check for and clear any obstructions. |
| Oil not transferring from tank via air pressure. | Insufficient air pressure, air leak, or drain hose valve closed. | Ensure air compressor is connected and providing adequate pressure (max 10 PSI). Check all connections for leaks. Open the drain hose valve. |
| Unit leaks oil. | Loose connections, damaged seals, or cracked components. | Tighten all connections. Inspect seals and hoses for damage and replace if necessary. Do not use if structural damage is present. |
Specifications
| Brand | Arksen |
| Model Number | 002-AU-20024 |
| Capacity | 20 Gallons |
| Adjustable Height | 45" to 72-1/2" |
| Working Pressure | 10 PSI (Maximum) |
| Gauge Range | 0-23 PSI in 0.5 PSI Increments |
| Product Dimensions | 36 x 18 x 18 inches |
| Item Weight | 36.9 pounds |
Warranty and Support
This ARKSEN product comes with a 1-Year Warranty against manufacturing defects. For warranty claims, technical support, or replacement parts, please contact ARKSEN customer service. Keep your purchase receipt as proof of purchase.
