
1. Important Safety Instructions
Please read all instructions carefully before operating your portable air conditioner. Retain this manual for future reference.
- Electrical Safety: Always plug the unit into a grounded 3-prong outlet. Do not use extension cords or adapter plugs. Ensure the power cord is not damaged or pinched.
- Placement: Place the unit on a firm, level surface. Maintain at least 20 inches (50 cm) of clear space around the unit for proper airflow. Do not block air inlets or outlets.
- Ventilation: The exhaust hose must be properly installed and vented to the outside to expel hot air. Improper ventilation can lead to inefficient cooling and potential overheating.
- Water Drainage: Ensure the drainage system is correctly set up to prevent water overflow. Regularly check and empty the water tank if not using continuous drainage.
- Maintenance: Always unplug the unit before cleaning or performing any maintenance. Do not attempt to repair the unit yourself; contact qualified service personnel.
- Children and Pets: Keep children and pets away from the unit during operation.
- Refrigerant: This unit uses R410A refrigerant. Only qualified personnel should handle refrigerant.
2. Product Overview
Familiarize yourself with the components of your SPT WA-1420E Portable Air Conditioner.

Figure 2.1: Front view of the SPT WA-1420E Portable Air Conditioner. This image shows the main unit with its control panel and air outlet.
Main Components:
- Main Unit: Houses the compressor, fan, and control electronics.
- Control Panel: Located on the top of the unit for manual operation.
- Remote Control: For convenient operation from a distance.
- Exhaust Hose: Flexible hose to vent hot air outside.
- Window Venting Kit: Panels and adapters for sealing the exhaust hose in a window.
- Air Filters: Removable filters for cleaning.
- Drainage Port: For removing condensed water.
3. Setup and Installation
Follow these steps to properly set up your portable air conditioner.
3.1 Exhaust Hose Assembly
- Extend the exhaust hose to its full length.
- Attach one end of the exhaust hose to the hose adapter for the unit. Twist clockwise until secure.
- Attach the other end of the exhaust hose to the window exhaust adapter. Twist clockwise until secure.

Figure 3.1: The flexible exhaust hose, essential for venting hot air out of the room.
3.2 Window Kit Installation
The window kit is designed for most standard vertical and horizontal sliding windows.
- Open the window and place the window sealing plate assembly into the window opening.
- Adjust the length of the window sealing plate using the adjustable panels to fit your window opening. Secure with screws if provided.
- Insert the window exhaust adapter (with the hose attached) into the opening of the window sealing plate. Ensure it is firmly seated to prevent air leakage.
- Close the window firmly against the sealing plate to create a tight seal.

Figure 3.2: Window kit panels, used to seal the window opening around the exhaust hose.
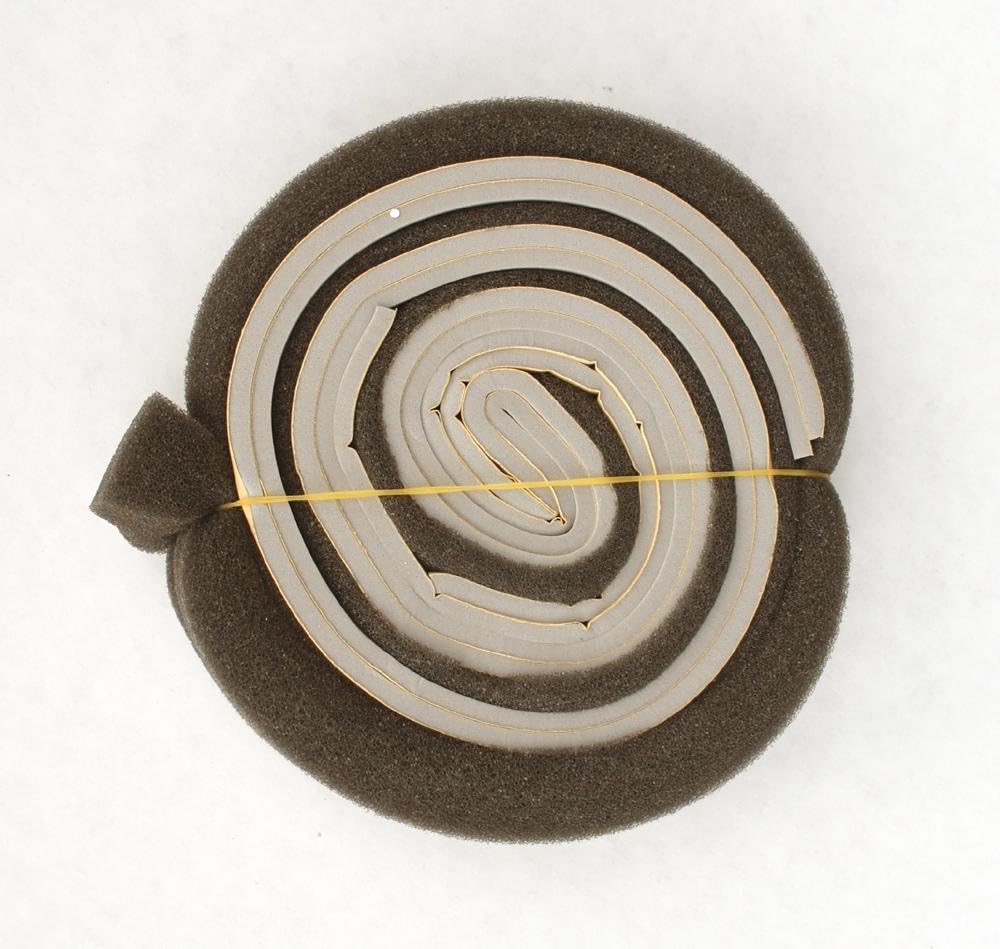
Figure 3.3: Foam weather stripping, used to improve the seal around the window kit and prevent air leakage.
3.3 Power Connection
Plug the power cord into a grounded 3-prong electrical outlet. Ensure the voltage matches the unit's requirements (115V/60Hz).
4. Operating Instructions
Your SPT WA-1420E offers three operational modes: Cooling, Dehumidifying, and Fan.
4.1 Control Panel and Remote Control
The unit can be operated using the control panel on the top of the unit or the included remote control. The remote control duplicates most functions of the control panel.
4.2 Operating Modes
- Cooling Mode: Select this mode for cooling the room. Use the temperature adjustment buttons to set your desired temperature (typically between 62°F and 88°F). The unit will cool until the room reaches the set temperature.
- Dehumidifying Mode: This mode removes excess moisture from the air without significant cooling. The fan speed is typically fixed at a low setting in this mode. Continuous drainage is recommended for extended use in dehumidifying mode.
- Fan Mode: This mode circulates air without cooling or dehumidifying. You can select from three fan speeds (Low, Medium, High).
4.3 Fan Speed Adjustment
In Cooling and Fan modes, press the Fan Speed button to cycle through Low, Medium, and High fan speeds. In Dehumidifying mode, the fan speed is usually preset.
4.4 Timer Function
Use the Timer button to set the unit to turn on or off automatically after a specified period (e.g., 1-24 hours).
5. Maintenance
Regular maintenance ensures optimal performance and longevity of your air conditioner.
5.1 Air Filter Cleaning
The air filters should be cleaned every two weeks or more frequently depending on usage and air quality.
- Unplug the air conditioner from the power outlet.
- Remove the filter covers (usually located on the back or side of the unit).
- Carefully pull out the air filters.
- Wash the filters under running water (warm, not hot) or use a vacuum cleaner to remove dust.
- Allow the filters to air dry completely before reinstalling them. Do not expose to direct sunlight.
5.2 Water Drainage
The unit will accumulate condensed water during operation. It features a self-evaporative system, but in high humidity conditions, manual drainage may be required.
- Manual Drainage: When the internal water tank is full, the unit will stop operating and display an indicator. Place a shallow pan or tray under the drainage port (typically at the bottom rear of the unit) and remove the drain plug to empty the water.
- Continuous Drainage: For prolonged use in dehumidifying mode or high humidity, attach the provided drain hose to the continuous drainage port (usually located higher on the unit) and direct it to a floor drain or a larger container.
5.3 Storage
When storing the unit for an extended period:
- Drain all accumulated water from the unit.
- Clean the air filters.
- Run the unit in fan-only mode for a few hours to dry the internal components.
- Unplug the power cord and coil it neatly.
- Remove the exhaust hose and window kit, and store them with the unit.
- Cover the unit with a plastic bag or cloth to protect it from dust.
- Store the unit in an upright position in a cool, dry place.
6. Troubleshooting
Refer to this section for common issues and their solutions.
| Problem | Possible Cause | Solution |
|---|---|---|
| Unit does not turn on | No power; Power cord damaged; Full water tank; Timer activated. | Check power connection and circuit breaker; Inspect power cord; Empty water tank; Deactivate timer. |
| Unit cools insufficiently | Dirty air filter; Exhaust hose not properly installed/sealed; Room too large; Doors/windows open; Air inlet/outlet blocked; Temperature setting too high. | Clean air filter; Ensure exhaust hose is securely connected and vented; Close doors/windows; Clear obstructions; Lower temperature setting; Consider room size (recommended for up to 750 sq. ft.). |
| Unit is noisy | Unit not on a level surface; Fan speed too high; Internal component vibration. | Place unit on a flat, stable surface; Reduce fan speed; Ensure no loose parts. If noise persists, contact support. |
| Water leaks from unit | Drain plug not properly inserted; Continuous drain hose blocked or improperly connected; Unit tilted. | Ensure drain plug is secure; Check continuous drain hose for kinks or blockages; Place unit on a level surface. |
7. Specifications
Technical details for the SPT WA-1420E Portable Air Conditioner.

Figure 7.1: Dimensions of the SPT WA-1420E Portable Air Conditioner.
| Feature | Detail |
|---|---|
| Model Number | WA-1420E |
| Cooling Capacity | 14,000 BTU (1.1 tons) |
| Recommended Floor Area | Up to 750 sq. ft. |
| Operational Modes | Cooling, Dehumidifying, Fan |
| Fan Speeds | 3 (Low, Medium, High) |
| Refrigerant | R410A (Eco-friendly) |
| Seasonal Energy Efficiency Ratio (SEER) | 8.9 |
| Noise Level | 55.2 dB |
| Power Source | Corded Electric |
| Wattage | 1580 watts |
| Item Weight | 73 pounds |
| Control Method | Remote Control |
| UPC | 876840006379 |
8. Warranty and Support
For warranty information and customer support, please refer to the warranty card included with your product or visit the official SPT website. You may also contact SPT customer service directly for assistance with product operation, troubleshooting, or parts replacement.
Manufacturer: Sunpentown
Brand: SPT


