1. Introduction
The Oakton WD-35413-00 Instruments Series pH/CON 700 Benchtop Meter is a versatile laboratory instrument designed for precise measurement of pH, conductivity, and temperature. This meter is supplied with a pH electrode, a conductivity/temperature probe, and an electrode stand, operating on 110/220 VAC. It is engineered for reliable performance in various scientific and industrial applications.
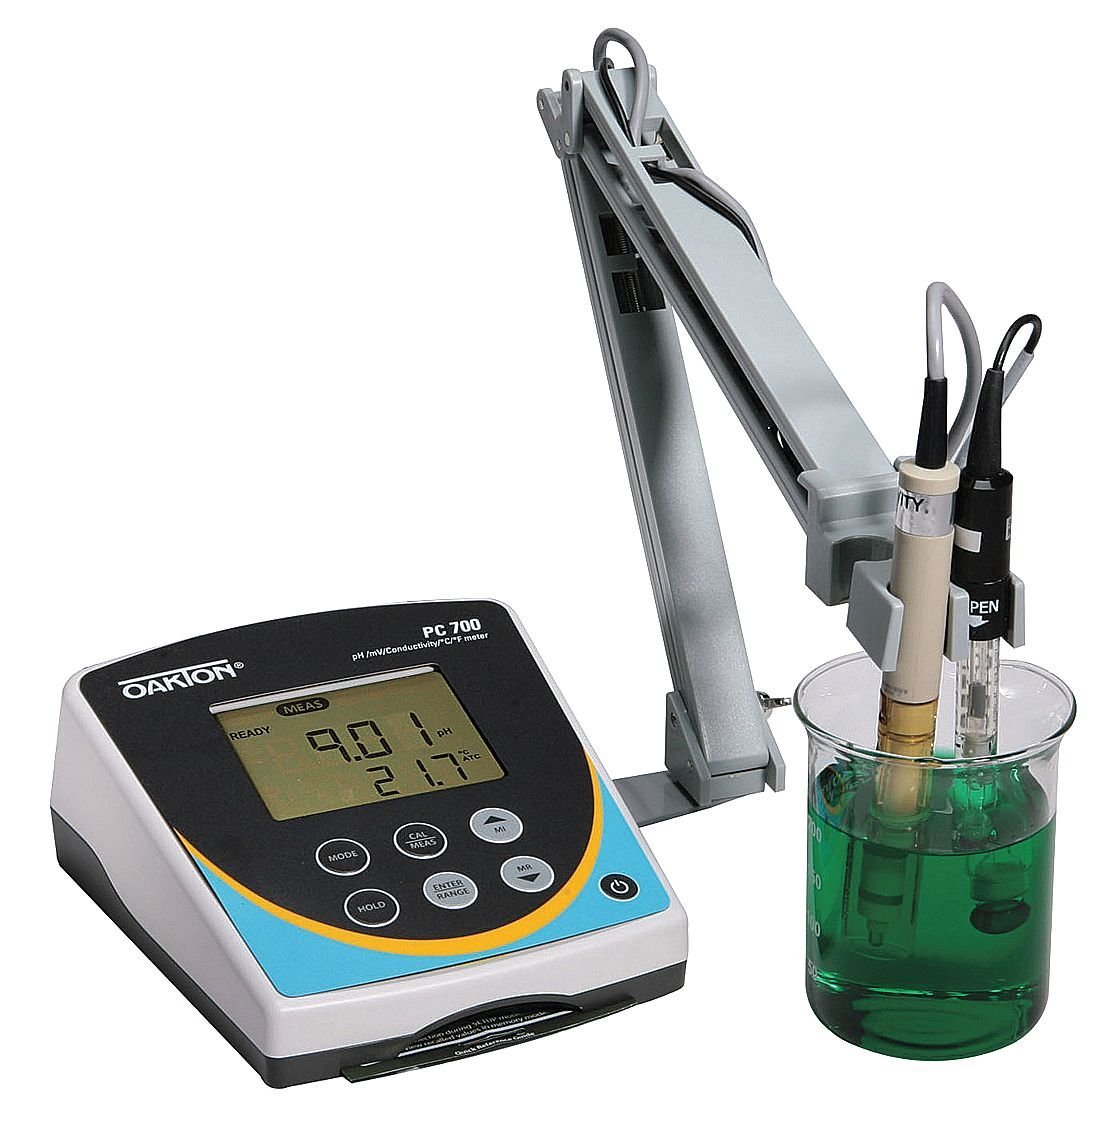
Figure 1: Oakton WD-35413-00 pH/CON 700 Benchtop Meter setup, showing the main unit, electrode stand, pH electrode, and conductivity/temperature probe immersed in a beaker.
2. Setup and Assembly
Proper setup ensures accurate measurements and extends the life of your instrument. Follow these steps for initial assembly:
- Unpacking: Carefully remove all components from the packaging. Verify that all items listed in the packing list are present: the pH/CON 700 meter, pH electrode, conductivity/temperature probe, electrode stand, and power adapter.
- Positioning the Meter: Place the meter on a stable, level surface away from direct sunlight, heat sources, and strong electromagnetic fields.
- Assembling the Electrode Stand:
- Attach the base of the stand to the main support rod.
- Secure the electrode holder arm to the support rod at a suitable height.
- Ensure the stand is stable and can securely hold the electrodes.
- Connecting Electrodes and Probes:
- Connect the pH electrode to the designated BNC connector on the back of the meter.
- Connect the conductivity/temperature probe to its respective port.
- Carefully place the electrodes into the electrode holder on the stand.
- Power Connection: Connect the provided 110/220 VAC power adapter to the meter's power input and then to a suitable power outlet.
- Initial Power On: Press the power button (⑂) to turn on the meter. The display should illuminate.
3. Operating Instructions
This section outlines the basic operation for pH and conductivity measurements.
3.1. pH Measurement
- Preparation: Rinse the pH electrode with distilled water and gently blot dry with a lint-free tissue.
- Calibration:
- Press the MODE button to select pH mode.
- Press the CAL/MEAS button to enter calibration mode.
- Immerse the pH electrode into the first pH buffer solution (e.g., pH 7.00). Wait for the reading to stabilize.
- Press ENTER/RANGE to confirm the calibration point.
- Rinse the electrode and repeat for subsequent buffer solutions (e.g., pH 4.01 and pH 10.00).
- Once calibration is complete, the meter will return to measurement mode.
- Sample Measurement:
- Rinse the calibrated pH electrode with distilled water.
- Immerse the electrode into the sample solution. Ensure the electrode junction is fully submerged.
- Allow the reading to stabilize. The pH value and temperature will be displayed.
- Press HOLD to freeze the current reading on the display. Press again to release.
3.2. Conductivity Measurement
- Preparation: Rinse the conductivity/temperature probe with distilled water.
- Calibration:
- Press the MODE button to select Conductivity mode.
- Press the CAL/MEAS button to enter calibration mode.
- Immerse the probe into a standard conductivity solution (e.g., 1413 µS/cm). Wait for the reading to stabilize.
- Press ENTER/RANGE to confirm the calibration point.
- Rinse the probe and repeat for other standard solutions if multi-point calibration is desired.
- Sample Measurement:
- Rinse the calibrated conductivity probe with distilled water.
- Immerse the probe into the sample solution. Ensure the probe tip is fully submerged and free of air bubbles.
- Allow the reading to stabilize. The conductivity value and temperature will be displayed.
4. Maintenance
Regular maintenance ensures the longevity and accuracy of your Oakton pH/CON 700 meter.
- Electrode Cleaning:
- After each use, rinse electrodes and probes thoroughly with distilled or deionized water.
- For stubborn deposits, consult the electrode's specific cleaning instructions.
- Electrode Storage:
- Store pH electrodes in a proper storage solution or pH 4 buffer. Never store dry.
- Conductivity probes can typically be stored dry after rinsing.
- Meter Cleaning: Wipe the meter's exterior with a damp cloth. Do not use abrasive cleaners or solvents. Ensure no liquid enters the meter casing.
- Calibration Frequency: Calibrate the meter regularly, ideally before each measurement session or when high accuracy is required. Calibration frequency depends on usage and sample characteristics.
5. Troubleshooting
Refer to this section for common issues and their potential solutions.
| Problem | Possible Cause | Solution |
|---|---|---|
| Unstable pH readings | Dirty electrode; air bubbles; electrode not conditioned; expired buffer. | Clean electrode; ensure no air bubbles; recondition electrode; use fresh buffer. |
| Inaccurate pH readings | Improper calibration; faulty electrode; temperature not compensated. | Recalibrate with fresh buffers; replace electrode; ensure ATC probe is connected and functioning. |
| No conductivity reading | Probe not connected; damaged probe; air bubbles in probe cell. | Check probe connection; replace probe; tap probe to dislodge bubbles. |
| Meter does not power on | Power adapter disconnected; faulty power outlet. | Check power connections; try a different outlet. |
6. Specifications
Key technical specifications for the Oakton WD-35413-00 pH/CON 700 Benchtop Meter:
- Model Number: WD-35413-00
- Manufacturer: Oakton
- Package Dimensions: 10 x 8 x 8 inches
- Package Weight: 5 pounds
- Power Requirement: 110/220 VAC (via supplied adapter)
- Included Components: pH Electrode, Conductivity/Temperature Probe, Electrode Stand
- First Available Date: March 7, 2013
7. Warranty and Support
For warranty information and technical support, please refer to the official Oakton website or contact your authorized distributor. Keep your purchase receipt as proof of purchase for warranty claims.
For further assistance, you may contact Oakton customer service directly. Contact details are typically available on the manufacturer's official website.


