
Hampton Bay 598 318
Hampton Bay 598 318 Semi-Flushmount Light Fixture User Manual
Model: 598 318
Introduction
Thank you for purchasing the Hampton Bay Angelina Collection 3-light semi-flushmount light fixture, model 598 318. This manual provides detailed instructions for the safe installation, operation, and maintenance of your new lighting fixture. Please read all instructions carefully before beginning installation and retain this manual for future reference.
Safety Information
WARNING: To reduce the risk of fire, electric shock, or personal injury, always follow these basic precautions:
- Turn off power at the circuit breaker or fuse box before installation or servicing.
- Consult a qualified electrician if you are unsure about the installation process.
- Use only the recommended bulb type and wattage as specified in the specifications section.
- Do not install this fixture in wet locations.
- Ensure all electrical connections are secure and comply with local codes and ordinances.
- Do not touch the bulb when the fixture is operating or immediately after it has been turned off.
Package Contents
Verify that all parts listed below are included in your package. If any parts are missing or damaged, contact customer service before proceeding with installation.
- Light Fixture Assembly (Model 598 318)
- Mounting Hardware Kit (screws, wire nuts, mounting bracket)
- Glass Shades (3 pieces)
- Instruction Manual
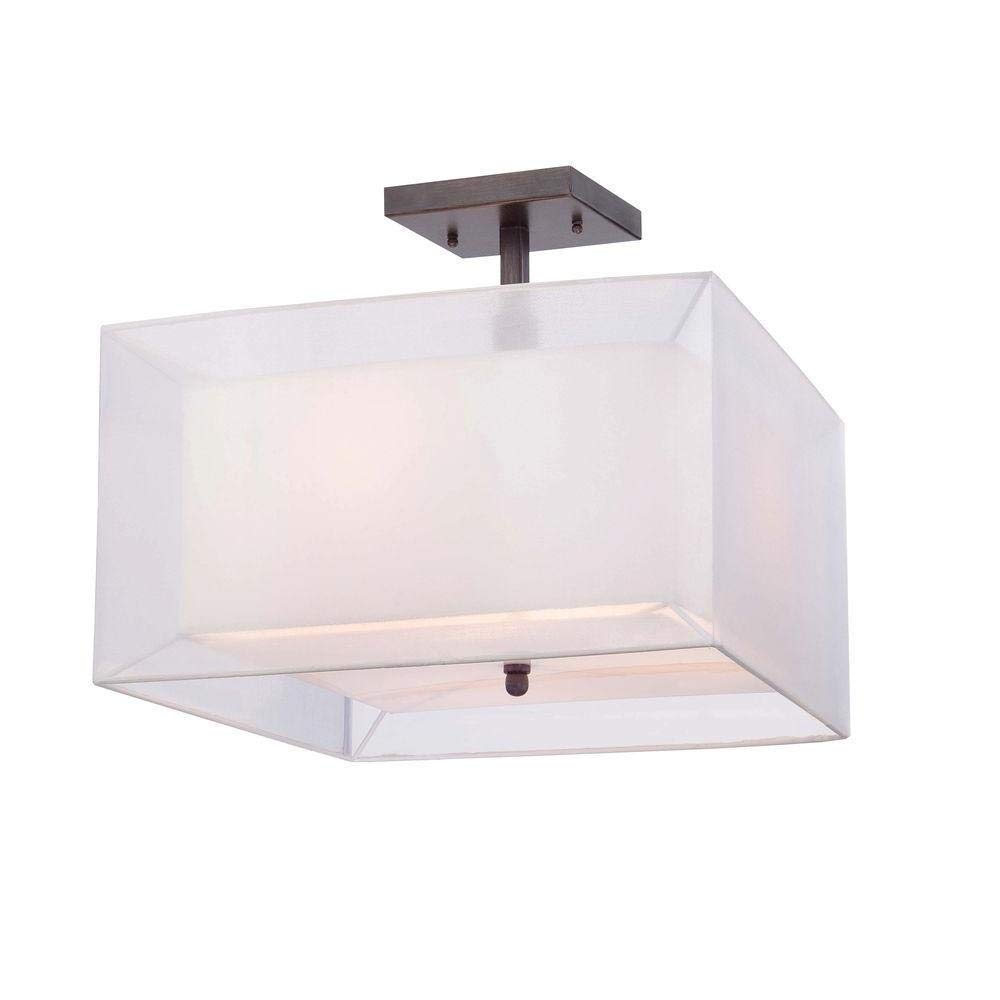
Image: The Hampton Bay 598 318 semi-flushmount light fixture, featuring a central base with three arms extending outwards, each holding a clear glass shade. The fixture is designed to be mounted close to the ceiling.
Setup and Installation
Tools Required (Not Included):
- Phillips Head Screwdriver
- Flat Head Screwdriver
- Wire Strippers
- Electrical Tape
- Safety Glasses
- Ladder
Installation Steps:
- Turn Off Power: Before starting, ensure the power to the junction box is turned off at the circuit breaker or fuse box.
- Prepare Mounting Bracket: Attach the mounting bracket to the junction box using the screws provided. Ensure the bracket is securely fastened.
- Wire Connections:
- Connect the bare copper ground wire from the fixture to the ground wire from the junction box using a wire nut.
- Connect the white wire from the fixture to the white (neutral) wire from the junction box using a wire nut.
- Connect the black wire from the fixture to the black (hot) wire from the junction box using a wire nut.
- Wrap electrical tape around each wire nut connection for added security.
- Mount Fixture: Carefully tuck all wires into the junction box. Align the fixture base with the mounting bracket and secure it with the provided screws.
- Install Glass Shades and Bulbs:
- Attach the three glass shades to the fixture according to the design.
- Screw in three standard base (E26) bulbs, not exceeding 60 watts each (or equivalent LED).
- Restore Power: Once installation is complete, restore power at the circuit breaker.
Operating Instructions
This light fixture operates using a standard wall switch (not included). Ensure the fixture is properly installed and bulbs are securely in place before operation.
- Turning On/Off: Flip the wall switch connected to the fixture to the "ON" position to illuminate the lights. Flip the switch to the "OFF" position to turn them off.
- Bulb Replacement:
- Turn off power to the fixture at the circuit breaker.
- Allow bulbs to cool completely before touching.
- Carefully unscrew the old bulb from its socket.
- Screw in a new bulb of the correct type and wattage (see Specifications).
- Restore power at the circuit breaker.
Maintenance
Regular maintenance will help preserve the appearance and functionality of your light fixture.
- Cleaning:
- Always turn off power to the fixture and allow it to cool before cleaning.
- Wipe the fixture with a soft, dry cloth.
- Do not use abrasive cleaners, solvents, or polishes as they may damage the finish.
- For glass shades, a mild glass cleaner can be used, applied to a cloth, not directly to the shade.
- Bulb Type: Use standard incandescent, CFL, or LED bulbs with an E26 (medium) base. Do not exceed 60 watts per bulb.
Troubleshooting
If you experience issues with your light fixture, refer to the following common problems and solutions:
| Problem | Possible Cause | Solution |
|---|---|---|
| Light does not turn on. |
|
|
| Light flickers. |
|
|
Specifications
| Model Number: | 598 318 |
| Brand: | Hampton Bay |
| Material: | Glass |
| Number of Light Sources: | 3 |
| Voltage: | 120 Volts |
| Max Wattage per Bulb: | 60 Watts (Total 180 Watts) |
| Bulb Base: | E26 (Medium) |
| Item Weight: | 3.65 pounds |
| Product Dimensions: | 10 x 12 x 14 inches |
| Certification: | UL Listed |
Warranty
The manufacturer's warranty information for this product is not explicitly provided in the available data. Please refer to the product packaging or contact the retailer for specific warranty details. The provided warranty description states "Na."
Customer Support
For technical assistance, missing parts, or any questions regarding the installation or operation of your Hampton Bay light fixture, please contact the retailer or manufacturer's customer service department. Contact information is typically found on the product packaging or the manufacturer's official website.
Related documents598 318


Ask a question about this manual
Ask about setup, troubleshooting, compatibility, parts, safety, or missing instructions. Manuals+ will review the question and use this page’s manual context to help answer it.