1. Introduction
This instruction manual provides essential information for the proper installation, operation, and maintenance of your Hella 6PV 009 591-011 Accelerator Pedal Sensor. This sensor is designed to accurately measure the position of the accelerator pedal, transmitting this data to the vehicle's engine control unit (ECU) for precise engine management. Please read this manual thoroughly before installation and use to ensure safe and optimal performance.
2. Safety Information
- Professional Installation Recommended: Installation of automotive components, especially those critical to vehicle operation, should be performed by qualified personnel or a certified mechanic.
- Disconnect Battery: Always disconnect the vehicle's battery before beginning any electrical work to prevent electrical shock or damage to vehicle systems.
- Use Correct Tools: Ensure you use the appropriate tools for installation to avoid damaging the sensor or surrounding components.
- Vehicle Service Manual: Always refer to your vehicle's specific service manual for detailed instructions regarding the removal of existing components and installation of new parts.
- Check Connections: After installation, ensure all electrical connections are secure and properly seated to prevent intermittent operation or failure.
3. Setup and Installation
The Hella 6PV 009 591-011 Accelerator Pedal Sensor is designed for direct replacement in compatible vehicles. Follow these general steps for installation. Always consult your vehicle's specific service manual for detailed, model-specific instructions.
- Preparation: Park the vehicle on a level surface, engage the parking brake, and disconnect the negative terminal of the vehicle's battery.
- Locate Existing Sensor: Identify the current accelerator pedal sensor, typically located near the accelerator pedal assembly inside the vehicle's cabin.
- Remove Old Sensor: Carefully disconnect the electrical connector from the old sensor. Unbolt or unclip the old sensor from its mounting points.
- Install New Sensor: Position the new Hella 6PV 009 591-011 sensor in the mounting location. Secure it with the appropriate bolts or clips, ensuring it is firmly seated.
- Connect Electrical: Reconnect the electrical connector to the new sensor, ensuring it clicks into place securely.
- Final Checks: Reconnect the vehicle's battery. Start the vehicle and perform a functional check of the accelerator pedal. If any warning lights appear or the pedal does not respond correctly, consult a qualified mechanic.

Figure 1: The Hella 6PV 009 591-011 Accelerator Pedal Sensor. This image shows the complete sensor assembly, including the pedal arm, sensor housing, and electrical connector. The sensor is black with a yellow label indicating part numbers.
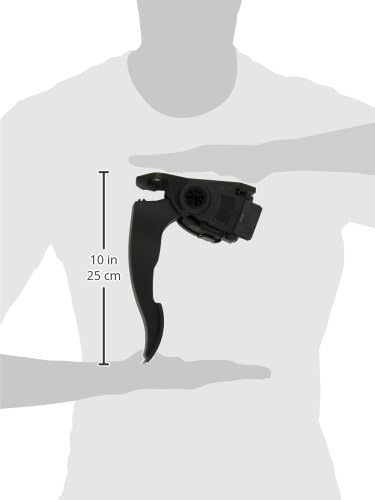
Figure 2: A hand holding the Hella 6PV 009 591-011 Accelerator Pedal Sensor, with a ruler indicating a length of approximately 10 inches (25 cm). This image provides a visual reference for the physical size of the sensor.
4. Operating Principles
The Hella 6PV 009 591-011 Accelerator Pedal Sensor is a critical component in your vehicle's electronic throttle control system. It translates the physical movement of the accelerator pedal into an electrical signal. This signal is then sent to the engine control unit (ECU), which interprets the driver's demand for acceleration and adjusts the engine's throttle position, fuel injection, and ignition timing accordingly. The sensor provides a precise and reliable input for optimal engine performance and fuel efficiency.
5. Maintenance
The Hella Accelerator Pedal Sensor is designed for long-term reliability and typically requires minimal maintenance. However, periodic inspection can help ensure its continued proper function:
- Visual Inspection: Periodically check the sensor and its electrical connector for any signs of physical damage, corrosion, or loose connections.
- Cleanliness: Ensure the area around the pedal and sensor is free from excessive dirt, debris, or moisture that could interfere with its operation. Use a dry, soft cloth for cleaning if necessary.
- Avoid Harsh Chemicals: Do not use harsh cleaning agents or solvents directly on the sensor, as these can damage its internal components or plastic housing.
6. Troubleshooting
If you experience issues with your accelerator pedal response, consider the following common troubleshooting steps. For complex issues, always consult a qualified automotive technician.
- Check Engine Light: If the "Check Engine" light illuminates, it may indicate a fault with the accelerator pedal sensor or related systems. Diagnostic trouble codes (DTCs) can be read using an OBD-II scanner.
- Poor Throttle Response: If the vehicle exhibits delayed or inconsistent throttle response, inspect the sensor's electrical connector for looseness or corrosion.
- Sticking Pedal: Ensure there is no physical obstruction preventing the accelerator pedal from moving freely.
- Professional Diagnosis: If basic checks do not resolve the issue, professional diagnosis is recommended. A technician can test the sensor's output and check for wiring harness issues or ECU faults.
7. Specifications
| Manufacturer: | Hella KGaA Hueck & Co. |
| Brand: | Hella |
| Model Number: | 6PV 009 591-011 |
| Item Weight: | 291 g |
| Product Dimensions (L x W x H): | 28.5 x 7.6 x 25 cm |
| OEM Part Numbers: | 10928540, 1000166874, 2201779-0 |
8. Warranty and Support
Hella products are manufactured to high-quality standards. For specific warranty information, please refer to the documentation included with your purchase or visit the official Hella website. For technical support or inquiries, please contact Hella customer service through their official channels.
Note: Unauthorized modifications or improper installation may void the product warranty.


