1. Introduction
This manual provides comprehensive instructions for the installation, operation, and maintenance of your MTX Audio 3510-02 10-inch Car Audio Subwoofer. Please read this manual thoroughly before installation and use to ensure optimal performance and product longevity. Proper installation and setup are crucial for achieving the best audio experience and preventing damage to the subwoofer or your vehicle's audio system.

Figure 1: Front view of the MTX Audio 3510-02 10-inch Car Audio Subwoofer.
2. Safety Information
- Professional Installation Recommended: For optimal performance and safety, professional installation by a qualified car audio technician is highly recommended.
- Power Disconnection: Always disconnect the vehicle's battery before performing any electrical work to prevent electrical shock or damage.
- Proper Wiring: Ensure all wiring is correctly connected and insulated to prevent short circuits and fire hazards. Use appropriate gauge wire for power and speaker connections.
- Ventilation: Install the subwoofer in a location that allows for adequate ventilation to prevent overheating.
- Secure Mounting: Securely mount the subwoofer to prevent it from becoming a projectile in the event of a sudden stop or accident.
- Volume Levels: Prolonged exposure to high volume levels can cause hearing damage. Exercise caution when adjusting audio levels.
3. Package Contents
Verify that all items are present in the package:
- MTX Audio 3510-02 10-inch Car Audio Subwoofer (1 unit)
4. Features
- High Power Handling: Designed to handle 250 Watts RMS and 500 Watts Peak power, ensuring robust bass output.
- Optimized Voice Coil: Features a 1.75-inch voice coil for efficient power conversion and durability.
- Inverted Apex Surround: Increases surface area, leading to increased volume displacement and higher Sound Pressure Level (SPL).
- Spider Plateau Venting: Directs cool air to the voice coil, improving thermal performance and extending lifespan.
- Progressive Suspension: Controls excursion at high power levels, reducing distortion and enhancing sound quality.
- Durable Construction: Built with a polypropylene cone and a 56 oz. magnet for reliable performance.
5. Specifications
| Feature | Specification |
|---|---|
| Model | 3510-02 |
| Speaker Type | Subwoofer |
| Speaker Size | 10 Inches |
| Impedance | 2 Ohms (SVC) |
| RMS Power Handling | 250 Watts |
| Peak Power Handling | 500 Watts |
| Recommended Amplifier Power | 125-250 Watts RMS |
| Frequency Response | 28Hz - 130Hz |
| Sensitivity | 83.2 dB |
| Voice Coil Diameter | 1.75 inches |
| Magnet Weight | 56 oz. |
| Mounting Depth | 4.625 inches |
| Cut Out Diameter | 9.188 inches |
| Sealed Enclosure Net Volume | 0.75 cu ft. |
| Vented Enclosure Net Volume | 2.0 cu ft. |
| Cone Material | Polypropylene |
| Color | Black |
| Connectivity Technology | Wired |

Figure 2: Rear view of the subwoofer, highlighting the terminals and magnet structure.
6. Setup and Installation
6.1 Enclosure Selection and Mounting
The MTX 3510-02 subwoofer is designed for use in both sealed and vented enclosures. Refer to the specifications section for recommended enclosure volumes and mounting dimensions.
- Mounting Type: This is a component subwoofer designed for flush mounting into a custom or pre-fabricated enclosure.
- Mounting Depth: Ensure your chosen enclosure provides at least 4.625 inches of mounting depth.
- Cut-Out Diameter: The enclosure's speaker opening should match the 9.188-inch cut-out diameter.

Figure 3: Side profile of the subwoofer, illustrating its mounting depth.
6.2 Wiring Connections
Connect the subwoofer to a compatible amplifier. The 3510-02 features a Single Voice Coil (SVC) with a 2-ohm impedance. Ensure your amplifier is stable at a 2-ohm load and provides adequate RMS power (125-250 Watts RMS recommended).
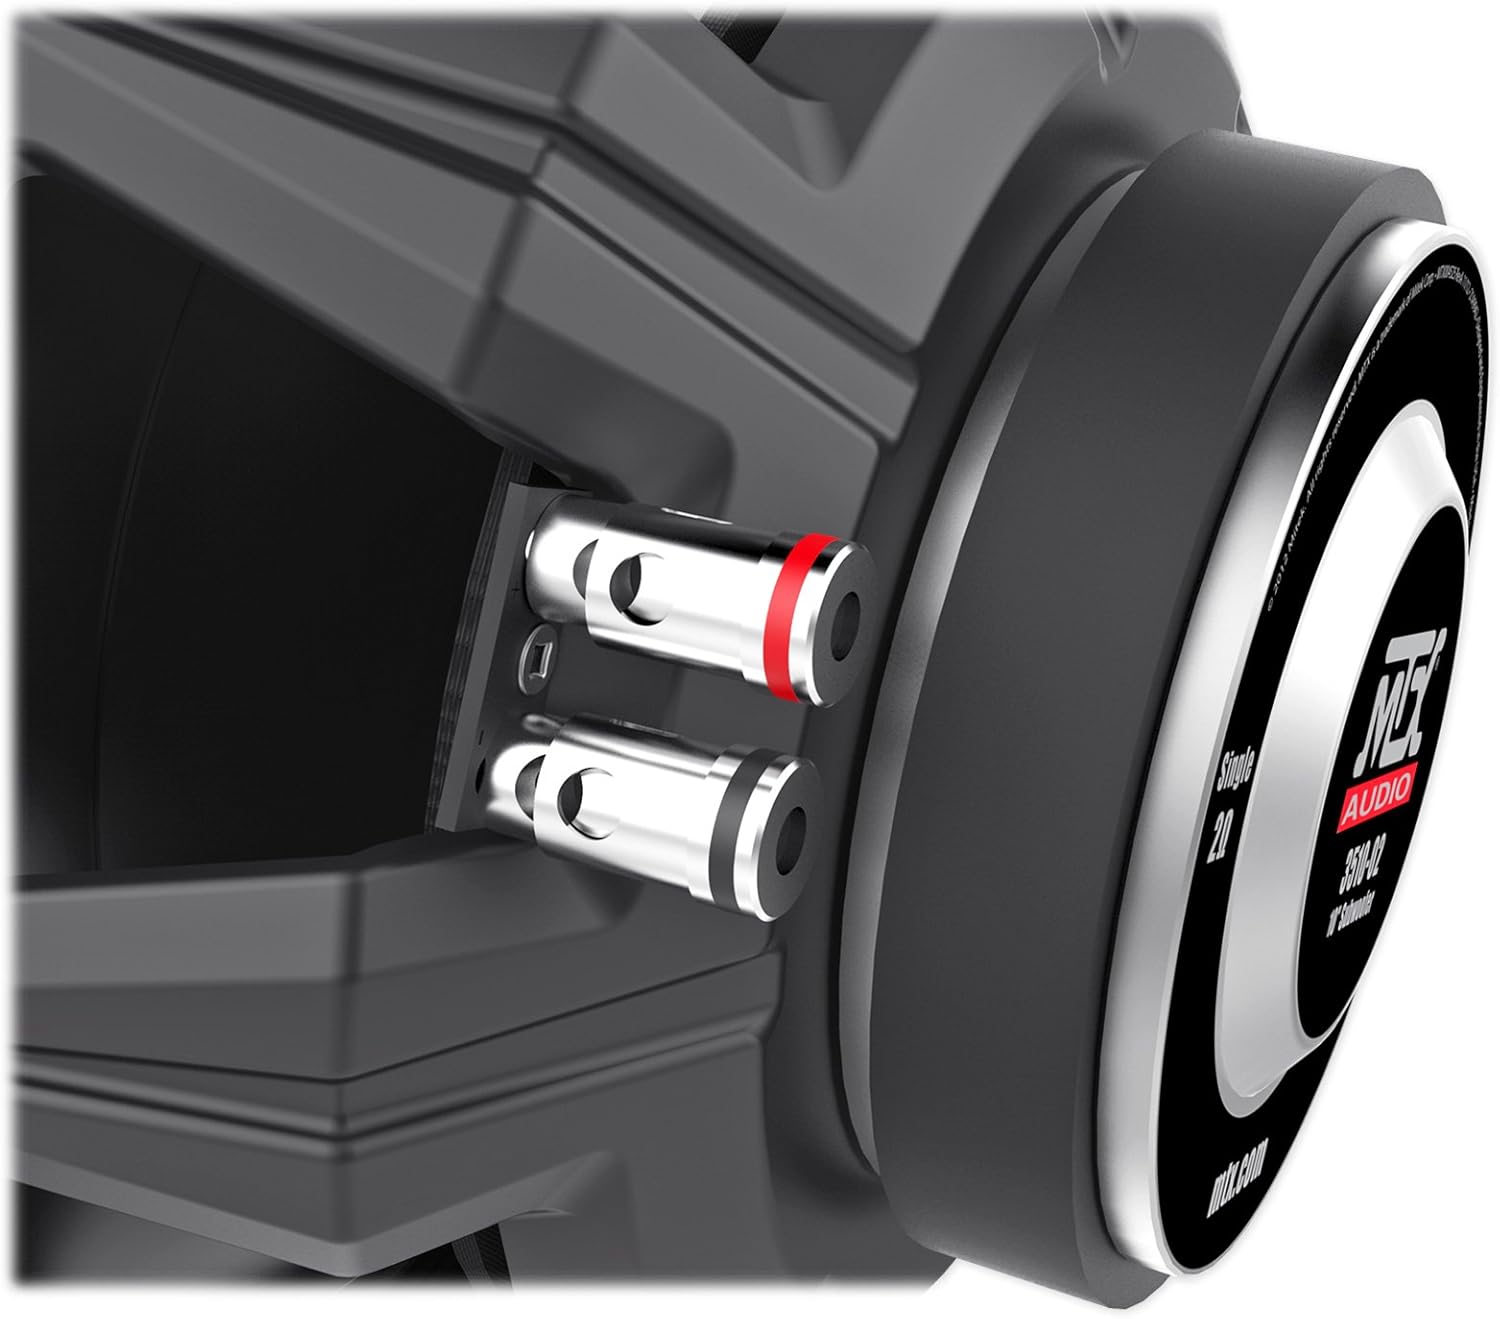
Figure 4: Close-up view of the subwoofer's spring-loaded speaker terminals for secure wire connection.
Use high-quality speaker wire of appropriate gauge for the power levels and cable length to minimize power loss and ensure clear signal transmission.
7. Operating and Amplifier Gain Setting
Properly setting the amplifier's gain control is critical for maximizing performance and preventing damage. The gain control is not a volume knob; it matches the amplifier's input sensitivity to the output voltage of your head unit. Incorrect gain settings can lead to distorted audio and potential equipment failure.
For detailed instructions on how to set your amplifier's gain using Ohm's Law, please refer to the following instructional video from MTX Audio. This method ensures that your amplifier delivers its rated power cleanly to the subwoofer.
Video 1: MTX Audio instructional video on setting amplifier gain using Ohm's Law. This video demonstrates the process of calculating and setting the correct RMS voltage output for your amplifier to match your subwoofer's power handling and impedance.
7.1 Amplifier Settings (General Guidelines)
- Gain: Set according to the Ohm's Law method described in the video.
- Low-Pass Filter (LPF): Adjust the LPF to filter out frequencies above the subwoofer's effective range, typically between 80Hz and 120Hz. This ensures the subwoofer only reproduces bass frequencies.
- Subsonic Filter: If your amplifier has a subsonic filter, set it to protect the subwoofer from playing frequencies below its resonant frequency, which can cause excessive excursion and damage. A common setting is around 25-30Hz.
- Bass Boost: Use bass boost sparingly, if at all. Excessive bass boost can introduce distortion and potentially damage the subwoofer. If used, apply in small increments and listen for any signs of distortion.
8. Maintenance
The MTX Audio 3510-02 subwoofer requires minimal maintenance. Follow these guidelines to ensure its longevity:
- Cleaning: Use a soft, dry cloth to clean the subwoofer cone and surround. Avoid using harsh chemicals or excessive moisture.
- Inspection: Periodically inspect the speaker terminals and wiring for secure connections and any signs of corrosion or damage.
- Environmental Protection: Protect the subwoofer from extreme temperatures, direct sunlight, and moisture.
9. Troubleshooting
If you experience issues with your MTX Audio 3510-02 subwoofer, consult the following common troubleshooting steps:
| Problem | Possible Cause | Solution |
|---|---|---|
| No Sound | No power to amplifier; loose wiring; incorrect input selection on head unit; amplifier in protect mode. | Check power, ground, and remote turn-on connections to the amplifier. Verify all speaker wires are securely connected. Ensure the head unit is set to the correct audio source. Check amplifier fuses. |
| Distorted Sound | Gain set too high; bass boost excessive; damaged subwoofer or amplifier; improper LPF setting. | Reduce amplifier gain. Decrease or disable bass boost. Check LPF settings. Inspect subwoofer cone and surround for damage. |
| Weak Bass | Gain set too low; phase issues; incorrect LPF setting; inadequate enclosure volume. | Increase amplifier gain (without distortion). Check phase setting on amplifier or head unit. Adjust LPF. Verify enclosure volume matches recommendations. |
| Subwoofer Overheating | Excessive power; inadequate ventilation; impedance mismatch. | Reduce volume or amplifier gain. Ensure proper airflow around the amplifier. Verify subwoofer impedance matches amplifier's stable load. |
10. Warranty Information
The MTX Audio 3510-02 Subwoofer comes with a 2-year limited warranty. This warranty covers defects in materials and workmanship under normal use. Please retain your proof of purchase for warranty claims. For specific terms and conditions, refer to the warranty documentation included with your product or visit the official MTX Audio website.
11. Support
If you require further assistance with your MTX Audio 3510-02 subwoofer, including installation, troubleshooting, or warranty inquiries, please contact MTX Audio Technical Support.
MTX Audio Technical Support: 800.225.5689
You can also visit the official MTX Audio website for additional resources, FAQs, and product information.


