
1. Introduction
This manual provides comprehensive instructions for the safe and effective installation, operation, and maintenance of your Mackie SWM300 Wall Mount Kit. This kit is specifically designed to securely mount Mackie DLM12 and DLM8 Series Loudspeakers to a wall, allowing for optimal sound projection and space utilization. Please read this manual thoroughly before attempting installation to ensure proper setup and to prevent damage to the product or injury.
2. Safety Information
Always adhere to the following safety guidelines during installation and use:
- Read all instructions carefully before beginning installation.
- Ensure the wall or mounting surface can safely support the combined weight of the SWM300 mount and the loudspeaker. Consult a structural engineer if unsure.
- Use only appropriate mounting hardware (screws, anchors) suitable for your specific wall material (e.g., wood studs, concrete, brick).
- Do not overtighten screws, as this may strip threads or damage the mounting surface.
- Ensure all connections are secure before releasing the loudspeaker.
- Keep children and pets away from the installation area.
- If you are not confident in your ability to safely install this product, seek assistance from a qualified professional installer.
3. Package Contents
Verify that all components are present before proceeding with installation:
- Mackie SWM300 Wall Mount Bracket Assembly
- Mounting Hardware (specific types and quantities may vary; refer to packaging for exact details)
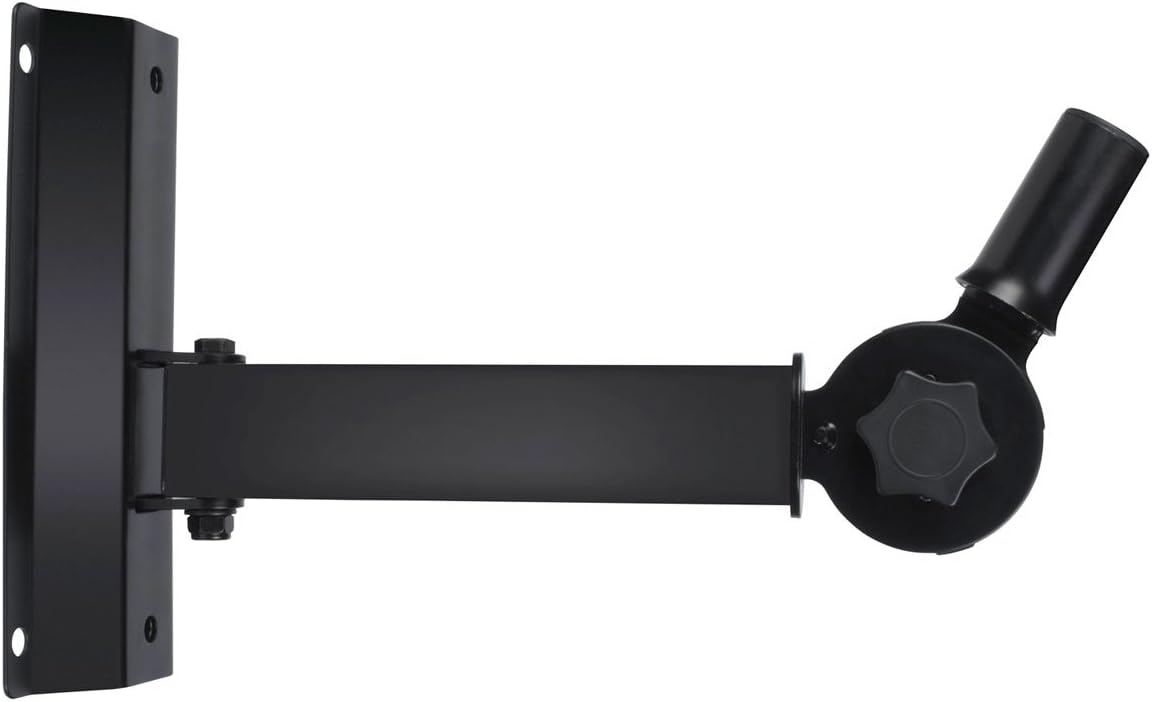
Figure 1: Mackie SWM300 Wall Mount Kit, showing the main bracket assembly.
4. Setup and Installation
Follow these steps to properly install your Mackie SWM300 Wall Mount Kit:
- Choose Mounting Location: Select a sturdy wall location that can support the weight of the mount and the loudspeaker. Consider the desired sound coverage and cable routing.
- Mark Drilling Points: Hold the wall plate of the SWM300 mount against the wall at the desired height and use a pencil to mark the locations for drilling mounting holes. Ensure the plate is level.
- Drill Pilot Holes: Using an appropriate drill bit size for your chosen mounting hardware and wall material, drill pilot holes at the marked locations.
- Secure Wall Plate: Attach the wall plate of the SWM300 mount to the wall using the provided or appropriate mounting hardware. Ensure it is firmly secured and does not wobble.
- Assemble Arm and Speaker Mount: If not already assembled, connect the adjustable arm to the wall plate and the speaker mounting pole to the arm. Ensure all bolts and nuts are tightened securely.
- Mount Loudspeaker: Carefully lift your Mackie DLM12 or DLM8 loudspeaker and slide its pole mount receptacle onto the SWM300's speaker mounting pole. Ensure the speaker is fully seated and stable.
- Adjust Angle: Loosen the adjustment knob on the SWM300 to tilt the loudspeaker to the desired angle. Once positioned, firmly tighten the knob to lock the speaker in place.

Figure 2: Front angled view of the SWM300 mount, showing the adjustable joint.
5. Operating (Adjustments)
The Mackie SWM300 Wall Mount Kit allows for easy adjustment of your loudspeaker's angle:
- To adjust the vertical tilt of the loudspeaker, locate the large adjustment knob on the side of the mount's pivot joint.
- Loosen this knob by turning it counter-clockwise until the speaker can be freely tilted.
- Carefully adjust the loudspeaker to the desired upward or downward angle.
- Once the desired angle is achieved, firmly tighten the adjustment knob by turning it clockwise until the speaker is securely locked in position. Do not overtighten.
6. Maintenance
To ensure the longevity and safe operation of your SWM300 Wall Mount Kit:
- Regular Inspection: Periodically inspect all mounting hardware, bolts, and joints for tightness. Vibrations from the loudspeaker or environmental factors can cause fasteners to loosen over time.
- Cleaning: Clean the mount with a soft, dry cloth. Do not use abrasive cleaners or solvents, as these may damage the finish.
- Environmental Conditions: Avoid exposing the mount to extreme temperatures or excessive moisture, which could lead to corrosion or material degradation.
7. Troubleshooting
If you encounter issues with your SWM300 Wall Mount Kit, consider the following:
- Speaker Feels Unstable:
- Ensure the loudspeaker is fully seated on the mounting pole.
- Verify that the adjustment knob is firmly tightened.
- Check all wall mounting screws for tightness.
- Mount Appears Loose on Wall:
- Re-check all screws securing the wall plate to the wall.
- Ensure the wall material is suitable and that appropriate anchors were used. If necessary, consult a professional.
- Difficulty Adjusting Angle:
- Ensure the adjustment knob is sufficiently loosened.
- Check for any obstructions around the pivot joint.
8. Specifications
Key specifications for the Mackie SWM300 Wall Mount Kit:
| Feature | Specification |
|---|---|
| Model Number | SWM300 |
| Compatible Devices | Mackie DLM12, DLM8 Series Loudspeakers |
| Mounting Type | Wall Mount |
| Material Type | Metal |
| Special Feature | Adjustable Tilt |
| Item Weight | 2.2 pounds (approx. 1 kg) |
| Product Dimensions | 15.7 x 10 x 5 inches (approx. 39.9 x 25.4 x 12.7 cm) |
9. Warranty and Support
For detailed warranty information, technical support, or to purchase replacement parts, please visit the official Mackie website or contact their customer service department. Keep your purchase receipt as proof of purchase for warranty claims.
Mackie Official Website: Visit the Mackie Store on Amazon