
Introduction
Thank you for purchasing the AcuRite 13239A1 Atomic Projection Clock. This device provides accurate time, date, day of the week, and indoor temperature, with the added convenience of projecting the time onto a wall or ceiling. This manual will guide you through the setup, operation, and maintenance of your new clock.
Package Contents
- AcuRite 13239A1 Atomic Projection Clock Unit
- Power Adapter
- Instruction Manual (this document)
Setup
1. Powering the Unit
Connect the included power adapter to the power jack located on the back of the clock unit. Plug the power adapter into a standard electrical outlet. The clock will power on and the display will illuminate.
2. Battery Backup (Optional)
For backup power during outages, install 3 AA alkaline batteries (not included) into the battery compartment located on the bottom of the unit. Ensure batteries are inserted with the correct polarity (+ and - markings).
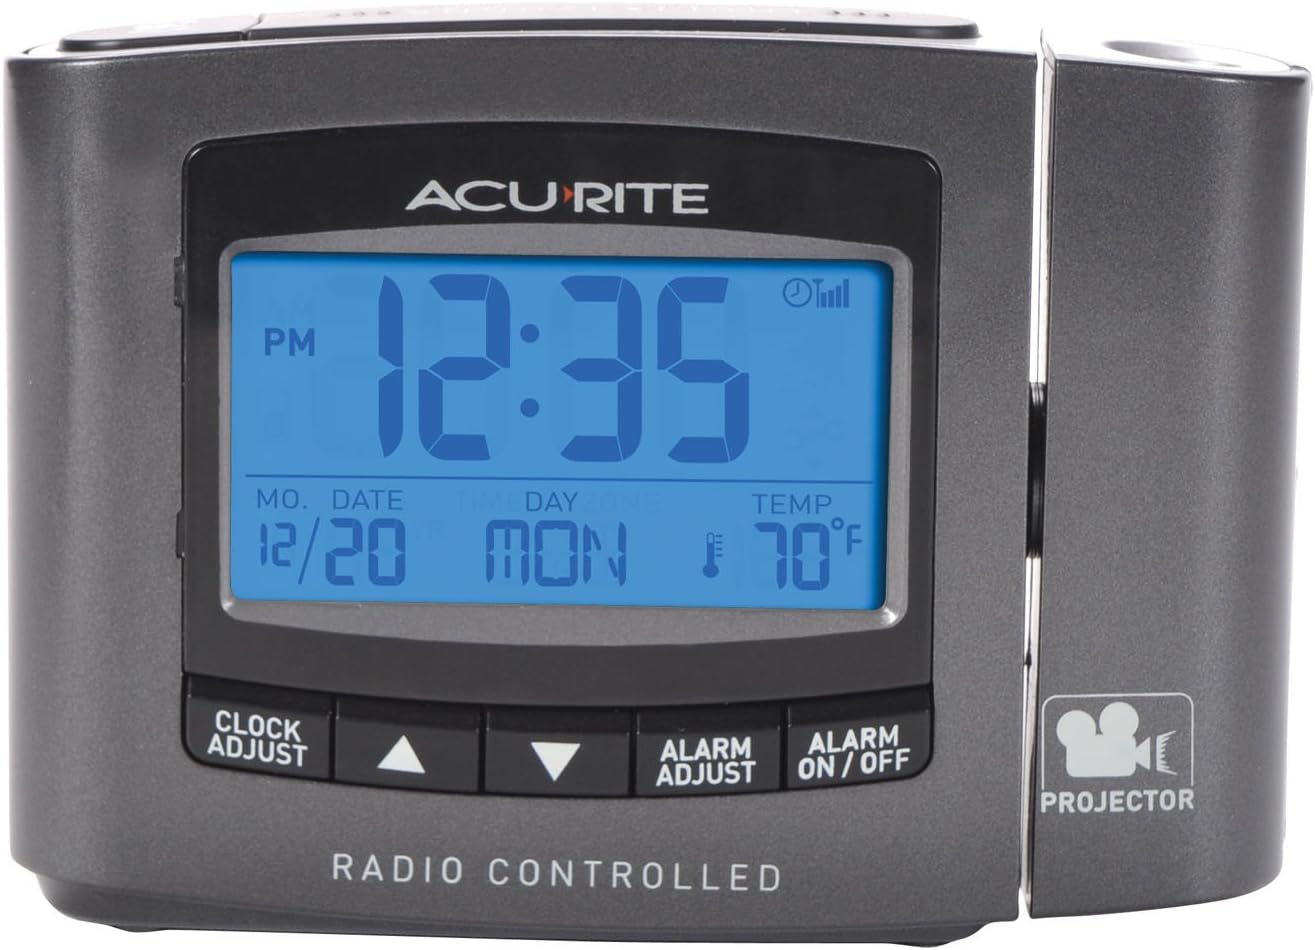
Image: Front view of the AcuRite 13239A1 Atomic Projection Clock, showing the display and control buttons. The display shows time, date, day, and indoor temperature.
3. Initial Setup and Atomic Clock Synchronization
Upon initial power-up, the clock will attempt to synchronize with the atomic clock signal. This process can take several minutes to a few hours. During synchronization, the signal strength indicator will flash. Once synchronized, the time and date will be automatically set and adjusted for Daylight Saving Time (DST).
If manual adjustment is required or preferred, refer to the 'Clock Adjustment' section under Operating Instructions.
Operating Instructions
1. Clock Adjustment
Press the CLOCK ADJUST button to enter time setting mode. Use the UP and DOWN arrow buttons to adjust the hour, minute, year, month, and day. Press CLOCK ADJUST again to confirm each setting and move to the next. Press any other button or wait 10 seconds for settings to save and exit.
2. Alarm Adjustment
Press the ALARM ADJUST button to enter alarm setting mode. Use the UP and DOWN arrow buttons to set the desired alarm time. Press ALARM ADJUST again to confirm. To activate or deactivate the alarm, press the ALARM ON/OFF button. An alarm icon will appear on the display when the alarm is active.
When the alarm sounds, press the SNOOZE button (located on top of the unit) to temporarily silence the alarm for 9 minutes. To turn off the alarm completely, press the ALARM ON/OFF button.
3. Projection Features
The clock can project the time onto a wall or ceiling. The projector lens is located on the side of the unit.
- Projection Activation: The projection is always on when the unit is powered.
- Focus Adjustment: Rotate the focus dial (located near the projector lens) to achieve a clear projection.
- Projection Rotation: The projector arm can be rotated 180 degrees to direct the projection. Additionally, the projected image can be flipped 180 degrees using a switch near the projector lens for optimal viewing angles.

Image: The AcuRite 13239A1 clock unit with a red digital time projection emanating from its side, illustrating the projection feature in action.

Image: A bedroom scene at night with the AcuRite 13239A1 clock on a nightstand, clearly projecting the time in large red digits onto the ceiling above the bed.
4. Temperature Display
The clock displays the indoor temperature. To switch between Fahrenheit (℉) and Celsius (℃), locate the ℉/℃ switch on the back of the unit and slide it to your preferred setting.
5. Momentary Backlight
Press the SNOOZE button to activate a bright blue momentary backlight for easier viewing in low light conditions.
Maintenance
Cleaning
Clean the unit with a soft, damp cloth. Do not use abrasive cleaners or chemicals that may damage the display or casing. Ensure the unit is unplugged before cleaning.
Battery Replacement
If using battery backup, replace the 3 AA batteries when the low battery indicator appears on the display, or if the clock loses time during a power outage. Always replace all batteries at the same time with new ones.
Troubleshooting
| Problem | Possible Solution |
|---|---|
| No display / Unit not powering on | Ensure the power adapter is securely plugged into both the clock and a working electrical outlet. Check the outlet with another device. If using battery backup, ensure batteries are fresh and correctly installed. |
| Incorrect time / Not synchronizing with atomic clock | Ensure the clock is placed away from large metal objects, thick walls, or electronic devices that may interfere with the signal. Allow several hours for synchronization. If necessary, manually set the time. |
| Projection is blurry | Adjust the focus dial located near the projector lens until the image is clear. Ensure the projection surface is within the optimal range. |
| Projection is upside down | Locate the image flip switch near the projector lens and toggle it to invert the projected image. |
| Alarm not sounding | Ensure the alarm is activated by pressing the ALARM ON/OFF button; the alarm icon should be visible on the display. Verify the alarm time is set correctly. |
Specifications

Image: A diagram showing the dimensions of the AcuRite 13239A1 clock, indicating a width of 5.1 inches and a height of 3.6 inches.
| Feature | Detail |
|---|---|
| Model Number | 13239A1 |
| Dimensions | 3.6" H x 5.1" W |
| Weight | 0.8 Pounds (12.8 ounces) |
| Power Source | Corded Electric (Power Adapter Included) |
| Battery Backup | 3 x AA Alkaline Batteries (not included) |
| Temperature Range | Indoor Temperature (Fahrenheit or Celsius) |
| Display Type | Digital LCD with Blue Backlight |
| Projection Color | Red |
| Clock Type | Atomic (Radio-Controlled) |
Warranty and Support
The AcuRite 13239A1 Atomic Projection Clock comes with a one-year limited warranty. For detailed warranty information or technical support, please refer to the official AcuRite website or contact their customer service department. Keep your purchase receipt as proof of purchase for warranty claims.