1. Introduction
Thank you for choosing the Walimex Pro FT-665T 3D Panhead Tripod. This professional tripod is designed for cameras, offering stability and versatility for various photographic needs. Constructed from aluminum alloy, it features a rotatable center column, adjustable leg angles, and a precise 3D panhead. This manual provides detailed instructions for the proper setup, operation, and maintenance of your tripod to ensure optimal performance and longevity.
2. Safety Instructions
- Always ensure all locking mechanisms are securely tightened before mounting equipment or leaving the tripod unattended.
- Do not exceed the maximum load capacity of 12 kg (26.4 lbs) to prevent damage to the tripod or your camera equipment.
- Be cautious when extending or collapsing the tripod legs to avoid pinching fingers.
- Avoid placing the tripod on unstable or slippery surfaces.
- Do not expose the tripod to extreme temperatures or corrosive substances.
- When carrying the tripod with a camera mounted, ensure the camera is securely attached and all adjustments are locked.
- Always use the provided carry bag for transport to protect the tripod from damage.
3. Components Overview
Familiarize yourself with the main parts of your Walimex Pro FT-665T tripod:
- 3D Panhead: Allows for precise horizontal (pan) and vertical (tilt) adjustments.
- Quick-Release Plate: For easy attachment and detachment of your camera.
- Panhead Handles: Control pan and tilt movements and locking.
- Bubble Level: For accurate horizontal alignment.
- Center Column: Adjustable height, rotatable for low-angle shots, with a hook for added stability.
- Leg Sections: Extendable segments of the tripod legs.
- Leg Locks: Secure the extended leg sections.
- Leg Angle Adjusters: Allow setting different leg angles.
- Rubber Feet: Provide grip on various surfaces.
- Foam Grips: For comfortable carrying.

Figure 1: Walimex Pro FT-665T Tripod, showing the overall structure and key components.

Figure 2: Detailed view of the 3D panhead, highlighting the quick-release plate and control handles.
4. Setup
4.1 Unpacking and Initial Inspection
Carefully remove the tripod from its packaging and the included carry bag. Inspect all components for any signs of damage. Ensure all parts listed in the 'Components Overview' are present.
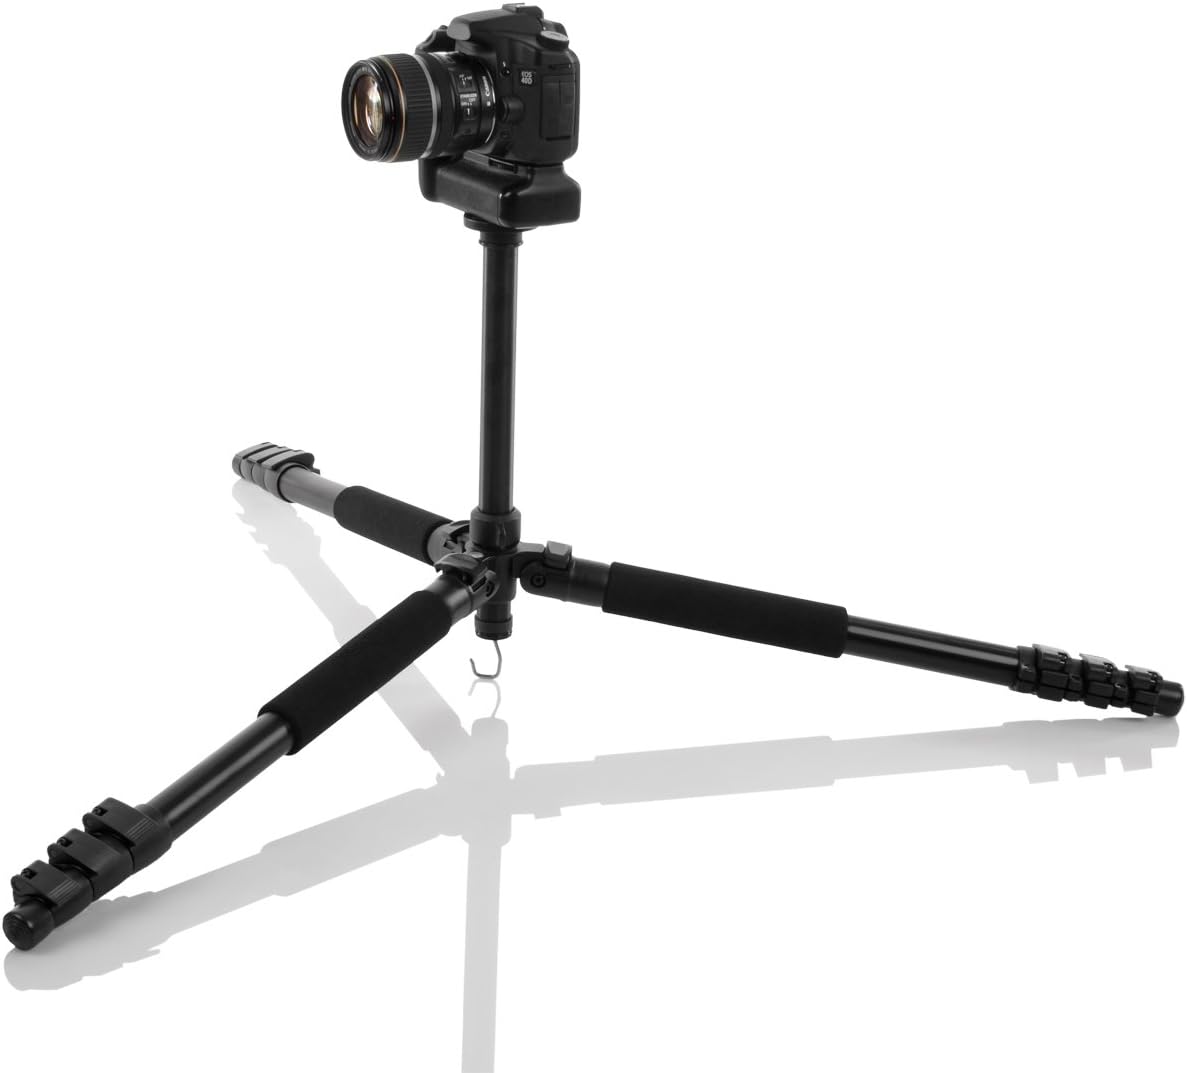
Figure 3: The tripod neatly stored within its convenient carry bag.
4.2 Extending the Tripod Legs
- Release the leg locks on each leg section.
- Extend the leg sections to the desired length.
- Securely close all leg locks to prevent the legs from collapsing.
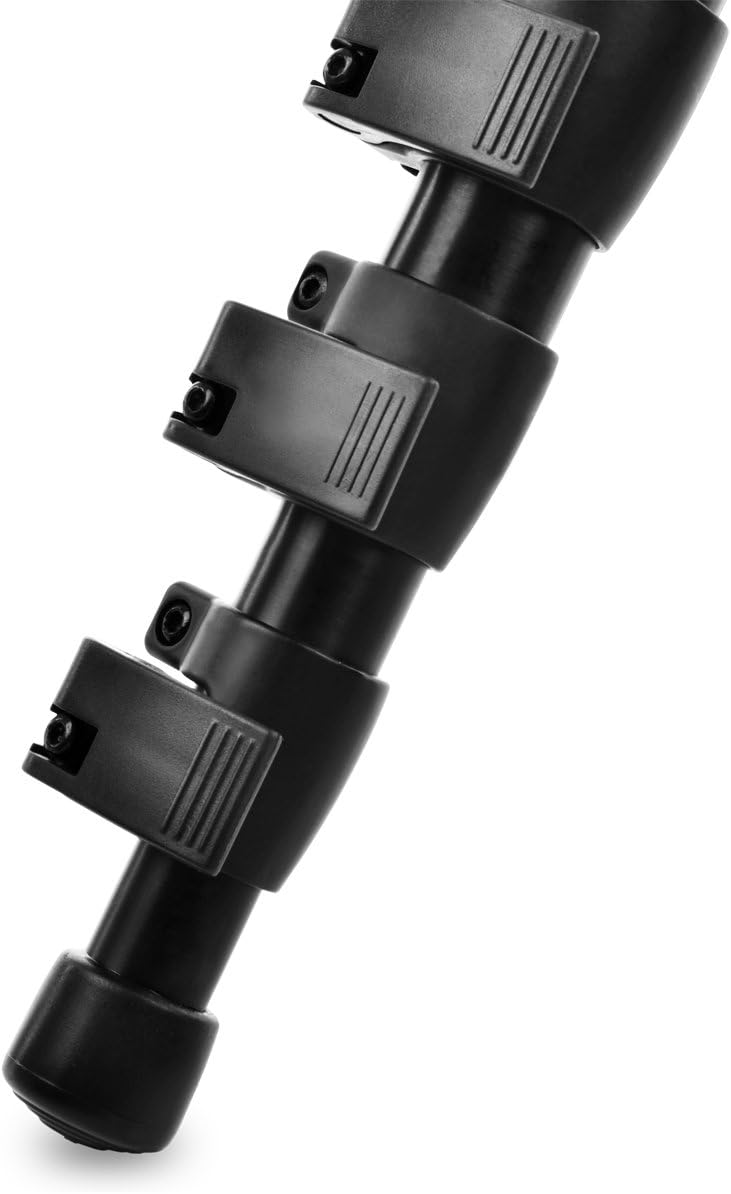
Figure 4: Detail of the leg locks used to secure the extended leg sections.
4.3 Adjusting Leg Angles
Each leg can be independently adjusted to different angles for stability on uneven terrain or for low-angle shooting. Locate the leg angle adjusters near the top of each leg and set them to the desired position.
4.4 Attaching the Camera to the Quick-Release Plate
- Remove the quick-release plate from the 3D panhead by releasing its locking lever.
- Attach the quick-release plate to the bottom of your camera using the 1/4 inch screw. Ensure it is tightened securely. The cork coating on the plate provides a non-slip surface.

Figure 5: The quick-release plate with its 1/4 inch camera connection screw.
4.5 Mounting the Camera to the Panhead
With the camera attached to the quick-release plate, slide the plate back into the panhead receiver until it clicks into place. Engage the locking lever to secure the camera firmly.
5. Operating the Tripod
5.1 Adjusting the 3D Panhead
The 3D panhead allows for independent control over horizontal (pan) and vertical (tilt) movements. Use the dedicated handles to loosen or tighten the pan and tilt axes. Adjust to the desired angle and then tighten the handles to lock the position.
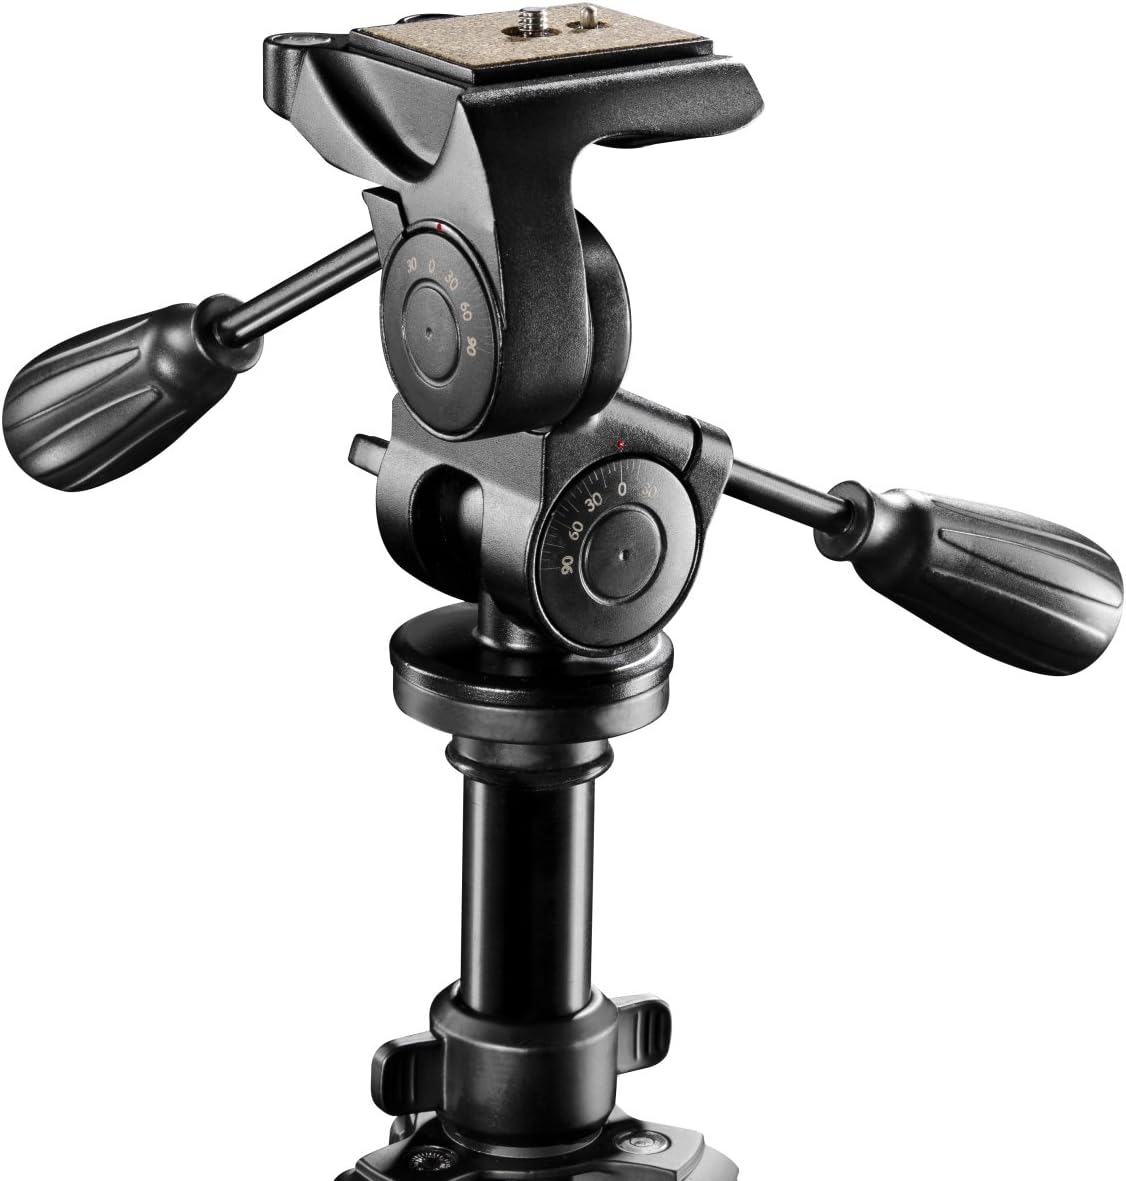
Figure 6: The 3D panhead with its distinct controls for precise camera positioning.
5.2 Using the Bubble Level
The integrated bubble level helps ensure your camera is perfectly horizontal. Adjust the tripod legs or the panhead until the bubble is centered within the indicator.
5.3 Adjusting the Center Column
The center column can be extended for additional height. Loosen the center column lock, raise or lower the column to the desired height, and then tighten the lock. For ground-level photography, the center column can be inverted. To do this, fully extend and remove the center column, then reinsert it upside down into the tripod's base.

Figure 7: The tripod configured for low-angle shots with the center column inverted.
5.4 Using the Stability Hook
A hook is located at the bottom of the center column. You can hang a weight (e.g., your camera bag) from this hook to increase the tripod's stability, especially in windy conditions or when using heavy lenses.
6. Maintenance
- Cleaning: Wipe down the tripod with a soft, damp cloth after each use, especially if used in dusty or sandy environments. Avoid harsh chemicals.
- Lubrication: The moving parts of the panhead are factory-lubricated. Do not apply additional lubricants unless specifically recommended by the manufacturer.
- Storage: Store the tripod in its carry bag in a dry, cool place away from direct sunlight and extreme temperatures.
- Inspection: Periodically check all screws, bolts, and locking mechanisms for tightness. Tighten any loose components carefully.
7. Troubleshooting
7.1 Tripod Instability
- Issue: Tripod feels wobbly or unstable.
Solution: Ensure all leg locks are fully tightened. Verify that the leg angle adjusters are set correctly and evenly. Check if the quick-release plate is securely attached to both the camera and the panhead. Consider hanging a weight from the center column hook for added stability.
7.2 Panhead Movement Issues
- Issue: Pan or tilt movements are too loose or too stiff.
Solution: Adjust the tension of the panhead handles. Tighten them for stiffer movement or to lock the position, and loosen for smoother movement.
7.3 Camera Not Attaching Securely
- Issue: Camera feels loose on the quick-release plate or the plate won't lock into the panhead.
Solution: Ensure the 1/4 inch screw on the quick-release plate is fully tightened into your camera's tripod mount. Make sure the quick-release plate is inserted correctly into the panhead receiver and the locking lever is fully engaged.
8. Specifications
| Feature | Detail |
|---|---|
| Brand | Walimex Pro |
| Model Name | FT-665T (Item model number: 18835) |
| Material | Aluminium, Plastic, Rubber |
| Maximum Height | 198 cm (77.9 inches) |
| Minimum Height (approx.) | 73 cm (28.7 inches) |
| Weight Limit | 12 Kilograms (26.4 pounds) |
| Item Weight | 2.27 Kilograms (5 pounds) |
| Tripod Head Type | 3D Panhead |
| Special Features | Rotatable Center Column, Spirit Level, Straightening Scale |
| Compatible Devices | Camera |
| Color | Black |
9. Warranty Information
Walimex Pro products are manufactured to high-quality standards. This product comes with a standard manufacturer's warranty against defects in materials and workmanship. The specific terms and duration of the warranty may vary by region and retailer. Please retain your proof of purchase for any warranty claims. For detailed warranty information, refer to the documentation provided at the time of purchase or contact your retailer.
10. Customer Support
Should you encounter any issues or have questions regarding your Walimex Pro FT-665T 3D Panhead Tripod that are not covered in this manual, please contact your retailer or the Walimex Pro customer service department. Contact information can typically be found on the Walimex Pro official website or on your product packaging.


