
1. Introduction
The Mac Mah Express V3 is a compact, self-contained, and complete portable sound system designed for various applications, from presentations to musical ambiance. This versatile unit features a 60W amplified 2-way speaker, integrated USB MP3 player, anti-shock CD player, and a dedicated dock for iPhone, iPod, and iPad devices. It also includes Bluetooth connectivity for wireless audio streaming from smartphones, tablets, or computers. The Express V3 comes equipped with two wireless microphones and offers a 7-channel mixer with ECHO and Talkover effects, ensuring clear audio and flexible control. Its robust ABS casing and integrated handle make it highly portable, complemented by a 5-hour battery life for autonomous operation.
2. Safety Instructions
- Read all instructions carefully before operating the device.
- Keep this manual for future reference.
- Do not expose the unit to rain or moisture to prevent fire or electric shock.
- Ensure proper ventilation; do not block any ventilation openings.
- Only use attachments/accessories specified by the manufacturer.
- Disconnect the unit during lightning storms or when unused for long periods.
- Refer all servicing to qualified service personnel.
- Avoid placing the unit near heat sources such as radiators, heat registers, stoves, or other apparatus (including amplifiers) that produce heat.
- Protect the power cord from being walked on or pinched, particularly at plugs, convenience receptacles, and the point where they exit from the apparatus.
3. Package Contents
Please check that all items listed below are included in your package:
- Mac Mah Express V3 Amplified Speaker Unit
- 2 x Wireless Handheld Microphones
- Power Cable
- Remote Control (for CD/USB/iPod/iPhone/iPad functions)
- User Manual (this document)
4. Product Overview
Familiarize yourself with the main components and controls of your Express V3 speaker.
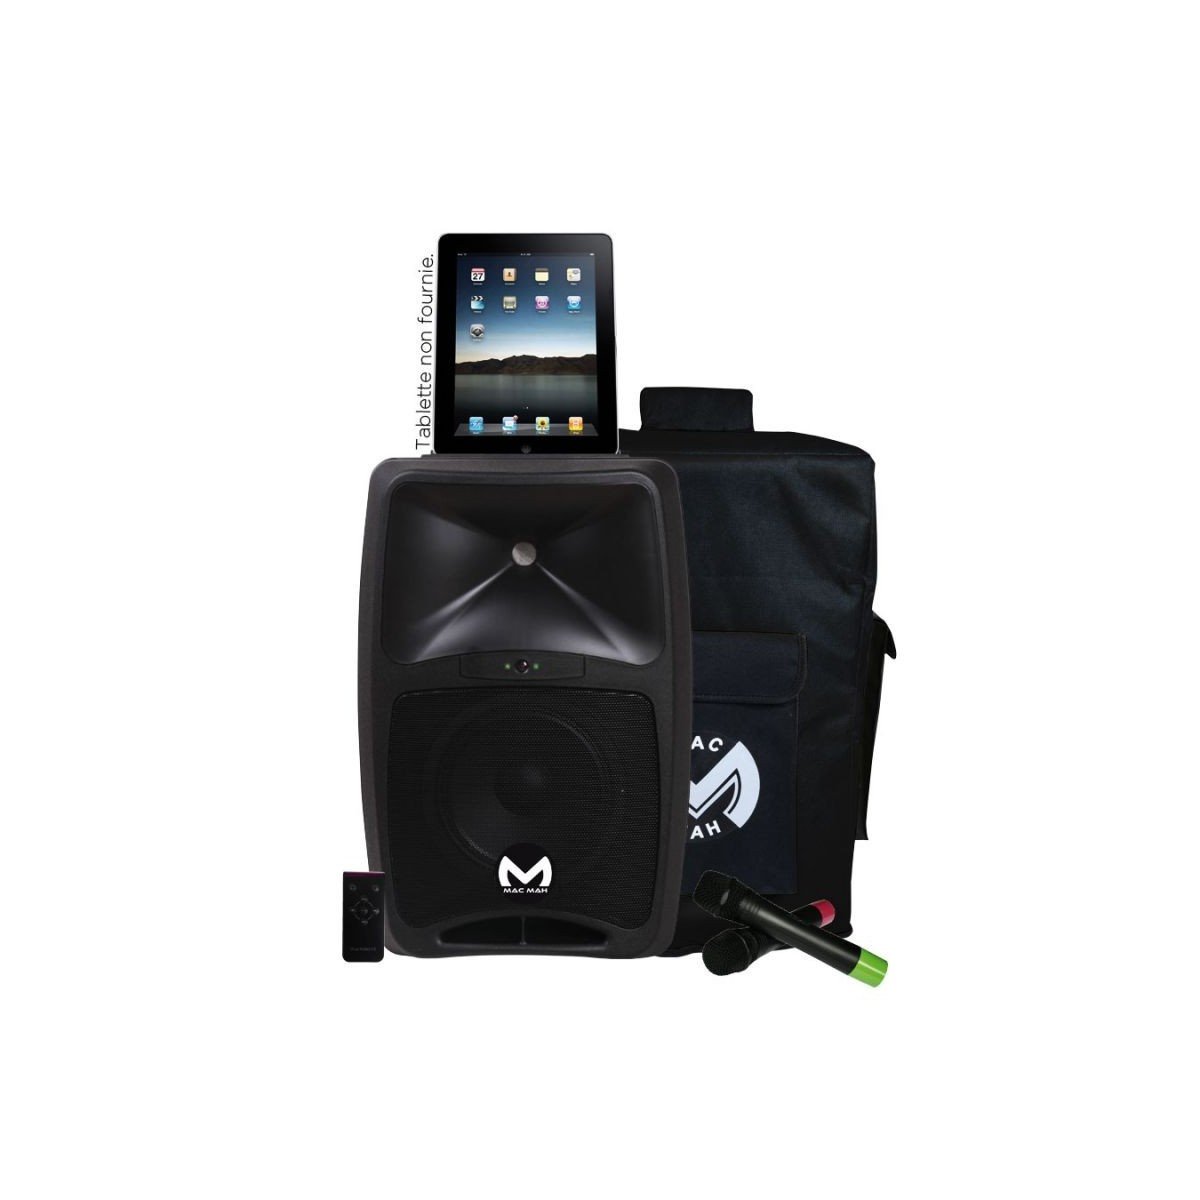
Figure 1: Front panel of the Mac Mah Express V3 amplified speaker, showing the main controls, display, CD slot, and dock for mobile devices.
The front panel typically includes:
- CD Player Slot: For inserting audio CDs.
- USB Port: For connecting USB drives with MP3 files.
- iPod/iPhone/iPad Dock: For direct connection and playback from Apple devices.
- Display Screen: Shows current mode, track information, and settings.
- Control Knobs: For master volume, microphone volumes, echo, and tone adjustments.
- Input Jacks: For wired microphones, line-in, and guitar.
The rear panel typically includes the power input, power switch, and line output (RCA).
5. Setup
5.1 Power Connection and Charging
- Connect the supplied power cable to the AC IN port on the rear of the Express V3 and then to a suitable power outlet.
- The internal rechargeable batteries (2 x 12V4AH) will begin charging automatically. A full charge provides approximately 5 hours of autonomous operation.
- Ensure the unit is fully charged before initial use for optimal battery life.
5.2 Microphone Setup
- Wireless Microphones: Insert batteries into the two supplied wireless handheld microphones. Turn on the microphones. The Express V3 will automatically detect them. Adjust their individual volume using the dedicated knobs on the mixer panel.
- Wired Microphones/Instruments: Connect a wired microphone, line-level device, or guitar to the MIC/LINE/GUITAR (combo) input jack. Adjust its volume using the corresponding control.
5.3 Connecting Audio Sources
- USB MP3 Player: Insert a USB flash drive containing MP3 files into the USB port. The unit will automatically switch to USB mode or you can select it manually.
- CD Player: Insert an audio CD into the CD slot. The unit will automatically switch to CD mode.
- iPhone/iPod/iPad: Place your compatible Apple device into the dedicated dock. Ensure it is securely seated. Use the device's controls or the supplied remote control for playback.
- Bluetooth: Activate Bluetooth on your smartphone, tablet, or computer. On the Express V3, select Bluetooth mode. Search for 'Mac Mah Express V3' (or similar) in your device's Bluetooth settings and pair.
- External Line Input: Connect an external audio source (e.g., another mixer, laptop) to the LINE IN (RCA) inputs.
6. Operating Instructions
6.1 Powering On/Off
Locate the main power switch on the rear panel of the unit. Flip it to the 'ON' position to power on the speaker. Flip it to 'OFF' to power down.
6.2 Volume Control
- Master Volume: Use the main volume knob to adjust the overall output level of the speaker.
- Individual Channel Volumes: Each input source (wireless mics, wired mic/line, USB, CD, iPod/iPhone/iPad, Bluetooth) has its own volume control knob on the mixer panel. Adjust these to balance the levels of different sources.
6.3 Media Playback (USB/CD/iPod/iPhone/iPad)
Once an audio source is connected and selected, use the playback controls (Play/Pause, Stop, Next/Previous Track, Repeat) on the unit's front panel or the remote control to manage your audio. The display screen will show relevant track information.
6.4 Bluetooth Streaming
After successful pairing (refer to Section 5.3), you can stream audio wirelessly from your paired device. Control playback and volume primarily from your source device, or use the Express V3's master volume and Bluetooth channel volume for overall level adjustment.
6.5 Microphone Functions (Echo and Talkover)
- Echo Effect: Use the ECHO control knob to add a reverberation effect to the microphone inputs. Adjust to your desired level.
- Talkover Function: The Talkover feature automatically reduces the music volume when a microphone signal is detected, making speech clearer. This function is typically activated automatically when using the microphones.
7. Maintenance
- Cleaning: Use a soft, dry cloth to clean the exterior of the unit. Do not use abrasive cleaners, waxes, or solvents.
- Storage: When not in use for extended periods, store the unit in a cool, dry place. Ensure the batteries are fully charged before storage and recharge them every few months to maintain battery health.
- Battery Care: Avoid completely draining the batteries regularly. Recharge them as soon as the low battery indicator appears.
8. Troubleshooting
| Problem | Possible Cause | Solution |
|---|---|---|
| No power | Power cable not connected; Unit switched off; Battery drained | Check power cable connection; Ensure power switch is ON; Charge the battery. |
| No sound output | Master volume too low; Input source volume too low; Incorrect input selected; Cables not connected properly | Increase master volume; Increase input source volume; Select correct input mode; Check all cable connections. |
| Wireless microphone not working | Microphone switched off; Batteries low/dead in mic; Microphone volume too low | Switch on microphone; Replace microphone batteries; Increase microphone volume knob. |
| Bluetooth pairing failed | Bluetooth mode not selected; Device too far; Interference | Select Bluetooth mode on Express V3; Move device closer; Avoid strong interference sources. |
| CD/USB playback issues | Damaged CD/USB; Incorrect file format; CD/USB not inserted correctly | Try a different CD/USB; Ensure files are MP3 format; Re-insert CD/USB correctly. |
9. Specifications
- Model Number: Express V3
- Brand: Mac Mah
- Speaker Type: 2-way amplified speaker (8'' 20 cmm woofer + 1.35'' HF driver)
- Output Power: 60 Watts (PROG)
- Connectivity Technology: USB, Bluetooth
- Special Features: USB Port, Portable, Remote Control, iPhone/iPod/iPad Dock, CD Player, Wireless Microphones, Echo, Talkover
- Recommended Uses: For smartphone or tablet, portable PA system
- Color: Black
- Item Weight: 15 Kilograms
- Package Dimensions: 65.2 x 42 x 35 cm
- Power Source: Electric Cable (AC) / Rechargeable Batteries
- Battery Type: 2 x 12V4AH
- Battery Autonomy: Approximately 5 hours
10. Warranty and Support
Mac Mah products are designed for reliability and performance. For specific warranty information, please refer to the warranty card included with your purchase or contact your local dealer. For technical support or service inquiries, please reach out to your authorized Mac Mah service center or the retailer where the product was purchased. Keep your proof of purchase for warranty claims.


