1. Introduction
This manual provides comprehensive instructions for the proper setup, operation, and maintenance of your Hampton Bay UC7078T Remote Control. This remote is designed specifically as a replacement for the UC7078T model and is not a universal remote. It includes the handheld remote and a wall holder.

Figure 1: Hampton Bay UC7078T Remote Control with its distinct button layout.
2. Compatibility
This remote control is a direct replacement for Hampton Bay UC7078T models only. It is not a universal remote and may not function correctly with other ceiling fan models or brands. Ensure your existing remote or fan receiver is compatible with the UC7078T specification for proper operation.
3. Setup and Installation
3.1. Battery Installation
The remote control requires one 9V battery (not included). To install the battery:
- Open the battery compartment cover on the back of the remote.
- Insert a new 9V battery, ensuring correct polarity (+/-).
- Close the battery compartment cover securely.
3.2. Matching DIP Switches
For the remote to communicate with your ceiling fan, the DIP switches on the new remote must match the settings on your fan's receiver unit. The receiver unit is typically located in the fan's canopy (the part that attaches to the ceiling).
- If you have your old remote: Open the battery compartment of your old remote and note the position of the small switches (DIP switches). Adjust the DIP switches on your new UC7078T remote to exactly match these settings.
- If you do not have your old remote: You will need to access the receiver unit in your ceiling fan's canopy. Turn off power to the fan at the circuit breaker before attempting this. Carefully remove the canopy cover to locate the receiver and its DIP switches. Match the settings on your new remote to the receiver's DIP switches.
There are 16 possible combinations for the DIP switches. If you are unable to locate the receiver or the old remote, you may need to try different combinations until the remote pairs with the fan. Ensure the fan's power is cycled (turned off and on at the breaker) after each DIP switch adjustment on the remote for the changes to take effect.
Video 1: Demonstrates how to match the DIP switches on a remote to a ceiling fan receiver. This is a crucial step for proper functionality.
Video 2: Shows the process of replacing a Hampton Bay ceiling fan remote control, including DIP switch configuration.
Video 3: A detailed demonstration of the Eogifee replacement remote for Hampton Bay UC7078T, highlighting its reverse function and setup.
Video 4: Overview of a replacement remote for Hampton Bay ceiling fans, showing basic functionality and installation steps.
4. Operating Instructions
Once the remote is properly set up and paired with your fan, you can control its functions using the buttons:
- LIGHT / DIMMER: Press to turn the light on or off. Hold the button down to dim or brighten the light.
- LO, MED, HI: These buttons control the fan speed. Press 'LO' for low speed, 'MED' for medium speed, and 'HI' for high speed.
- FAN OFF: Press this button to turn the fan off.
- REVERSE: This button controls the direction of the fan blades, allowing for seasonal use (downward airflow for cooling, upward airflow for circulating warm air).
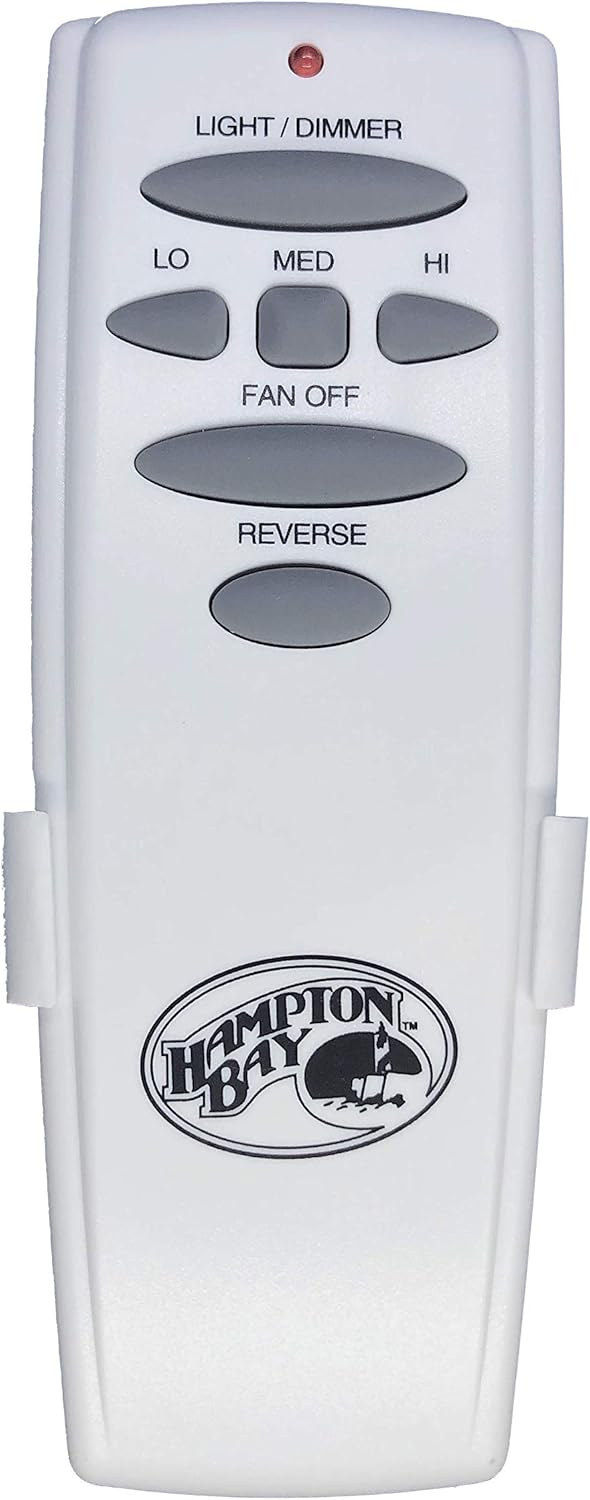
Figure 2: Hampton Bay UC7078T Remote Control securely placed in its included wall holder.
Video 5: An honest review demonstrating the functionality of the Hampton Bay Remote Control, including light and fan speed adjustments.
Video 6: Illustrates the ease of setting the frequency (DIP switches) for a new remote to control a ceiling fan.
5. Maintenance
To ensure optimal performance and longevity of your remote control:
- Battery Replacement: Replace the 9V battery when the remote's indicator light becomes dim or the remote's range decreases.
- Cleaning: Wipe the remote with a soft, dry cloth. Do not use abrasive cleaners or immerse the remote in water.
- Storage: Store the remote in a cool, dry place away from direct sunlight and extreme temperatures.
6. Troubleshooting
| Problem | Possible Cause | Solution |
|---|---|---|
| Remote not controlling fan/light. | Incorrect DIP switch settings. | Verify and match the DIP switch settings on the remote to the fan's receiver. Cycle power at the circuit breaker after each adjustment. |
| Remote has short range or intermittent operation. | Low battery. | Replace the 9V battery with a fresh one. |
| Remote is not responding at all. | Dead battery or remote malfunction. | Replace the battery. If the issue persists, the remote may be faulty. |
| Fan/light does not respond after matching DIP switches. | Incompatible remote model. | Ensure your fan's receiver is specifically designed for the UC7078T remote. This remote is not universal. |
7. Specifications
| Feature | Detail |
|---|---|
| Brand | Hampton Bay |
| Model Number | UC7078T |
| Product Dimensions | 9 x 7 x 3 inches |
| Item Weight | 3.2 ounces |
| Batteries Required | 1 x 9V battery (not included) |
| Special Feature | Ergonomic design, Light Dimmer, Fan Speed Control (Lo, Med, Hi), Fan Off, Reverse Function |
| Color | White |
| Max Number of Supported Devices | 1 (per paired receiver) |
| Compatible Devices | Hampton Bay Ceiling Fans with UC7078T receiver |
8. Warranty and Support
For warranty information or technical support, please refer to the documentation provided with your original Hampton Bay ceiling fan or contact Hampton Bay customer service directly. Keep your purchase receipt for warranty claims.


